In part 1 of this series, How to Implement Lighter Weight Portals, I wrote about the infrastructure and installation aspects of Portals. To make the tasks of managing and installing portals, I recommended cloud solutions and for IBM, their PureApplication system both in the cloud and on-premise.
In Part 2, I turn my attention to applications and how to make task of developing portal applications more lightweight.
The goal of a portal is to combine applications and content at the glass for a user. By this definition alone, we should always think of how to make lightweight portlets. If you have a larger application to build, break it down into core components that can be built into separate portlets, rather than one large portlet.
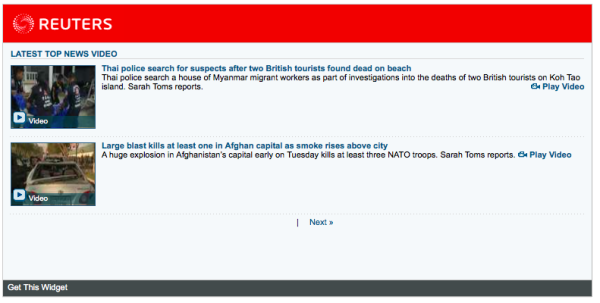
Even if you can get to smaller, bite-sized applications or portlets, you are still faced with the underlying framework imposing additional layers on your efforts. We’ll focus on Java-based portals to make the discussion simple and I’ll use IBM WebSphere Portal as an example. Say we want to simply display a feed from Reuters as shown in our first picture here.
Reuters provides the javascript, so all we need to do is put it into a portlet for display on our page.
To create a portlet for use in IBM WebSphere Portal, a developer is going to use IBM Rational Application Developer (already a heavy-weight tool), create a new project using a wizard, fill in some details about the portlet, like name, Java version, etc. and then hit go. RAD will do a nice job of building the portlet shell with all the right components set up. These components include xml files, TLD files, libraries or references, file folders and start JSP files. Already, we have a lot of code to manage.
Once I put in my custom code, I then have to build the project, create a .war file, and then deploy it to WebSphere Portal. After its deployed, I can create a portal page, and my new portlet and I’m all set. In most IT shops, build and deploy to production can take weeks or months just because IT has to control the changes to production very tightly.
If I’m a business guy who just wants a very simple portlet, this makes portal look heavyweight to me, but its likely the process than the technology.
So how to fix this?
In most IBM WebSphere Portal environments you also have IBM Web Content Manager for content management. We can use WCM to build and deploy portlets that are lightweight. WCM already has a portlet deployed, so we can eliminate the whole build and deploy process. We only need to get our code into WCM as content and then tell the WCM Portlet to display our content.
Here’s an example using the Reuter’s feed shown above. First, to create content in WCM we need an Authoring Template and a Presentation Template. All we want to display is some HTML/Javascript content, so our authoring template needs only one input field and the presentation template should display what ever is in that one field. Sounds simple.
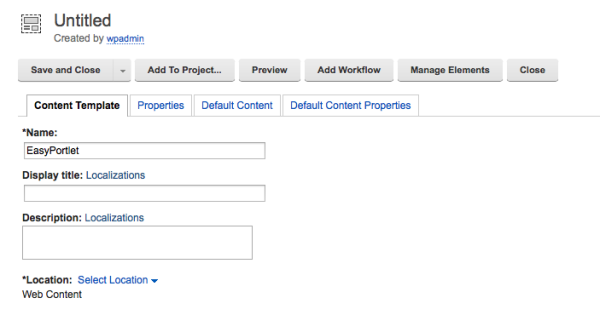
In the WCM authoring tool, create a new authoring template. I called this one “EasyPortlet”
To add our one field, click on the Manage Elements button and add an HTML component. WCM renders an HTML component as plain HTML, so what ever you put in there is displayed as is. I called my field HTMLBody. I also added a workflow so that my content would be published right away. This is handy feature of using WCM – you can assign workflows to this kind of code to make sure business users are not publishing something that would break the portal.
That’s it for the authoring template. One HTML field and a workflow.
Now for the presentation template.
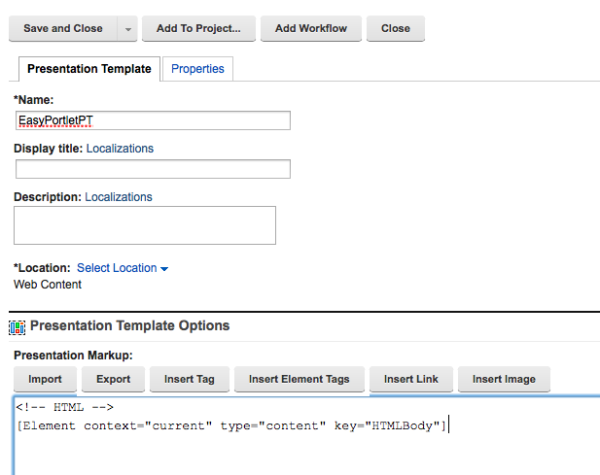
This is easier than the authoring template. I created a new presentation template and named it EasyPortletPT. In the presentation markup, I included the one field from the authoring template – HTMLBody.
Whenever a piece of content is displayed using this template the HTMLBody field will render as is.
In WCM you have to associate the presentation template with the authoring template – that how WCM knows where to get content to render. I created a Site Area for my new WCM Portlets and in the site area I mapped the two templates together.
Now the basics are all set. We have the authoring and presentation templates and they are mapped together. That took about 5 minutes to complete.
Next we can create content in WCM using the Authoring template. Navigate to the library and site area where we will store the WCM portlets. In my case, I called the site area “WCMPortlets”.
Create a new content item, selecting the EasyPortlet authoring template. Give your content item a name, such as Reuter’s News. The template displays the HTMLBody field, and I copied the Reuter’s supplied script into that field. Seethe following screen shots. So that took another minute.
Finally, we need to display this content on our portal. Create a new page in WebSphere Portal using the admin interface, or the toolbars in Portal 8 & 8.5.
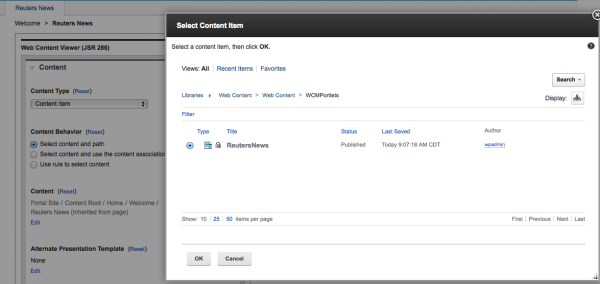
On the new page add the Web Content Display (JSR286) portlet. The portlet needs to be configured to display our Reuter’s News content item. Edit the shared settings of the portlet (a user will need special privileges to access this – another way to control publishing of these portlets).
In the settings screen, click the Edit link under Content, then navigate to the content item as shown. Press OK and then save the settings.
When portal redisplays the page, your portlet will now display the Reuter’s content as shown in the last screen shot.
All total, that took about 10 minutes to set up this new portlet using WCM.
Since I don’t have to deploy a new portlet (the WCM portlet is already deployed), I can publish my content through Portal’s standard publishing process (Syndication).
Here are a few other benefits to publishing simple portlets using WCM:
- You can use WCM Versioning to keep track of changes made to the content (code)
- Portal 8 uses Projects that can house several WCM portlets and publish them all at the same time
- WCM includes a preview function so you can see how the portlet will look before you publish it
- If you need to reuse the content on other servers, you can export the WCM library and import it into another environment.
- You can build a workflow for these types of content to ensure that IT looks over the code before its published.
- You can use the Cache settings in the WCM portlet to cache the content item for maximum performance.
In the final post of this series, I’ll take a look at how we can extend this concept of WCM Portlets beyond the simple version I showed here. Using these same concepts, we can build portlets using common Javascript frameworks like Knockout.js, Ember, Angular, etc. In fact, IBM has published a Script Portlet in their Solutions Catalog that works similar to what I’ve shown here.


