
What We Are Building
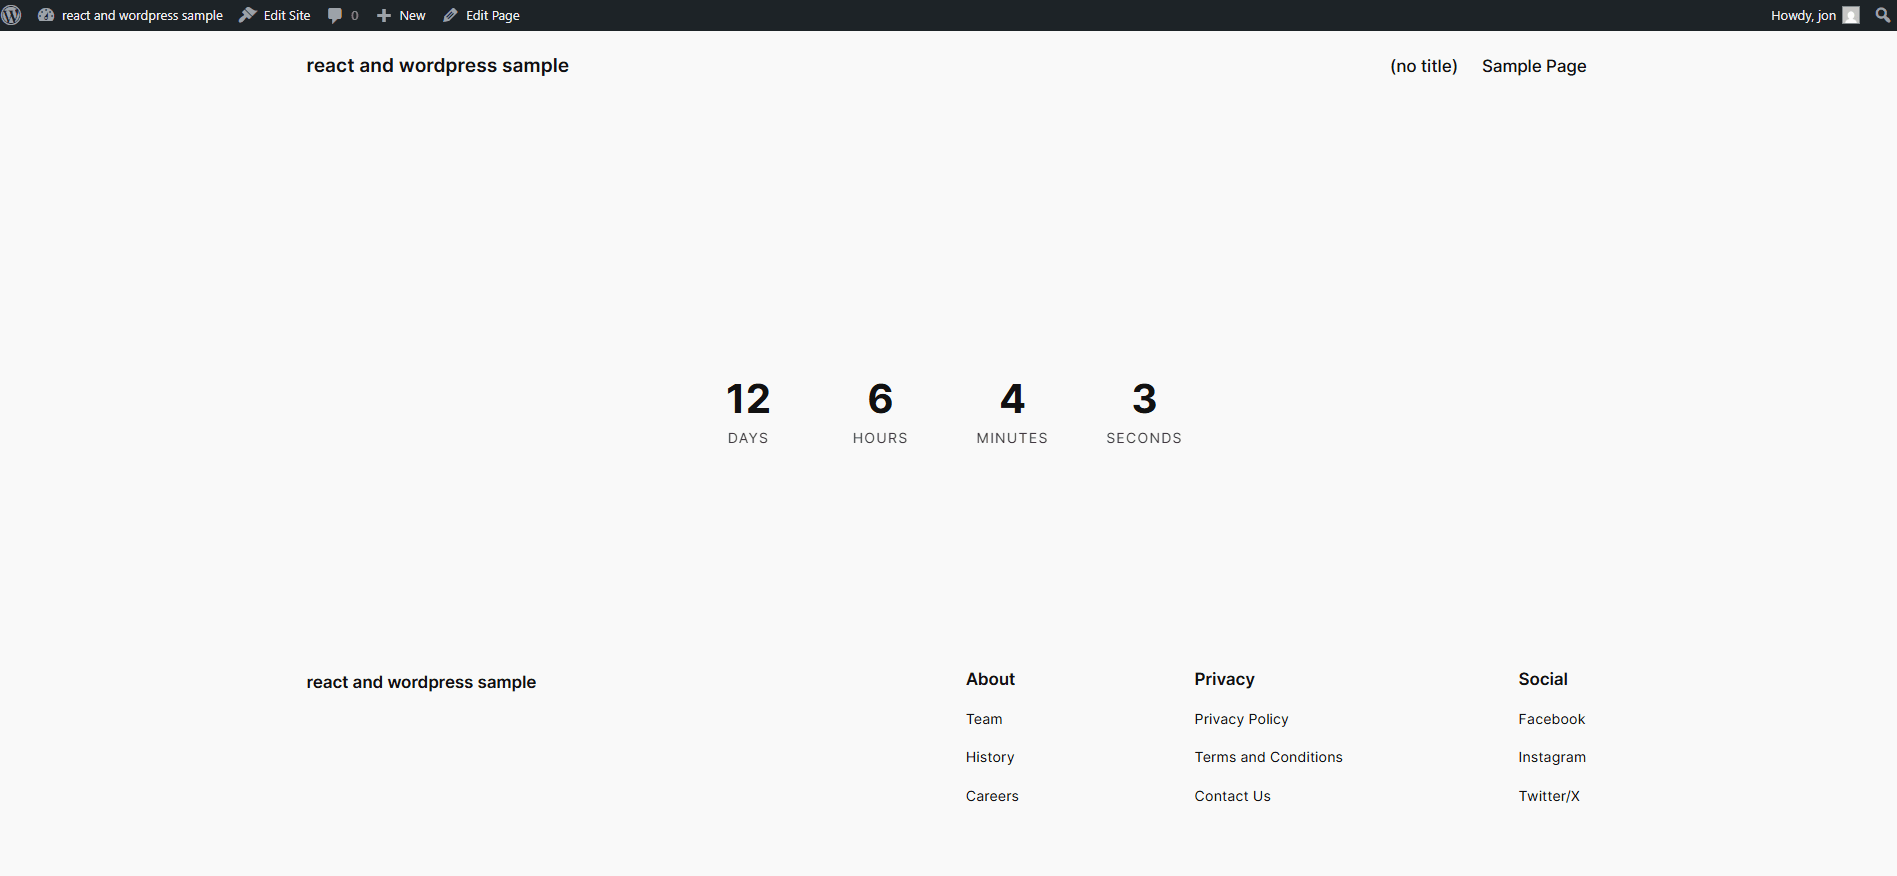
Example of the countdown plugin we will build with React
[wp_countdown_timer]– on the page where you want the timer to appear. You can set the exact date and time for the countdown on the plugin’s settings page. When the countdown reaches zero, the user will be redirected automatically to a URL of your choosing. Before that, if a user clicks anywhere on the page, they’ll be redirected manually:
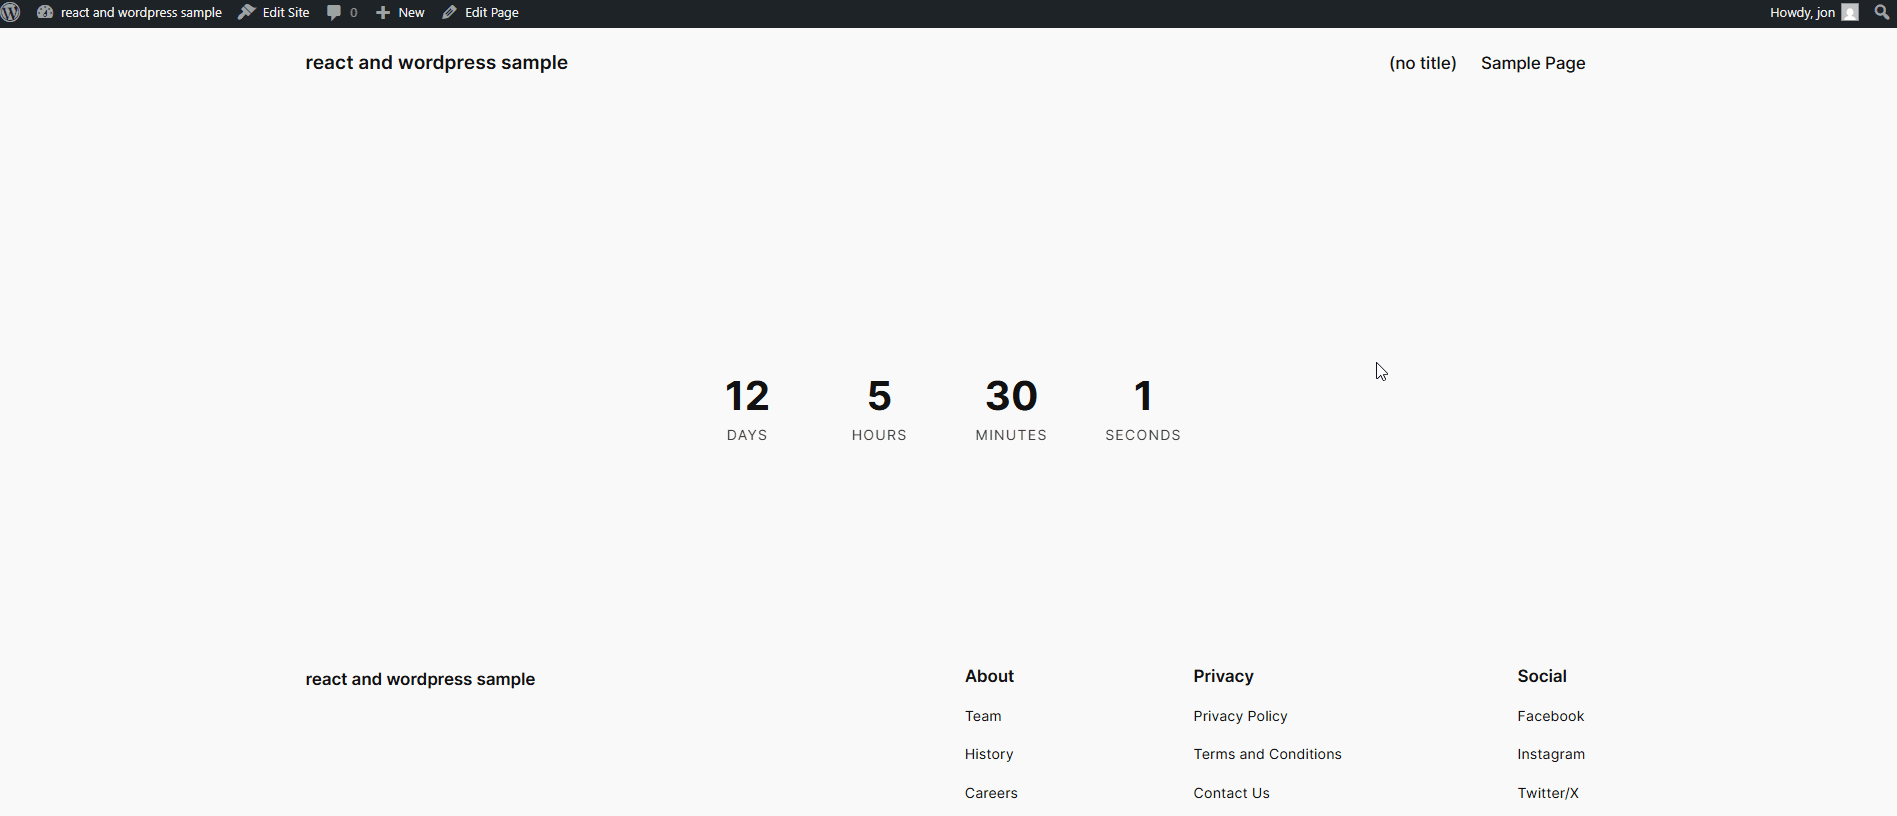
Click on the page where the countdown plugin is set to trigger the redirect manually
1. Setting Up the Development Environment
First, initialize your project with npm and install necessary dependencies. Create a new folder called wp-react-countdown in your WordPress project’s /plugins directory. Using the command line, cd into your new wp-react-countdown folder and run:
  npm init -y
  npm install react react-dom @vitejs/plugin-react vite
After running those commands, your wp-react-countdown folder’s structure should look like this:
  wp-react-countdown/
  ├── node_modules/
  ├── package.json
  └── package-lock.json
2. Creating the WordPress Plugin File
Make a new file in /wp-react-countdown called wp-countdown-timer.php. This is the main plugin file and serves as the entry point for the React component. In this file, we also register the plugin’s settings page, where you can configure the countdown’s target date and time, as well as the redirect URL. The final function in this file – wp_countdown_timer_shortcode() – outputs a container div that the React app will mount to.
Paste the following content into your new wp-countdown-timer.php file:
<?php
/**
 * Plugin Name: WP Countdown Timer
 * Description: A simple countdown timer that redirects when finished
 * Version: 1.0.0
 * Author: Jon Jackson
 * Text Domain: wp-countdown-timer
 */

if (!defined('ABSPATH')) {
    exit;
}

// Define plugin constants
define('WP_COUNTDOWN_TIMER_VERSION', '1.0.0');
define('WP_COUNTDOWN_TIMER_PLUGIN_DIR', plugin_dir_path(__FILE__));
define('WP_COUNTDOWN_TIMER_PLUGIN_URL', plugin_dir_url(__FILE__));

// Register activation hook
register_activation_hook(__FILE__, 'wp_countdown_timer_activate');

function wp_countdown_timer_activate() {
    add_option('wp_countdown_timer_target_date', '2025-05-16T00:00:00');
    add_option('wp_countdown_timer_redirect_url', home_url());
}

// Add admin menu
add_action('admin_menu', 'wp_countdown_timer_admin_menu');

function wp_countdown_timer_admin_menu() {
    add_menu_page(
        'Countdown Timer Settings',
        'Countdown Timer',
        'manage_options',
        'wp-countdown-timer',
        'wp_countdown_timer_admin_page',
        'dashicons-clock',
        30
    );
}

// Register settings
add_action('admin_init', 'wp_countdown_timer_register_settings');

function wp_countdown_timer_register_settings() {
    register_setting('wp_countdown_timer_settings', 'wp_countdown_timer_target_date');
    register_setting('wp_countdown_timer_settings', 'wp_countdown_timer_redirect_url');
}

// Admin page content
function wp_countdown_timer_admin_page() {
    ?>
    <div class="wrap">
        <h1>Countdown Timer Settings</h1>
        <form method="post" action="options.php">
            <?php settings_fields('wp_countdown_timer_settings'); ?>
            <?php do_settings_sections('wp_countdown_timer_settings'); ?>

            <table class="form-table">
                <tr>
                    <th scope="row">Target Date</th>
                    <td>
                        <input type="datetime-local"
                               name="wp_countdown_timer_target_date"
                               value="<?php echo esc_attr(get_option('wp_countdown_timer_target_date')); ?>"
                               class="regular-text">
                    </td>
                </tr>
                <tr>
                    <th scope="row">Redirect URL</th>
                    <td>
                        <input type="url"
                               name="wp_countdown_timer_redirect_url"
                               value="<?php echo esc_url(get_option('wp_countdown_timer_redirect_url')); ?>"
                               class="regular-text">
                        <p class="description">Where to redirect when the countdown ends</p>
                    </td>
                </tr>
            </table>

            <?php submit_button(); ?>
        </form>
    </div>
    <?php
}

// Enqueue scripts and styles
add_action('wp_enqueue_scripts', 'wp_countdown_timer_enqueue_scripts');

function wp_countdown_timer_enqueue_scripts() {
    global $post;
    if (!is_a($post, 'WP_Post') || !has_shortcode($post->post_content, 'wp_countdown_timer')) {
        return;
    }

    wp_enqueue_script(
        'wp-countdown-timer',
        WP_COUNTDOWN_TIMER_PLUGIN_URL . 'dist/assets/main.js',
        array(),
        WP_COUNTDOWN_TIMER_VERSION,
        true
    );

    $css_file = WP_COUNTDOWN_TIMER_PLUGIN_DIR . 'dist/assets/index.css';
    if (file_exists($css_file)) {
        wp_enqueue_style(
            'wp-countdown-timer',
            WP_COUNTDOWN_TIMER_PLUGIN_URL . 'dist/assets/index.css',
            array(),
            WP_COUNTDOWN_TIMER_VERSION
        );
    }

    $redirect_url = get_option('wp_countdown_timer_redirect_url', home_url());
    if (!preg_match('/^https?:\/\//i', $redirect_url)) {
        $redirect_url = home_url($redirect_url);
    }

    wp_localize_script('wp-countdown-timer', 'wpCountdownTimer', array(
        'targetDate' => get_option('wp_countdown_timer_target_date'),
        'redirectUrl' => esc_url(rtrim($redirect_url, '/'))
    ));
}

// Add shortcode
add_shortcode('wp_countdown_timer', 'wp_countdown_timer_shortcode');

function wp_countdown_timer_shortcode() {
    return '<div id="wp-countdown-timer-root" class="wp-countdown-timer"></div>';
}
3. Creating the React Component
Make a new folder inside /wp-react-countdown called src, and create a JSX file inside this src folder called CountdownTimer.jsx.
This file contains the React component that handles the countdown functionality. The component reads the target date and redirect URL passed in via the global wpCountdownTimer variable (whose values are set by the site’s administrator in the plugin’s settings page), and displays the countdown in the UI.
Once the target date and time is reached, the page will automatically redirect to the URL specified by the admin in the plugin settings. Before the countdown finishes, users can click anywhere on the page (except on a button, a, or input element), and they’ll be redirected manually.
Here is CountdownTimer.jsx:
import { useState, useEffect } from 'react';
import './CountdownTimer.css';

const CountdownTimer = () => {
  const [timeLeft, setTimeLeft] = useState({
    days: 0,
    hours: 0,
    minutes: 0,
    seconds: 0
  });

  useEffect(() => {
    const targetDate = new Date(window.wpCountdownTimer.targetDate);
    const redirectUrl = window.wpCountdownTimer.redirectUrl;

    const updateCountdown = () => {
      const now = new Date();
      const diff = targetDate - now;

      if (diff <= 0) {
        clearInterval(timer);
        if (redirectUrl) {
          window.location.href = redirectUrl;
        }
        return;
      }

      setTimeLeft({
        days: Math.floor(diff / (1000 * 60 * 60 * 24)),
        hours: Math.floor(diff / (1000 * 60 * 60)) % 24,
        minutes: Math.floor(diff / (1000 * 60)) % 60,
        seconds: Math.floor(diff / 1000) % 60
      });
    };

    const timer = setInterval(updateCountdown, 1000);
    updateCountdown();

    return () => clearInterval(timer);
  }, []);

  useEffect(() => {
    const handleDocumentClick = (event) => {
      // Check if the clicked element or any of its parents is a link - we still want to allow user to click these!
      let element = event.target;
      while (element) {
        if (element.tagName === 'A' || element.tagName === 'BUTTON' || element.tagName === 'INPUT') {
          return;
        }
        element = element.parentElement;
      }

      // If we get here, the user clicked on a part of the page with the countdown that wasn't on a link or button - redirect!
      const redirectUrl = window.wpCountdownTimer.redirectUrl;
      if (redirectUrl) {
        window.location.href = redirectUrl;
      }
    };

    // Add click listener to the document
    document.addEventListener('click', handleDocumentClick);

    // Cleanup
    return () => {
      document.removeEventListener('click', handleDocumentClick);
    };
  }, []);

  return (
    <div className="wp-countdown-timer">
      <div className="countdown-row">
        <div className="time-segment">
          <span className="time-value">{timeLeft.days}</span>
          <span className="time-label">Days</span>
        </div>
        <div className="time-segment">
          <span className="time-value">{timeLeft.hours}</span>
          <span className="time-label">Hours</span>
        </div>
        <div className="time-segment">
          <span className="time-value">{timeLeft.minutes}</span>
          <span className="time-label">Minutes</span>
        </div>
        <div className="time-segment">
          <span className="time-value">{timeLeft.seconds}</span>
          <span className="time-label">Seconds</span>
        </div>
      </div>
    </div>
  );
};

export default CountdownTimer;

4. CSS for Styling
Let’s add a CSS file to style the countdown component. Inside the /src folder, create a file called CountdownTimer.css:
.countdown-container {
  margin: 0;
  min-height: 100vh;
  display: flex;
  align-items: center;
  justify-content: center;
  background-color: #000;
  color: #fff;
  font-family: -apple-system, BlinkMacSystemFont, 'Segoe UI', Roboto, Oxygen, Ubuntu, Cantarell, 'Open Sans', 'Helvetica Neue', sans-serif;
  cursor: pointer;
}

.countdown-content {
  text-align: center;
  padding: 2rem;
}

.countdown-grid {
  display: grid;
  grid-template-columns: repeat(4, 1fr);
  gap: 2rem;
  max-width: 800px;
  margin: 0 auto;
}

.wp-countdown-timer {
  text-align: center;
  padding: 2rem;
  margin: 2rem 0;
  cursor: pointer;
}

.countdown-row {
  display: flex;
  justify-content: center;
  gap: 2rem;
  flex-wrap: wrap;
}

.time-segment {
  display: flex;
  flex-direction: column;
  align-items: center;
  min-width: 100px;
}

.time-value {
  font-size: 2.5rem;
  font-weight: bold;
  line-height: 1;
}

.time-label {
  font-size: 0.9rem;
  text-transform: uppercase;
  letter-spacing: 1px;
  margin-top: 0.5rem;
  opacity: 0.8;
}

.completion-text {
  font-size: 2rem;
  font-weight: bold;
}

@media (max-width: 768px) {
  .countdown-row {
    gap: 1rem;
  }

  .time-segment {
    min-width: 80px;
  }

  .time-value {
    font-size: 2rem;
  }

  .time-label {
    font-size: 0.8rem;
  }

  .completion-text {
    font-size: 1.5rem;
  }
}
5. Add Entry Point for React Component
Inside the /src folder, create a file called main.jsx that will serve as the entry point for the CountdownTimer component:
import React from 'react';
import ReactDOM from 'react-dom/client';
import CountdownTimer from './CountdownTimer';
import './CountdownTimer.css';

document.addEventListener('DOMContentLoaded', () => {
  const rootElement = document.getElementById('wp-countdown-timer-root');
  if (rootElement) {
    ReactDOM.createRoot(rootElement).render(
      <React.StrictMode>
        <CountdownTimer />
      </React.StrictMode>
    );
  } else if (process.env.NODE_ENV === 'development') {
    // Only show error in development
    console.error('Countdown timer root element not found');
  }
});
6. Setting Up Vite
In your /wp-react-countdown folder, create a file called vite.config.js:
import { defineConfig } from 'vite';
import react from '@vitejs/plugin-react';

export default defineConfig({
  plugins: [react()],
  build: {
    outDir: 'dist',
    emptyOutDir: true,
    rollupOptions: {
      input: {
        main: 'src/main.jsx'
      },
      output: {
        entryFileNames: 'assets/[name].js',
        chunkFileNames: 'assets/[name].[hash].js',
        assetFileNames: (assetInfo) => {
          const info = assetInfo.name.split('.');
          const ext = info[info.length - 1];
          if (/\.(css)$/.test(assetInfo.name)) {
            return 'assets/index.css';
          }
          return `assets/[name].[hash].${ext}`;
        }
      }
    }
  }
});
7. Building and Development
Add these scripts to your package.json file:
{
  "scripts": {
    "dev": "vite",
    "build": "vite build",
    "watch": "vite build --watch"
  }
}
Your package.json file should now look like this:
{
  "name": "wp-react-countdown",
  "version": "1.0.0",
  "description": "",
  "main": "index.js",
  "scripts": {
     "dev": "vite",
    "build": "vite build",
    "watch": "vite build --watch"
  },
  "keywords": [],
  "author": "",
  "license": "ISC",
  "dependencies": {
    "@vitejs/plugin-react": "^4.5.2",
    "react": "^19.1.0",
    "react-dom": "^19.1.0",
    "vite": "^6.3.5"
  }
}
Now, cd into /wp-react-countdown and run the following commands to build the project:
  npm install
  npm run build
After running these commands, your project structure should now look like this:
  wp-countdown-timer/
  ├── dist/
  ├── node_modules/
  ├── src/
  │   ├── CountdownTimer.jsx
  │   ├── CountdownTimer.css
  │   └── main.jsx
  ├── package.json
  ├── package-lock.json
  ├── vite.config.js
  ├── wp-countdown-timer.php
If you need to make any changes to the contents of the /wp-countdown-timer folder, be sure to run npm run watch in that directory so that vite automatically rebuilds when any files change.
8. Using the Plugin
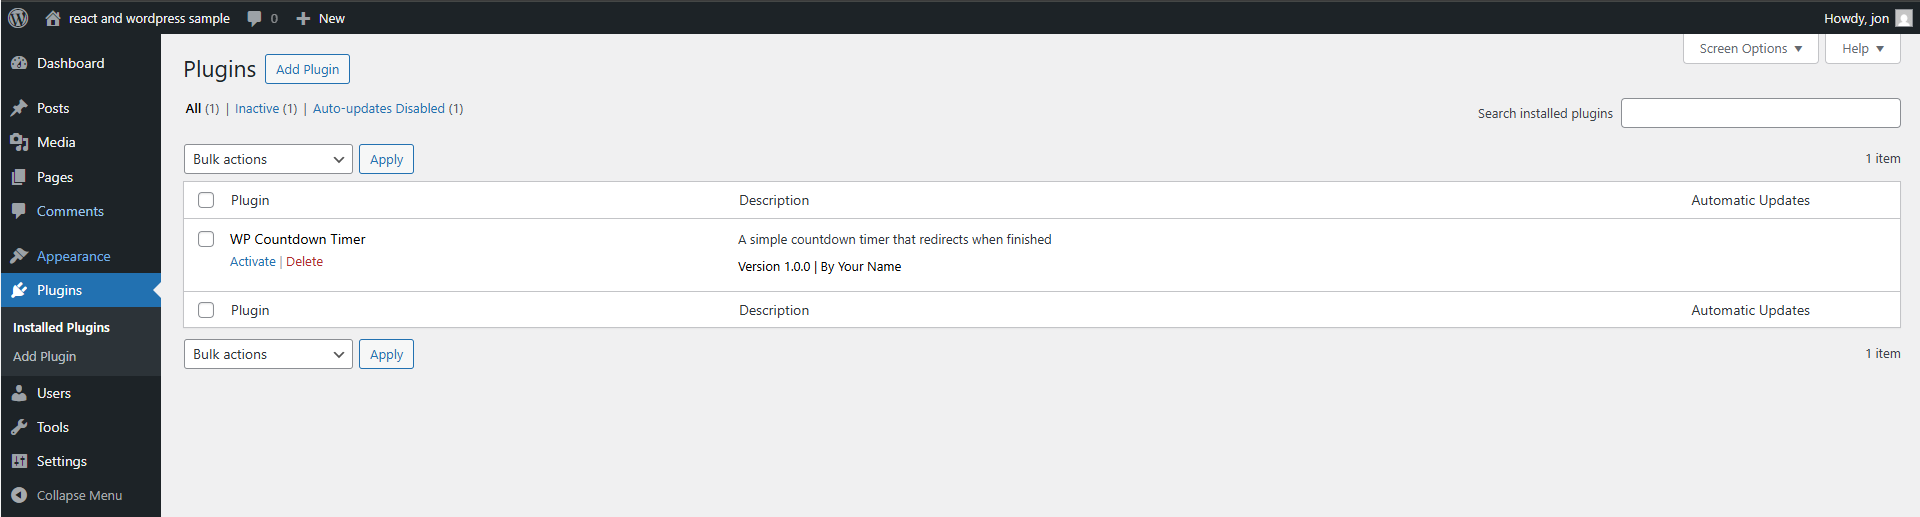
To use the plugin, navigate to your WordPress admin page > “Plugins” and Activate this plugin:
Activate the plugin in WP Admin > Plugins
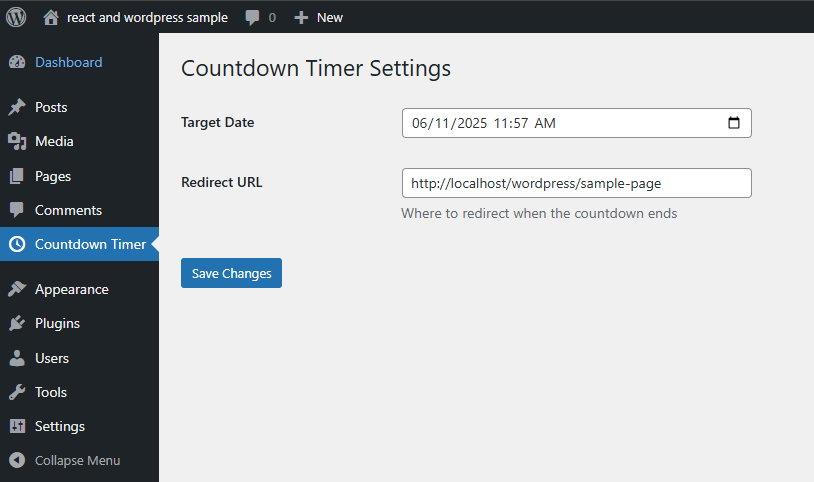
Then, click on the “Countdown Timer” in the sidebar menu and choose a target date and a page to redirect to once that date/time is reached. Remember to click “Save Changes”:
Countdown Timer in WordPress Settings view
Add the [wp_countdown_timer] shortcode to any page where you would like this countdown to show. A good user experience pattern is to use this countdown component on a “splash page” that redirects visitors to the homepage or another featured page:
WordPress shortcode
Now the countdown will be displayed on that page, and will redirect to the target page that you set in the “Redirect URL” field when the countdown expires, or when the user clicks anywhere on the page where the countdown is set:
example of clicking on the page to redirect to the target URL
Conclusion
Creating WordPress plugins with React allows developers to create modern, interactive user interfaces while maintaining WordPress’s flexibility and ease of use. This example demonstrates a simple countdown timer, but the same principles can be applied to create more complex plugins with rich user interfaces and interactive features.