This blog provides a detailed explanation of the technical approach for implementing Continuous Deployment (CD) processes within Azure DevOps. It focuses on automating the deployment of solutions to SharePoint environments. This approach not only speeds up the release cycle but also enhances reliability, minimizes errors, and ensures that updates are deployed quickly and effectively.
Continuous Deployment (CD) takes validated code packages from the build process and deploys them into a staging or production environment. Developers can track successful deployments and narrow issues to specific package versions.
Prerequisite for building CD for SPFx in Azure DevOps
To set up Continuous Deployment(CI) for SPFx in Azure DevOps, ensure you have the following things already setup:
- An Azure DevOps account with required access
- CI pipeline for building the required package file .sppkg for deployment
- Required access to App Catalog for deploying to SharePoint Online
Implementation
We need to create a new Release in Azure DevOps to implement CD. It requires the following steps:
- Creating the Release Definition
- Link the Build Artifact
- Create the Environment
- Install NodeJS
- Install Office 365 CLI
- Connect to App Catalog
- Add Solution Package to App Catalog
- Deploy the App
- Set Environment Variables
Creating the Release Definition
- Login to Visual Studio Online (Azure DevOps)
- Select your project to set up a build definition.
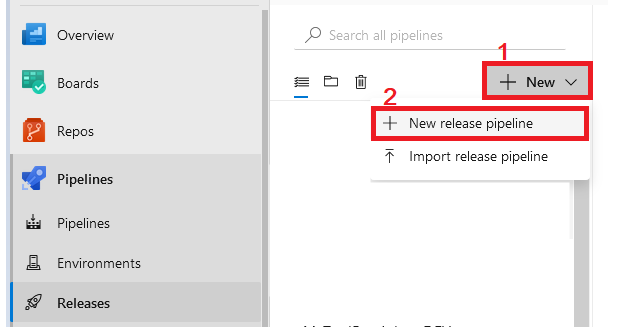
- From the left navigation, click Pipelines > Releases.
- Click the “+ New” button > click “New Release Pipeline”.
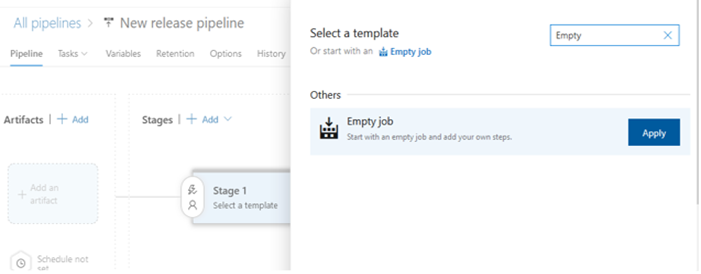
- Select template > Empty job > Apply.
Linking the Build Artifact
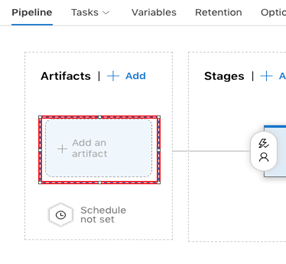
- Click on Add an artifact.
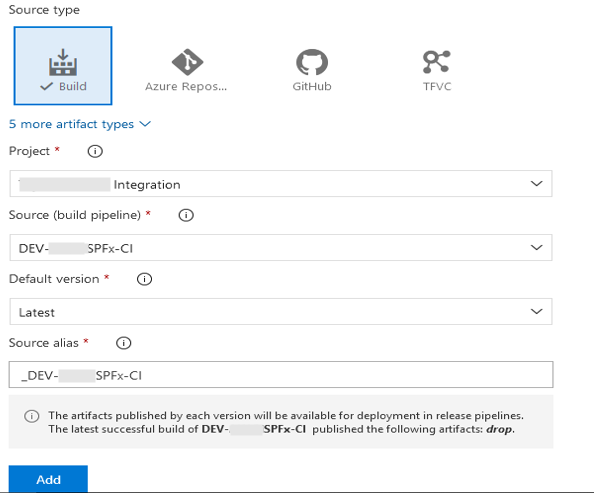
- Select Project, Source, etc.
Note: Give a meaningful name to “Source alias” and note it down. This name will be used in upcoming steps.
Create the Environment
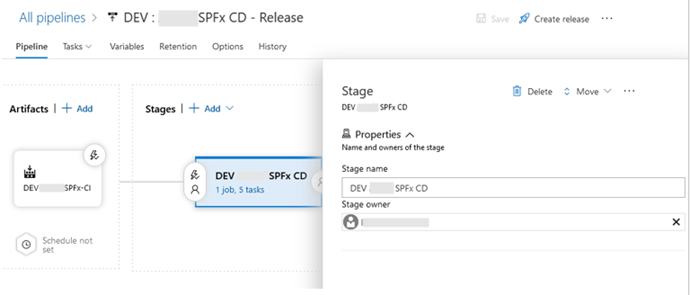
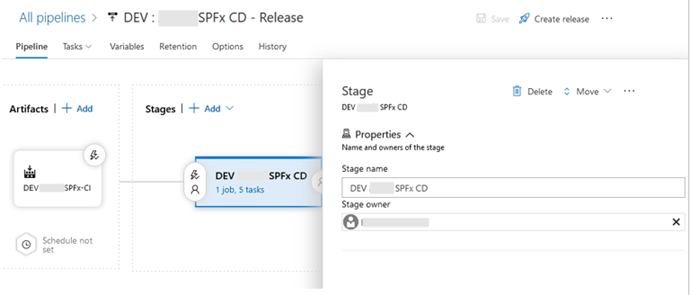
- Under Stages, click “Stage 1”.
- Name your environment.
Installing NodeJS
- Go to the “Tasks” tab
- The task configuration window will appear the same as in the build definition.
- On the default agent, click + sign.
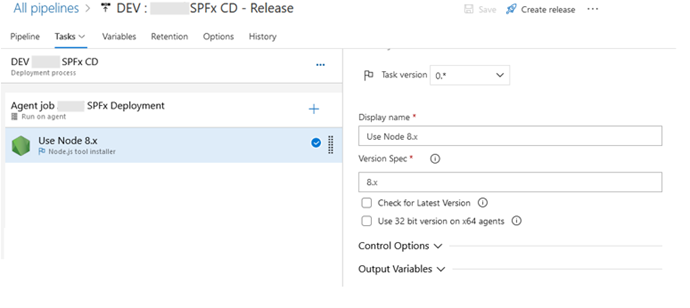
- Search for “Node”.
- Add Node.js tool installer.
- Specify 10.x in the Version Spec field. If your project is based on SharePoint Framework 1.7.1 or earlier, use version 8.x.
Install Office 365 CLI
Office 365 Common Language Interface (CLI) is an open-source project from the OfficeDev PnP Community.
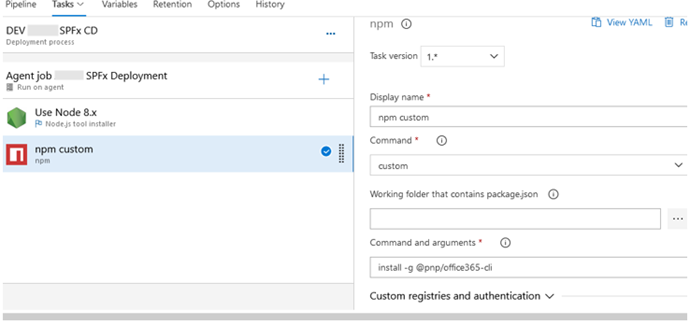
- Add npm task.
- Under “Command,” select custom.
- In the “Command and Arguments,” type install -g @pnp/office365-cli.
Set Environment Variables
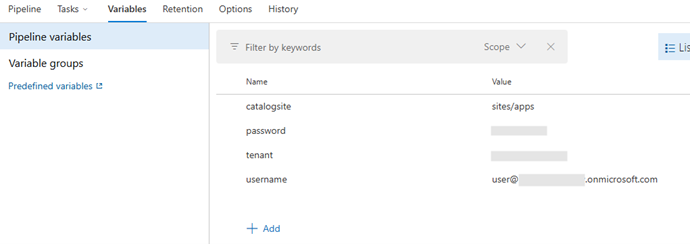
Before connecting to SharePoint, we can define some variables used at multiple steps in the deployment process. So, define the process variables in the “Variables” tab below.
- Click the Variables tab.
- Under Pipeline variables, add the variables below.
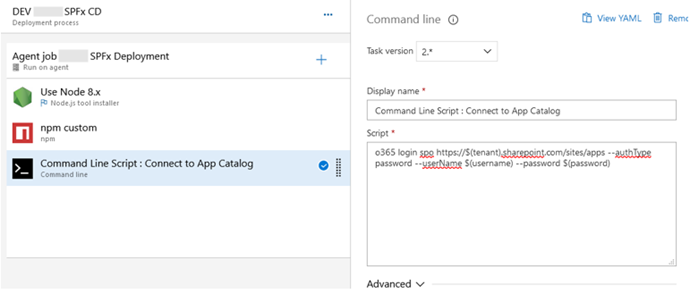
Connect to App Catalog
We need to authenticate against our tenant’s app catalog.
- Add the “Command Line” task.
- In the “Script” field, type in the below command:
o365 spo login https://$(tenant).sharepoint.com/$(catalogsite) --authType password --userName $(username) --password $(password)
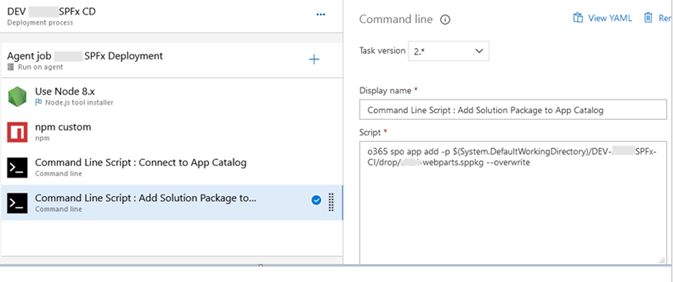
Add Solution Package to App Catalog
Now, we need to upload the solution package to the app catalog.
- Add “Command Line” task.
- In the “Script” field, type in the below command:
o365 spo app add -p $(System.DefaultWorkingDirectory)/<Source alias>/drop/ webparts.sppkg --overwrite
Note: “Source alias” is the alias name set up during the “Link the Build Artifact” step.
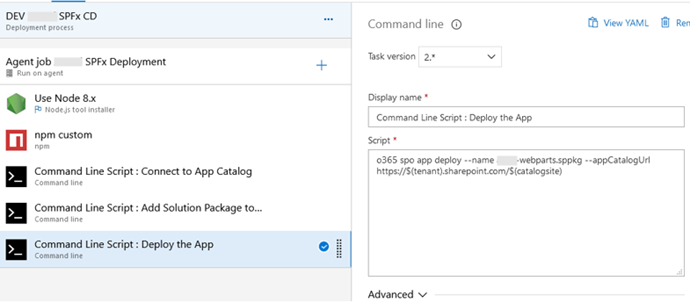
Deploy the App Catalog
Finally, we must deploy the app .sppkg file to the App Catalog to make it available to all site collections within the tenant.
- Add “Command Line” task.
- In the “Script” field, type in the below command.
o365 spo app deploy --name webparts.sppkg --appCatalogUrl https://$(tenant).sharepoint.com/$(catalogsite)
Conclusion
Setting up a Continuous Deployment (CD) for SPFx in Azure DevOps automates the process of solution package deployment to the App Catalog in the SharePoint environment. This process will enable developers to focus on ensuring a seamless and consistent delivery process, accelerate iterations, and maintain a more agile and adaptable development environment.

