React 19 brings a fresh set of improvements and features aimed at delivering better performance. In this post, I’ll showcase some of these new features like Server Components, Server Functions, the new hooks like use, useActionState and useOptimistic.
React is a popular JavaScript library for building user interfaces. It uses a declarative approach to create reusable UI components, making it easier to handle state, manage complex UIs, and build interactive and dynamic web applications.
We’ll use a small TODO app—not the most original example, but it gets the job done—originally built in React 18, to illustrate how these new features come into play in React 19. I’ve chosen Next.js 15 as the framework for this updated version of our app, as it seamlessly supports server components and will expedite our development process.
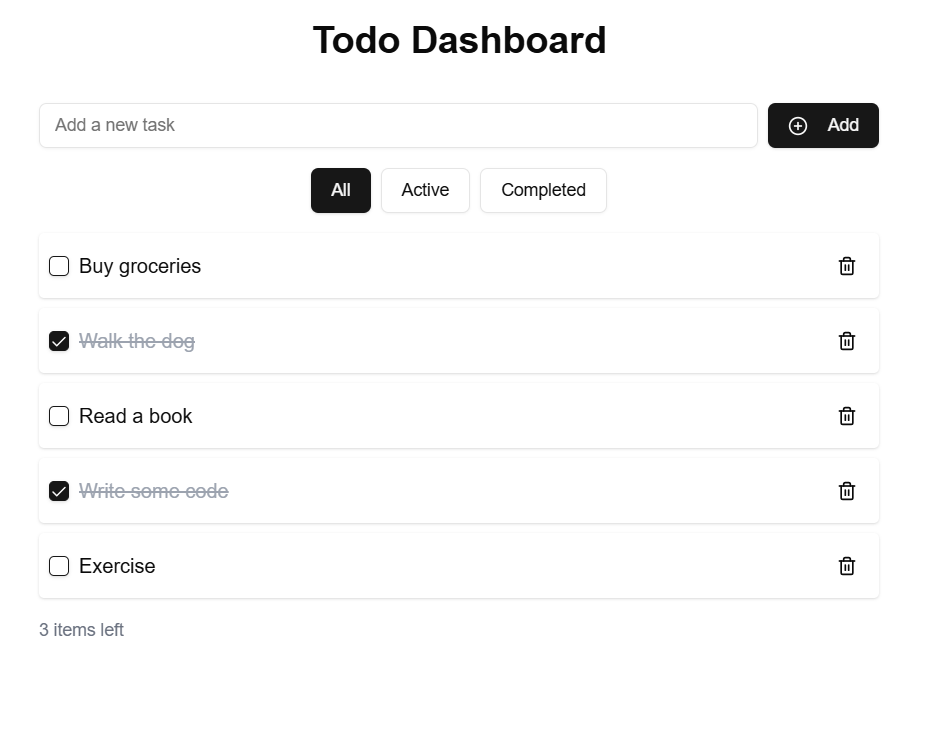
Transitioning from Client-Side Fetching to Server Components
In React 18, fetching data often involves using useEffect hooks and multiple pieces of state—one for the data, another for loading, and potentially another for error handling. Here’s an example of our TODO dashboard component written in React 18, relying heavily on useEffect to fetch data from the server:
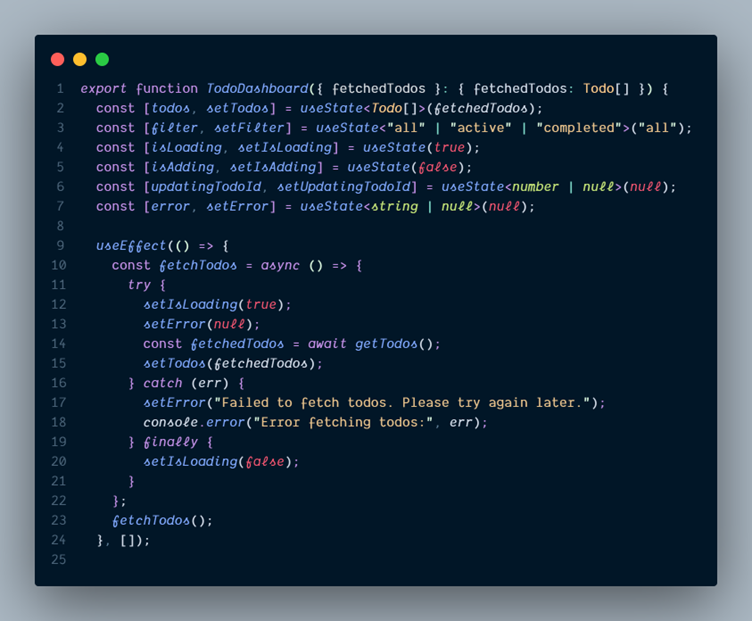
While this works, it forces us to manage several states on the client side. Any data fetching delays result in loading states on the client, and the error handling logic is also client-bound.
Enter Server Components:
With React 19’s Server Components, we can simplify this process. Instead of fetching data in a useEffect hook on the client, we can shift this responsibility to the server. This approach reduces the amount of state we need to maintain on the client and often improves initial page load performance.
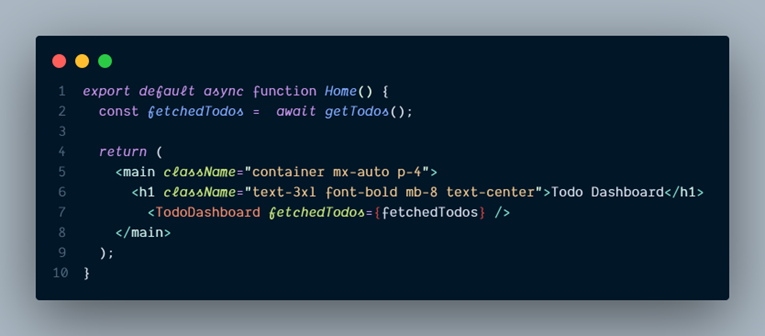
First thing we notice now, its that server components can be defined as async functions. This means you can await your data fetching calls directly within the component’s body—no need to use useEffect or manage separate loading states on the client side. Once the promise resolves, you pass your data to the children components that can be server or client components.
What is happening?
- Awaiting Data on the Server: The data is already available by the time the client receives the HTML, so there’s no “loading” state on the client side.
- Reduced Client-Side Complexity: We no longer need useEffect hooks or extra useState variables to manage fetching, loading, or error states on the client.
- Improved Performance and User Experience: The user sees the content immediately on page load (once the server’s done fetching), resulting in faster perceived performance and a smoother experience overall.
If you compare the initial page load for both versions of our applications, you will notice that we now do not have the loading state, while we fetch the list of TODOs.
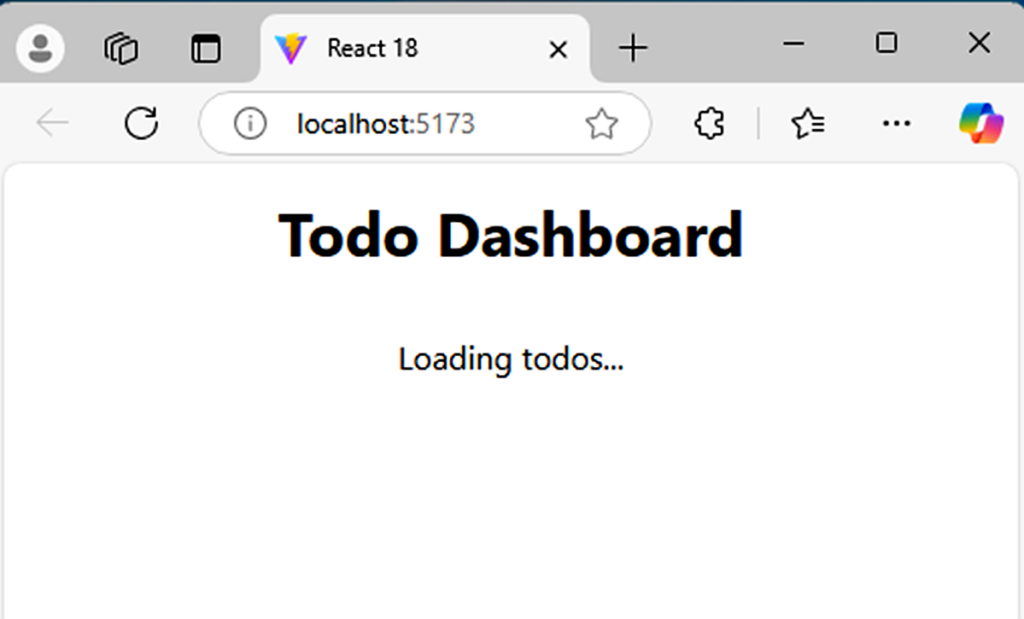
In previous version of React, the first page load in the browser, is a blank page. You can validate this is the case when viewing the Page Source Code the browsers receive:

When we inspect the source code in the browser for our new Server Component, we can see the fully rendered HTML content of the page—exactly what the user sees immediately after the page loads. For clarity, I’ve stripped out the CSS classes and SVGs to make it easier to read.
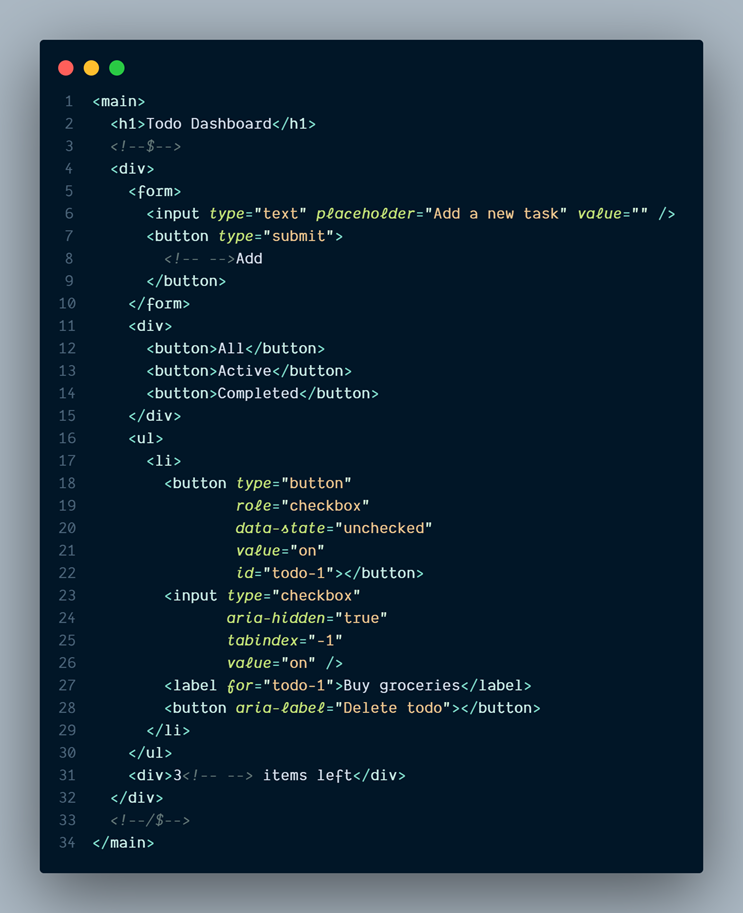
Note: We could dedicate an entire blog post just to discussing Server Components—and I probably will in the future—but for now, there’s an important detail to highlight: Even if you mark a component as a client component with the use client directive, the server will still render it on the initial page load. In other words, the server sends down the fully rendered HTML for that component before it ever reaches the browser. Simply marking it as a client component does not prevent the server from generating the initial HTML.
What the use client directive does is ensure that all the JavaScript necessary for interactivity—such as onClick handlers, useEffect hooks, or any browser-only logic—is bundled and delivered to the client. After the server has sent the initial HTML, the browser “hydrates” the page by attaching event listeners and running any client-side code. This process brings the UI to life, enabling dynamic updates and user interactions.
The key takeaway is that both server and client components start out as fully rendered HTML from the server. Client components then gain interactivity once the browser finishes hydration, bridging the gap between static markup and the dynamic, responsive interfaces that React is known for.
Presenting use() hook.
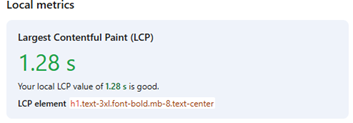
Awaiting the getTodos() call in our server component is convenient, but it doesn’t significantly improve a key performance metric: the Largest Contentful Paint (LCP). In our current setup, the app takes about 1.28 seconds before it displays any meaningful content to the user.
What is the use() Hook?
The use() hook is a new feature in React 19 that allows you to integrate asynchronous data directly into server components without blocking the entire render. Instead of waiting for data to load before sending any UI to the client, use() lets you immediately render what you can, while pending data resolves in the background.
How Does it Work?
- Asynchronous Loading: When you wrap a promise-returning function with use(), React knows this piece of data is still loading and can start rendering other parts of the UI.
- Suspense Integration: Combined with Suspense boundaries, use() displays fallback content until the async data is ready. Once the data resolves, React seamlessly updates the UI.
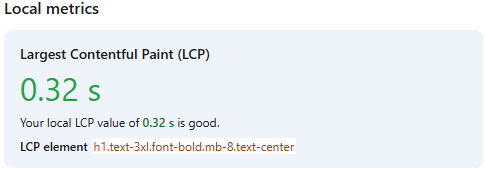
- Better Performance and Perceived Speed: By not holding up the initial render, use() improves the Largest Contentful Paint (LCP) and makes your app feel snappier. Users see something meaningful on the screen sooner, which enhances their experience.
By leveraging use(), we can start rendering the page without waiting for the entire data fetching process to complete. This means users see initial content sooner, improving both perceived performance and overall user experience.
Here is one way we can make use of this new functionality.
In our server component, we start fetching the list of todos, but we do not await the promise to resolve. We pass down the prop to our dashboard:
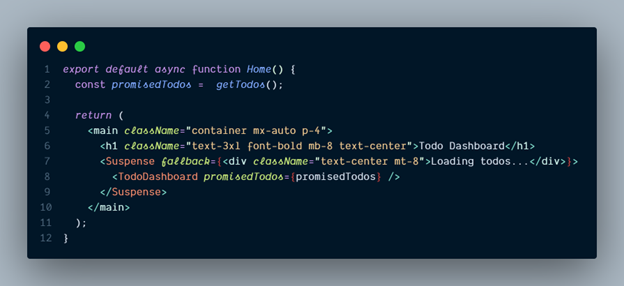
The dashboard component wrap the promise with the new hook and it will suspend this component until the promise resolves

During the time this promise is pending, the Suspense boundary in our server component shows a fallback UI or loading state, and the user receives a faster response when anvigate to our application.
Introducing Server Functions:
Now that we have our server component running and optimizing our initial fetching and page load. We can also reduce the amount of javascript code we send to the browaser, improving performance and security.
Right now, the functions to add, delete and toggle out TODOs states is sent to the client for it to run and execute.
Server functions in React 19 let you run certain logic exclusively on the server and then seamlessly integrate the results into your components.
How Do Server Functions Work?
- Server-Only Execution: Server functions never ship to the client. They are invoked on the server, allowing you to perform data operations, complex calculations, or sensitive logic (like handling environment variables or secure tokens) that you don’t want in the user’s browser.
- Seamless Integration with Components: You can directly call server functions within server components, simplifying your data flow and code structure.
Benefits:
- Security: Sensitive logic stays on the server, never exposing secrets to the client.
- Performance: Offloading work to the server cuts down on client-side overhead.
- Clean Architecture: Your application code can become cleaner and more maintainable.
Server component can define Server functions with the ‘use server’ directive:
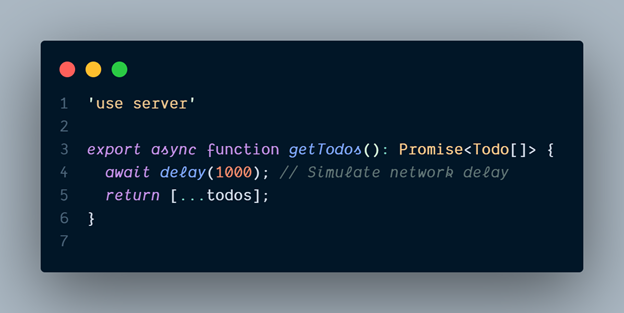
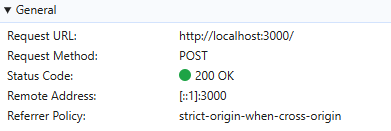
Now, when we add, delete, or toggle one of our Todos, you’ll notice that each of these actions triggers a POST request to the server. This request calls a server function to execute the desired operation and returns the updated result back to the browser.
On my local setup, it looks something like this:
Introducing useActionState
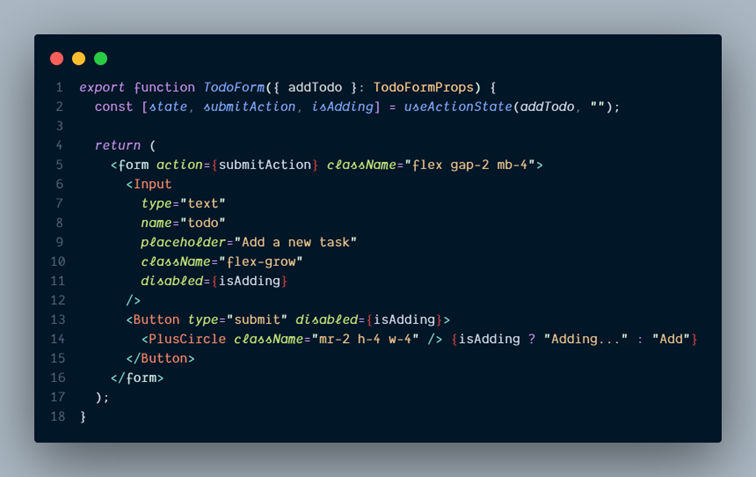
Managing form states like isAdding can quickly become cumbersome, especially as your app grows. You often find yourself creating multiple state variables or prop-drilling them across components. React 19 simplifies this with the new useActionState hook.
useActionState allows you to track the state of a server function directly, without needing to manually manage extra state variables
In our example App, we can eliminate the isAdding prop and handle the loading state seamlessly with useActionState and te action prop in the Form HTML element.
Lets be more optimistic.
In our app, we can add, delete, and toggle todos, but right now, we wait until the mutations are resolved on the backend before updating the UI. To make this delay more noticeable for the purpose of this exercise, I’ve added artificial delays to each action. This raises an important question: how can we make our app react faster to user actions?
Enter useOptimistic, a React 19 hook designed specifically for this purpose. Optimistic updates let you immediately reflect changes in your UI without waiting for the server to confirm them. This creates a smoother, more responsive experience for users, as they no longer need to wait for server round-trips to see the result of their actions.
How Does useOptimistic Work?
useOptimistic provides a simple way to manage optimistic state:
- Initial State: You provide the initial state of the component.
- Reducer Function: You define a reducer function that takes the current state and the action data, then computes the optimistic state.
- State Updates: React temporarily applies the optimistic state while the server operation executes in the background. If the operation succeeds, the state is finalized; if it fails, React reverts to the previous state.
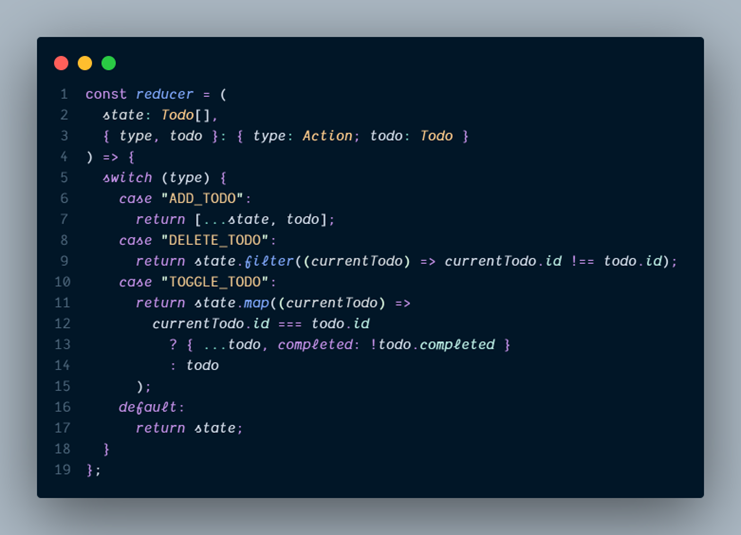
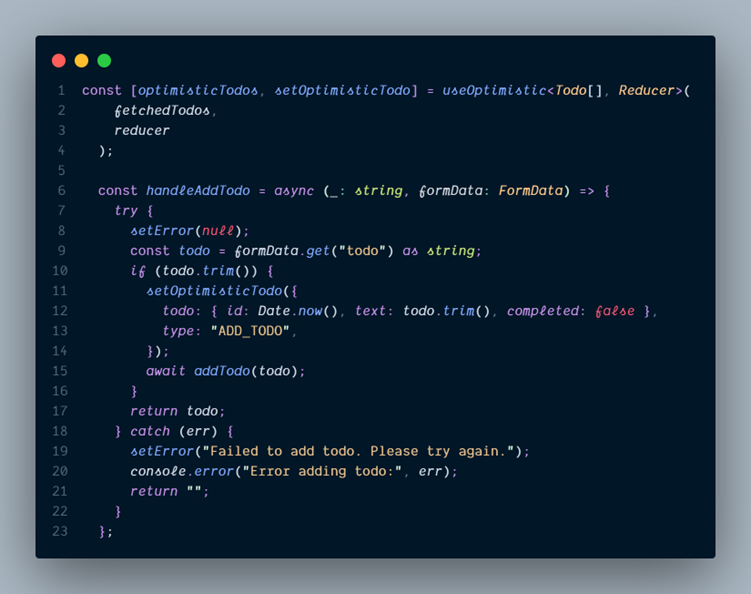
To use useOptimistic, we start by creating a reducer to centralize all the actions we can perform on our todos. This makes it easy to manage updates and ensures our UI feels fast and responsive.
Next, we create our optimistic state. This state will use the useOptimistic hook, with the initial state set to the todos received from the server. The optimistic state serves as the current source of truth for our UI, reflecting both the confirmed server state and any optimistic changes we apply locally.
The initial state provides a baseline—this is the state of the todos as fetched from the backend. From here, any user actions, such as adding, deleting, or toggling a todo, will temporarily update this optimistic state while waiting for the server to process the corresponding mutation. If the server confirms the operation, the state remains; otherwise, it reverts to the initial state.
Wrapping Up
In this post, we’ve explored some of the most significant new features of React 19, focusing on features like use(), useActionState, useOptimistic, and Server Components. These updates not only enhance performance but also simplify development by reducing boilerplate and streamlining workflows.
Of course, React 19 brings even more features and improvements beyond what we’ve covered here. I encourage you to dive deeper into the release notes and experiment with these new tools to deliver better experiences for your users while making your development process more efficient. With React 19, it’s never been easier to write cleaner, more maintainable code.
If you would like to do a similar on-hands experience here is the repository that you can use to start migrating to React 19.
You can get more insights and great articles in our Perficient Blogs.

