
In our previous blog, we explored how to set up Splunk Cloud and index dummy data using the upload option. Now that you have your Splunk Cloud environment up and running, let’s take it a step further. In this blog, we’ll dive into the HTTP Event Collector (HEC), a powerful feature in Splunk that allows you to send data to Splunk over HTTP or HTTPS. This is particularly useful for real-time data ingestion from various sources, such as applications or cloud services. Let’s get started!
Setting Up HTTP Event Collector in Splunk Cloud
1: Enable HEC in Splunk Cloud
- Login to your Splunk Cloud dashboard.
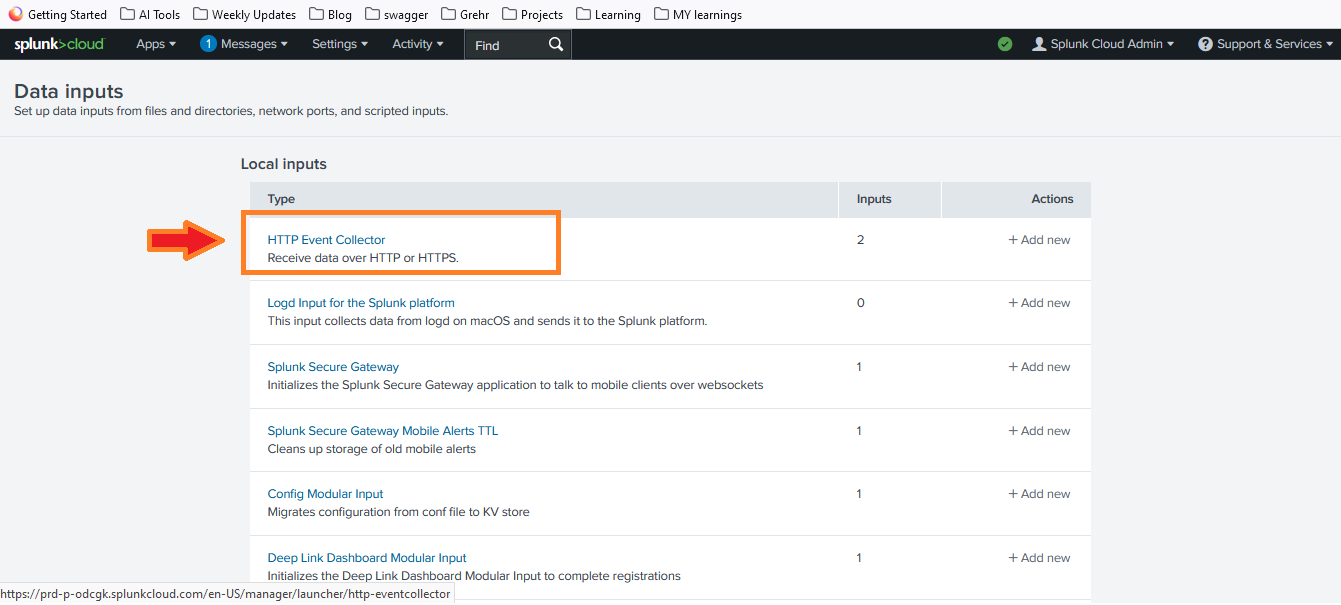
- Navigate to the Settings menu and select Data Inputs.

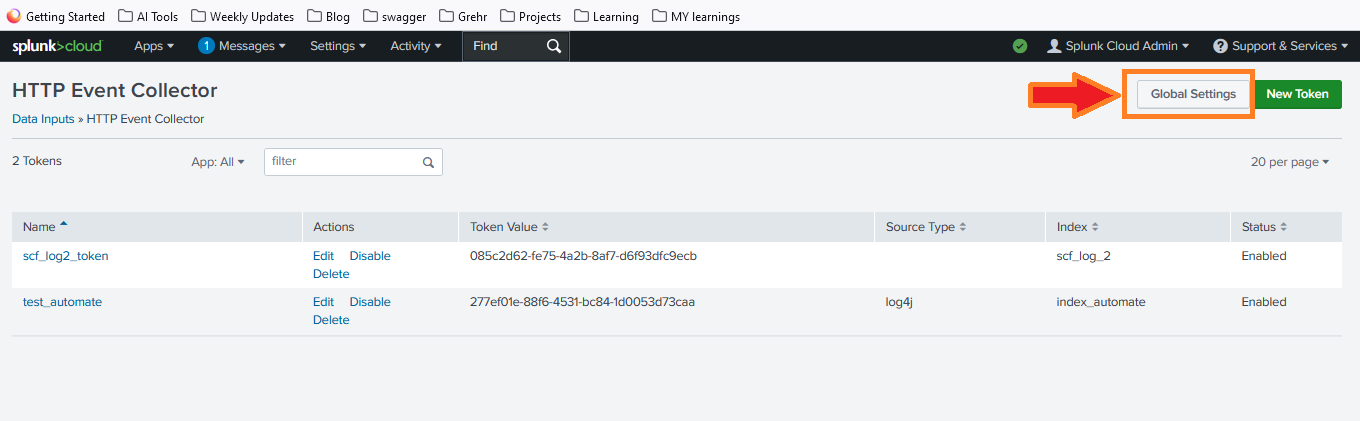
- Click on HTTP Event Collector and then Global Settings.
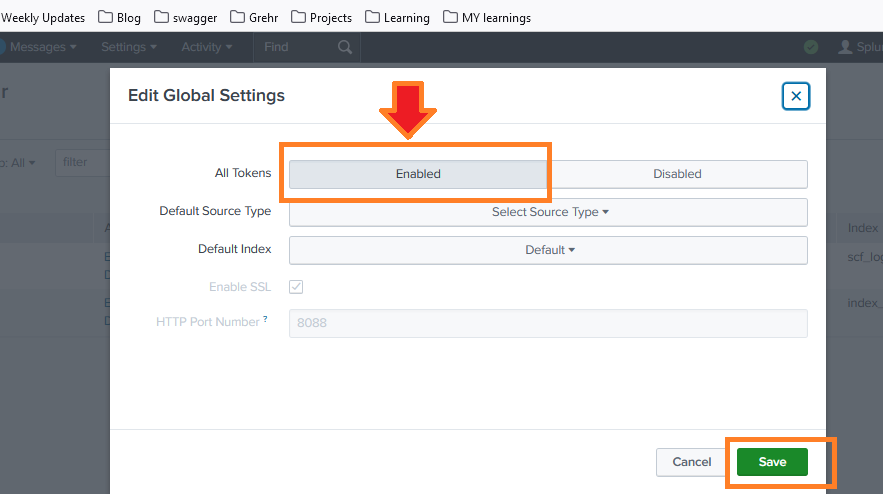
- Enable the HEC by toggling the switch to Enabled.
- Click Save to apply the changes.
2: Create a New Token
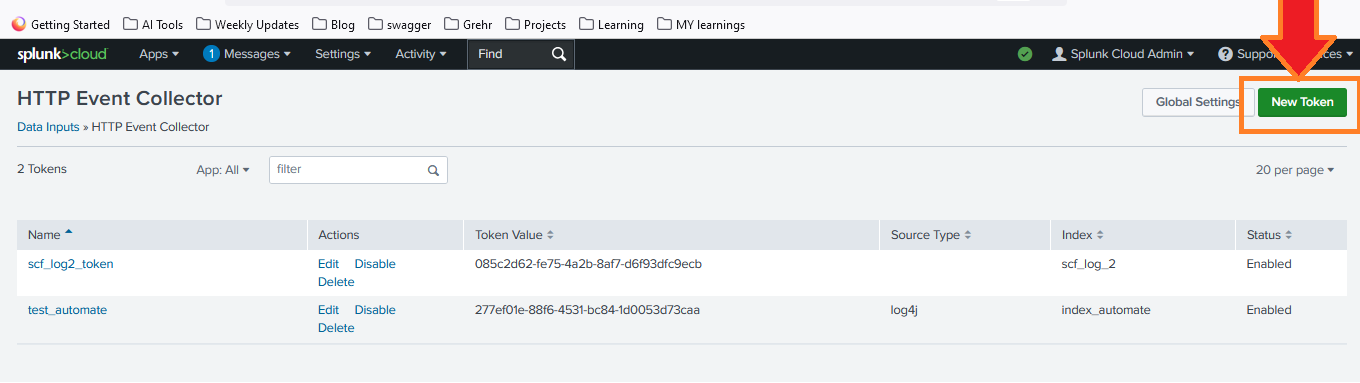
- In the HTTP Event Collector page, click on New Token.
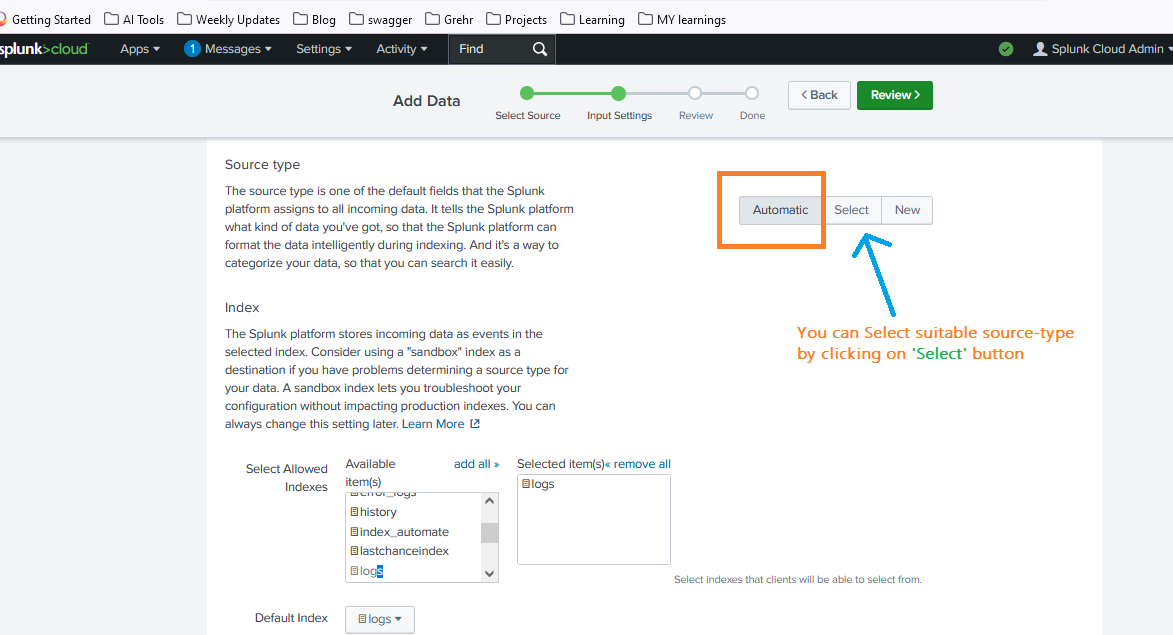
- Enter a name for your token and configure the necessary settings, such as source type and index.
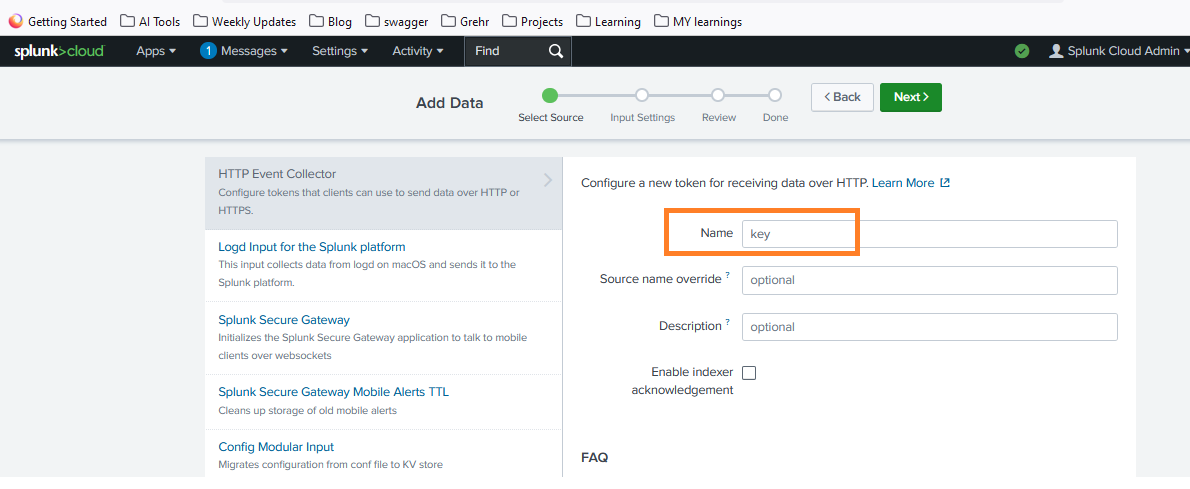
- Click Next and review your settings.
- Click Finish to create the token. Make sure to copy the token value as you’ll need it to send data.
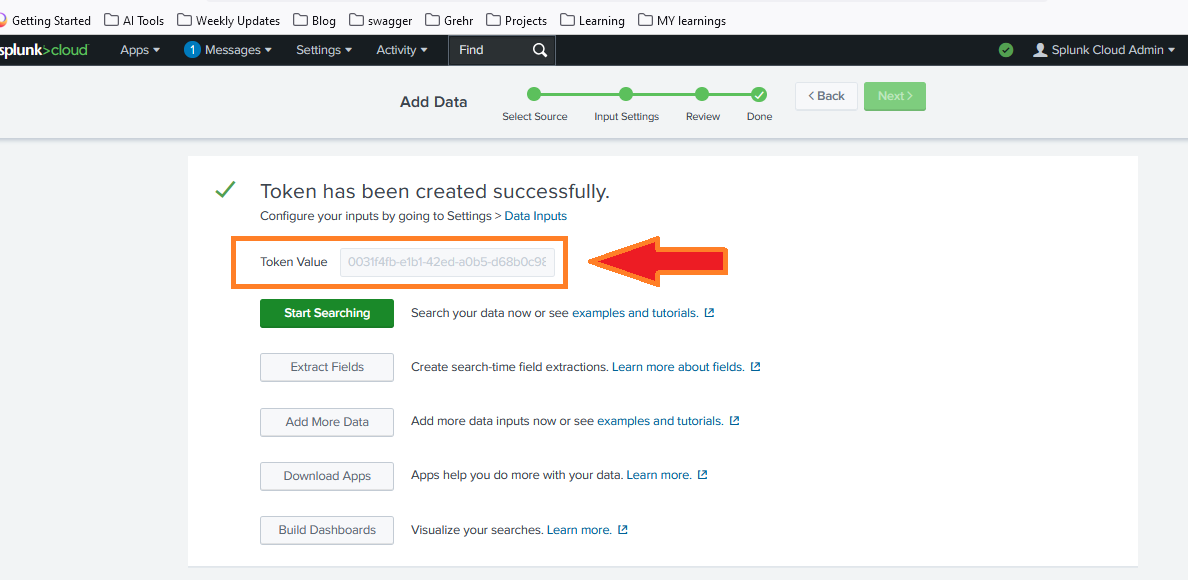
Important: Make sure to copy and securely store the token value. You’ll need this to authenticate when sending data to Splunk Cloud.
3: Sending Data to Splunk Cloud Using HEC
- Prepare Your Data: Format your data as a JSON payload. Here’s an example:
{ 'event': 'Hello, world!', 'sourcetype': 'sourcetype-test', 'index': 'your_index' } - Send Data Using cURL: Use the following cURL command to send data to Splunk
curl --location "https://<splunk-cloud-url>:8088/services/collector/event" --header "Authorization: Splunk <your-token>" --header "Content-Type: application/json" --data "{\"event\": \"Hello, world!\", \"sourcetype\": \"sourcetype-test\", \"index\": \"<your-index>\"}" -k
Replace
<your-splunk-cloud-url>with your actual Splunk Cloud URL and<your-token>with the token you created earlier.
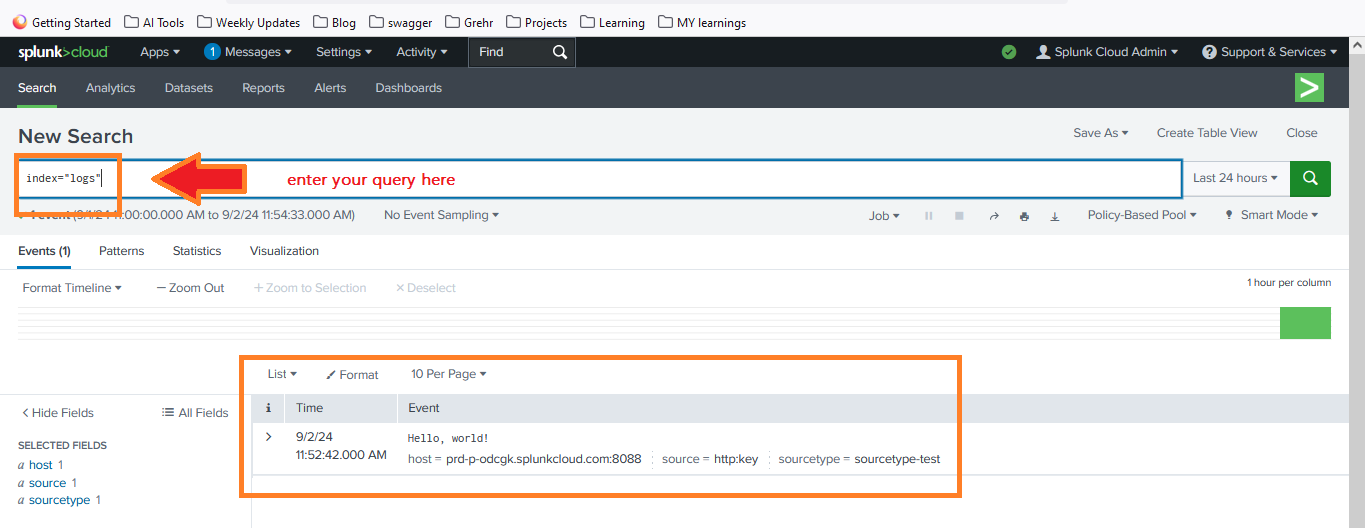
4: Verifying Data in Splunk Cloud

After sending data via HEC, it’s crucial to verify that it has been successfully indexed in Splunk Cloud.
- Log in to your Splunk Cloud dashboard.
- Use the search bar to query your indexed data. For example, you can search for index=”logs”.
By following these steps, you’ve successfully set up the HTTP Event Collector in Splunk Cloud and sent data using Curl. This powerful feature allows you to seamlessly integrate data from various sources in real-time, making it easier to monitor and analyze your data streams.