
This comprehensive guide walks you through the process of setting up Splunk Universal Forwarder to send real-time logs to Splunk Cloud. Learn how to enhance your organization’s log management capabilities, from installation to troubleshooting.
Introduction to Splunk Cloud and Universal Forwarder
What is Splunk Cloud?
Splunk Cloud is a powerful cloud-based platform for collecting, analyzing, and visualizing machine-generated data from various sources. It offers robust tools for searching, monitoring, and analyzing log data, making it indispensable for IT operations, security, and business analytics.
The Role of Universal Forwarder
To efficiently get logs into Splunk Cloud, you need Splunk Universal Forwarder (UF). This lightweight version of Splunk collects and forwards log data to Splunk Cloud in real-time, bridging the gap between your data sources and the cloud platform.
Why Use Universal Forwarder for Log Forwarding?
- Real-Time Data Monitoring: Enables quick insights by forwarding logs to Splunk Cloud in real-time.
- Efficiency: Lightweight design minimizes impact on system resources.
- Scalability: Capable of forwarding logs from multiple sources, suitable for small to large-scale deployments.
Getting Started: Prerequisites and Setup
Before diving into the setup process, ensure you have:
- Splunk Cloud Account: An active account (free trial or paid subscription). If you don’t have an account yet, you can follow the instructions provided in the blog, “Understanding Splunk and Setting Up Splunk Cloud,” to get started.
- Universal Forwarder Installation Package: Downloaded for your specific operating system.
- Access to Log Files: Identified and accessible log files for monitoring.
Step 1: Setting Up the Splunk Universal Forwarder
Download and Install Splunk Universal Forwarder
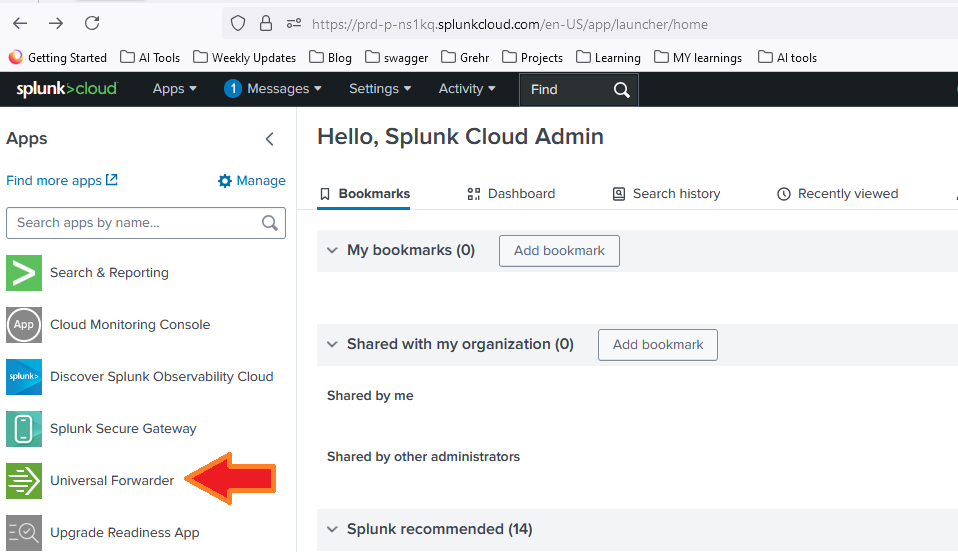
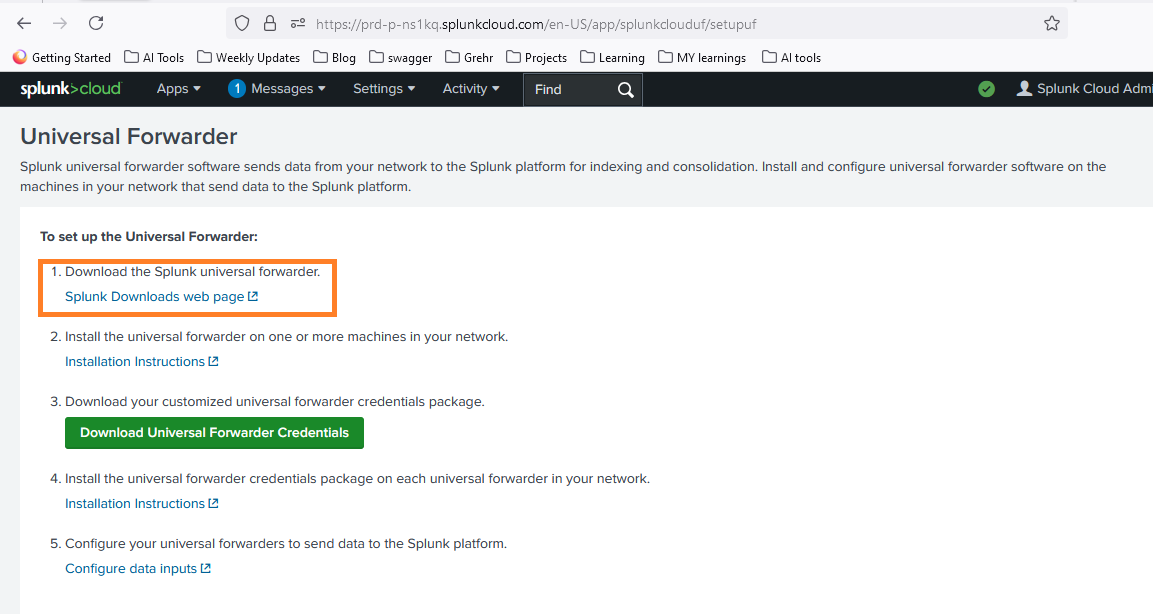
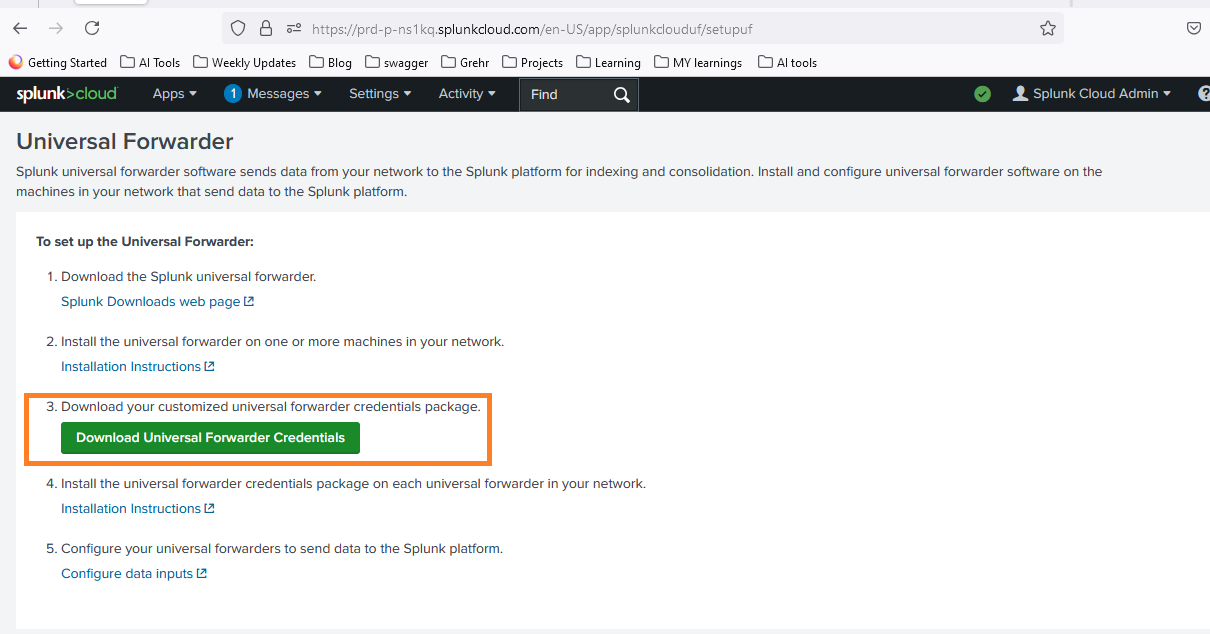
- Visit the Splunk Cloud platform and navigate to the Universal Forwarder option.
- Click on the Splunk Downloads web page to choose and download your specific version.
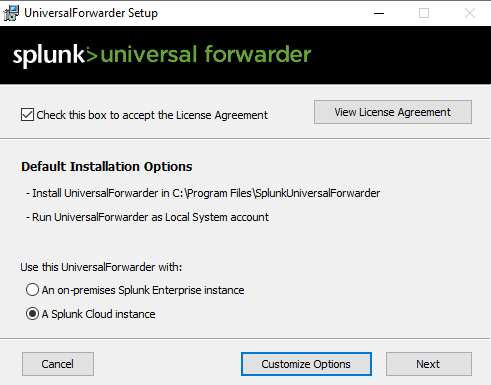
- Run the installer or extract the package to your desired location.
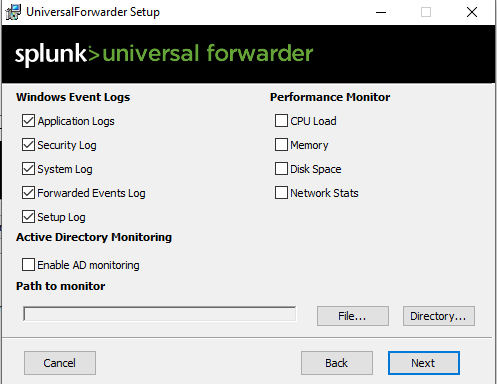
- Follow on-screen prompts to complete the installation.
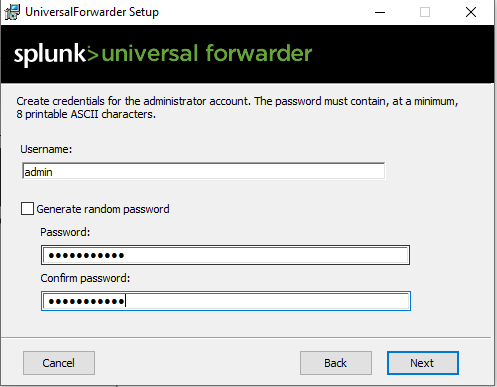
- The Universal Forwarder service should start automatically after installation.
Step 2: Configuring Universal Forwarder
Basic Configuration

Follow these steps to connect Universal Forwarder to your Splunk Cloud instance:
- Download the Splunk Cloud certificate from the platform.
- Install the certificate using the command:
splunk.exe install app C:\tmp\splunkclouduf.spl
- Restart Splunk:
Splunk restart
- Configure the forwarder to send data to Splunk Cloud:
splunk add forward-server prd-xyz.splunkcloud.com:9997
Replace the server address with your specific Splunk Cloud instance.
- Enable the forwarder to receive data:
splunk enable listen 9997
- Add a data input:
splunk add monitor C:/KANCHAN/POCs/scf.log
Step 3: Verifying Data Indexing and Customizing Indexes
Checking Data Indexing
- Log in to your Splunk Cloud instance.
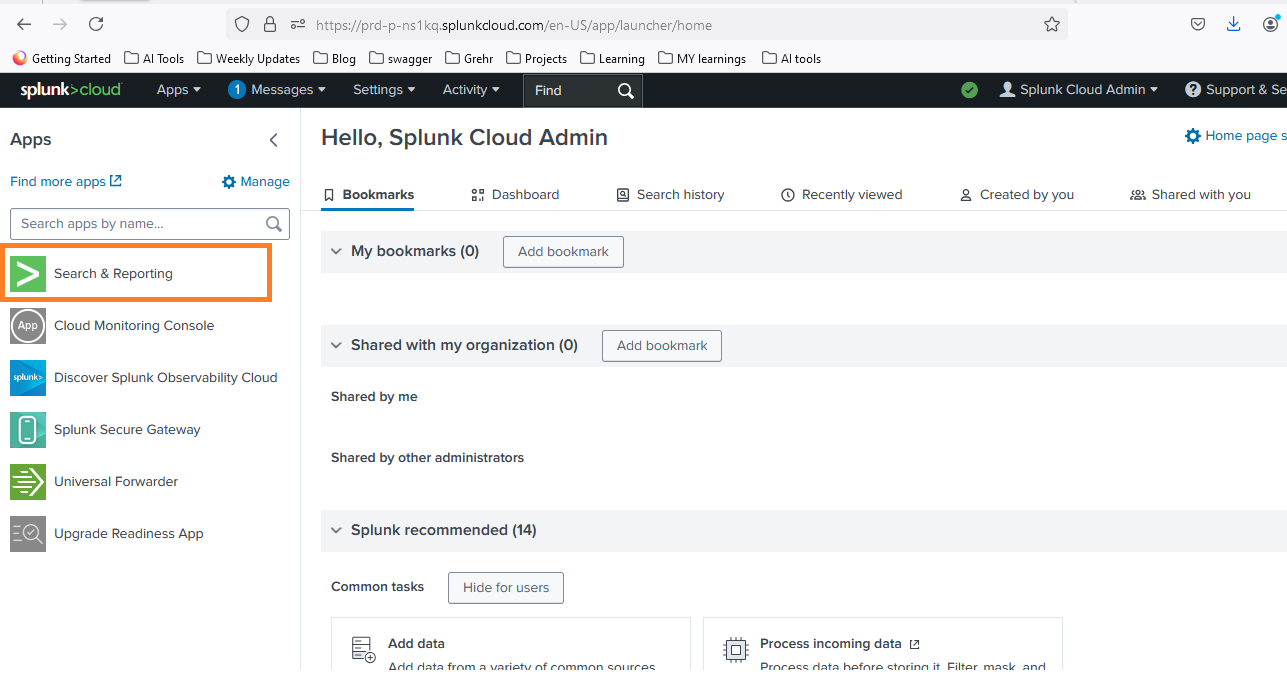
- Navigate to the Search & Reporting app.
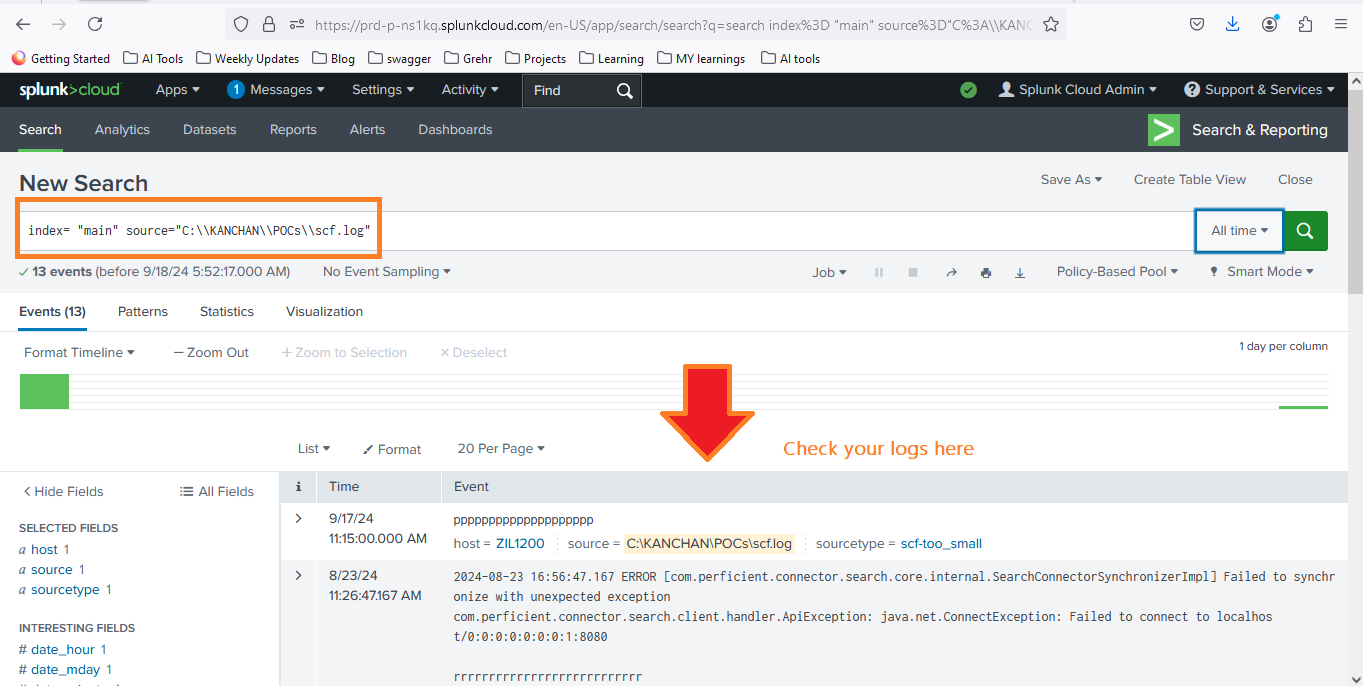
- Run a search query, e.g.:
index= "main" source="C:\\KANCHAN\\POCs\\scf.log"
Configuring Custom Indexes
- Locate or create the inputs.conf file in $SPLUNK_HOME/etc/apps/search/local/.
- Add the following configuration:
disabled = false
index = test
sourcetype = log_file
- Save the file and restart Universal Forwarder.
- Verify the new index is receiving data.
index=test sourcetype=log_file
Remember to create the custom index in your Splunk Cloud instance if it doesn’t exist.
Troubleshooting Common Issues
If you encounter data transmission problems, check these common culprits:
- Firewall settings: Ensure outbound connections on the specified port are allowed.
- Network configuration: Verify network connectivity to Splunk Cloud:
telnet <splunk_cloud_url> 9997
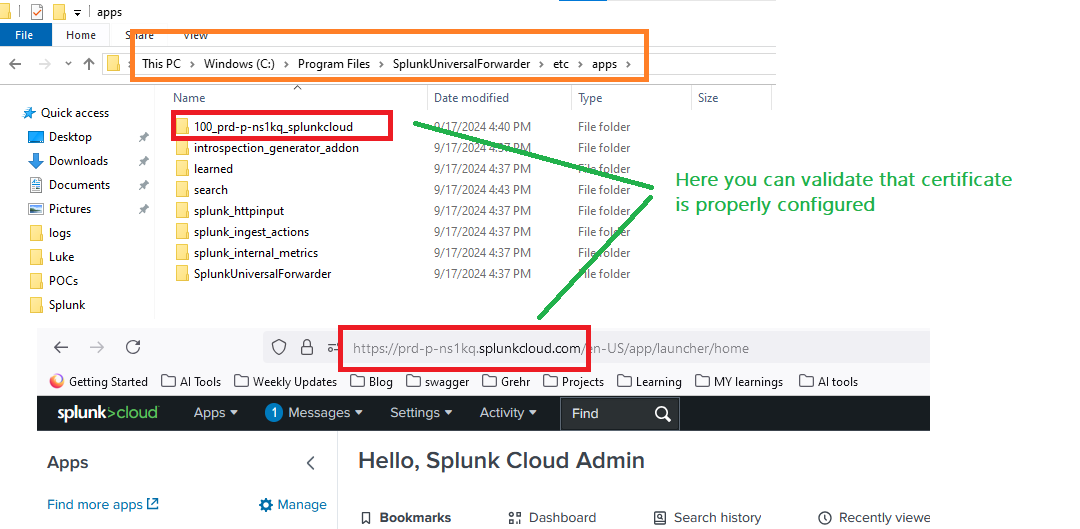
- Certificate issues: Validate that certificates are properly configured
Understanding Real-Time Log Forwarding
it’s crucial to understand what we mean by “real-time log forwarding” in the context of Splunk Universal Forwarder.
What is Real-Time Log Forwarding?
Real-time log forwarding refers to the process where log files are continuously monitored for changes, and any new data is immediately sent to Splunk Cloud. This means that as soon as new log entries are written to a file, they are detected and forwarded, ensuring that your Splunk Cloud instance always has the most up-to-date information.
Let’s break this down using our example:
splunk add monitor C:/KANCHAN/POCs/scf.log
When you use this command, you’re telling the Universal Forwarder to:
- Continuously Monitor: The Universal Forwarder will keep a constant watch on the scf.log file.
- Detect Changes: Whenever the scf.log file is modified (i.e., new log entries are added), the Universal Forwarder immediately detects these changes.
- Forward New Data: As soon as new log entries are detected, they are forwarded to Splunk Cloud without any manual intervention.
- Maintain File Position: The Universal Forwarder keeps track of where it last read in the file, ensuring that only new data is sent and no duplicates are created.
This real-time nature of log forwarding is incredibly powerful because it means:
- You always have the most current data in Splunk Cloud for analysis.
- You can set up near real-time alerts and dashboards in Splunk Cloud, as the data is being continuously updated
For example, if your scf.log file is an application log that records user activities, errors, or system events, any new entries will be almost immediately available in Splunk Cloud. This allows for rapid detection of issues, real-time monitoring of user activities, or instant alerts on critical events.
It’s important to note that while we use the term “real-time,” there is always a small delay due to factors like network latency and processing time. However, in most cases, this delay is negligible, and the data can be considered to be available in near real-time.
Splunk Cloud Capabilities
Setting up real-time log forwarding to Splunk Cloud using Universal Forwarder significantly enhances your organization’s log management capabilities. By following this guide, you’ve taken a crucial step towards more efficient and insightful data analysis. Continue exploring Splunk Cloud’s features to unlock the full potential of your log data.