
Software development requires testing as an essential component. It ensures that your code operates as intended and finds errors before being used in production. Test writing, meanwhile, can occasionally seem like a tedious task. Fortunately, this procedure may be accelerated and improved upon by using GitHub Copilot, an AI-powered coding assistant. In this blog post, we’ll look at how to create tests for your code and optimize your development process with GitHub Copilot.

What is GitHub Copilot?
GitHub Copilot is an intelligent code suggestion tool created by GitHub and OpenAI to help with code authoring. It can assist you with writing boilerplate code, intricate algorithms, and—most significantly for this blog—creating test cases for your functions and procedures.
Getting Started with GitHub Copilot
- Obtain GitHub Copilot: GitHub Copilot is available through a subscription. After obtaining a subscription, ensure your chosen code editor has it installed and activated.
- Install the Extension: In the Extensions view, the GitHub Copilot extension is available for Visual Studio Code users. Just type “GitHub Copilot” into the search bar and select “Install.”
Creating Tests with GitHub Copilot
Open Your Codebase
Open your project in Visual Studio Code or any other suitable code editor. Ensure you know where your test files are going and that your code is arranged correctly. In the GitHub Copilot Chat, you can also ask the copilot to write down a code for you.
The chat window looks like this:

Start Writing Code

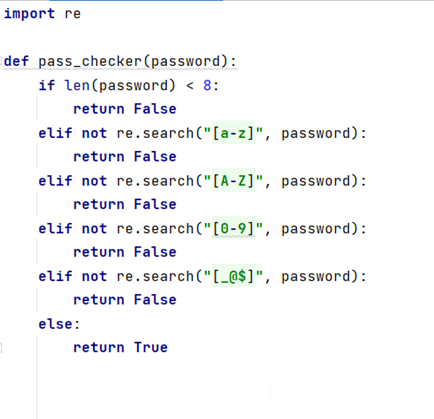
Suppose you have a function like the one below in Python, which validates the password:
Generate Test Files
- Create a Test File: In your project directory, create a new file for your tests. For example, you might create test_passChecker.py if you’re working with Python.
- Ask Copilot to generate a Test Function: Begin by writing a basic test function or simply saying, “Hey, write down a test for the password checker.”
Leverage Copilot for Test Generation
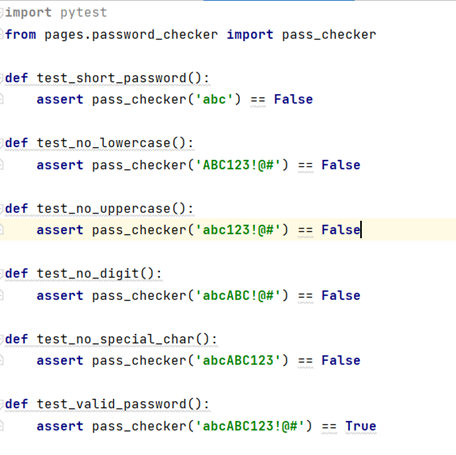
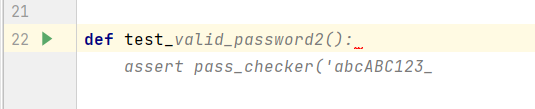
- Start Typing: GitHub Copilot will suggest additional test cases as you type your test function. These might include edge cases or different types of input.
- Review Suggestions: Copilot’s suggestions will appear in a dropdown or inline in your editor. You can accept a suggestion by clicking on it or pressing Tab. Review these suggestions to ensure they align with what you want to test.
Refine and Customize
- Adjust Test Cases: Sometimes, the generated tests might require adjustments. Feel free to modify them to better fit your specific use cases or to enhance coverage.
- Add More Complex Tests: For more complex functions, you might need to write custom test cases. Use Copilot’s suggestions as a starting point and build upon them.
Run Your Tests
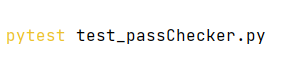
Once you’ve generated and refined your test cases, it’s time to run them. You can use pytest or unit test to execute your tests and verify that everything works as expected.
Benefits of Using GitHub Copilot for Testing
- Efficiency: Quickly generate multiple test cases without manually writing each one. This speeds up your testing process and reduces repetitive work.
- Coverage: Get suggestions for a variety of test scenarios, including edge cases that you might not have considered. This helps improve the robustness of your tests.
- Learning Aid: For beginners, Copilot can be used as a learning tool by showing the standard format of tests and offering recommended practices.
While GitHub Copilot is a powerful tool for generating code and tests, it’s important to be aware of some of the potential downsides. Here’s a breakdown of the cons of using GitHub Copilot:
- Code Quality and Reliability: GitHub Copilot generates code based on patterns it has learned from existing codebases. This means the code it suggests might not always follow best practices or be free from bugs. Make sure to check and test the code that is generated thoroughly.
- Over-Reliance: Relying heavily on Copilot might hinder your growth as a developer. It’s important to understand how code works and be able to write it from scratch, as this will deepen your problem-solving skills and understanding of programming concepts.
- Cost and Accessibility: GitHub Copilot is a subscription service. Some developers or organizations may be concerned about the expense, particularly if they have a limited budget. The free version of GitHub Copilot has limits, and you may need to purchase a subscription to utilize all of its capabilities.
Ultimately, GitHub Copilot should be used in addition to your coding procedures, not as a substitute for them. By combining its recommendations with your knowledge and meticulous review procedures, you may maximize its benefits and minimize any problems.
GitHub Copilot is a powerful tool for your testing process. You may write and maintain tests more quickly by utilizing its AI-driven recommendations, freeing up time to concentrate on coding rather than tedious activities. You can successfully include GitHub Copilot in your development process and improve the quality of your software by following the instructions in this guide.
Thank you for sharing good information.