
In today’s fast-paced digital world, deploying and managing web applications efficiently is crucial for developers and businesses alike. AWS Elastic Beanstalk offers a powerful and user-friendly platform to streamline this process, allowing you to focus on writing code rather than managing infrastructure. In this blog, we’ll explore AWS Elastic Beanstalk, its key features, and how to deploy a web application using this robust service. We’ll also share insights from a proof of concept (POC) deployment to highlight its practical benefits.
What is AWS Elastic Beanstalk?
AWS Elastic Beanstalk is a platform-as-a-service (PaaS) responsible for application deployment, scaling, and management. It supports multiple programming languages, application codes, and frameworks, including Java, .NET, PHP, Node.js, Python, Ruby, Go, and Docker. Elastic Beanstalk handles the provisioning of resources such as EC2 instances, load balancers, and databases, allowing developers to focus on their application’s code.
Key Features of AWS Elastic Beanstalk
- Ease of Use: With Elastic Beanstalk, you can deploy your application with just a few clicks. The service auto-configures capacity provisioning, load balancing, scaling, and application health monitoring details.
- Support for Multiple Platforms: Whether you’re building a simple web app or a complex enterprise solution, Elastic Beanstalk supports various platforms and frameworks, making it a versatile choice for developers.
- Automatic Scaling: Elastic Beanstalk automatically scales your application up or down based on demand, ensuring optimal performance and cost-efficiency.
- Monitoring and Health Management: Built-in monitoring tools provide insights into your application’s performance and health, helping you identify and resolve issues quickly.
- Customization: You can fully customize your environment by selecting specific instance types, database configurations, and network settings.
Step-by-Step Guide to Deploy a Web Application with AWS Beanstalk
Prerequisites
The following prerequisites are required to deploy your application.
- An AWS account
- Your application code ready for deployment
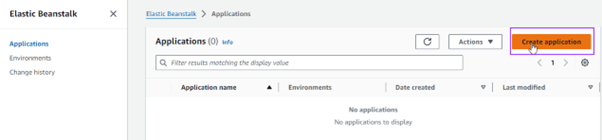
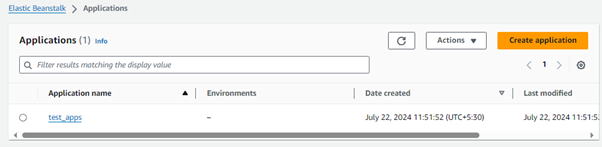
Step 1: Create an Elastic Beanstalk Application
- Sign in to the AWS Management Console: Navigate to the Elastic Beanstalk service.
- Create an application: Click on “Create application” and provide a name and description for your application.
Step 2: Create an Environment
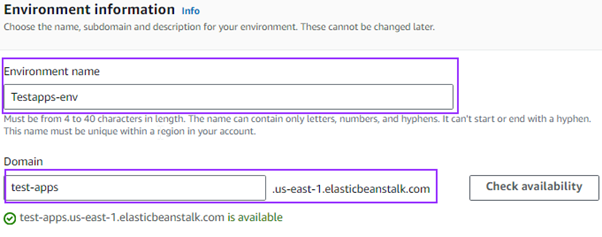
Configure an environment and provide the created application details.
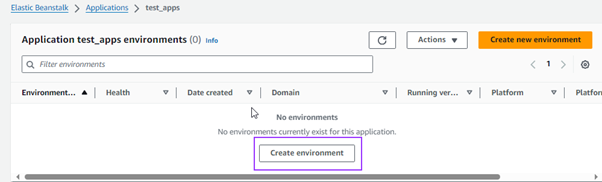
Configuration details required for creating the environment:
- Environment type: Webserver environment
- Environment name: Testapps-env
- Domain: test-apps.us-east-1.elasticbeanstalk.com (it can be autogenerated and you can choose custom domain as well by checking domain availability).
- Platform Type: Managed platform
- Platform: Docker container
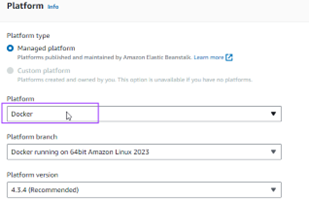
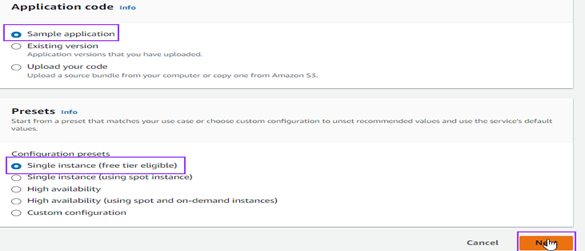
- Application code and Presets: For now, we are deploying a sample Docker container. Select the presets value as per the requirement and then click on next.
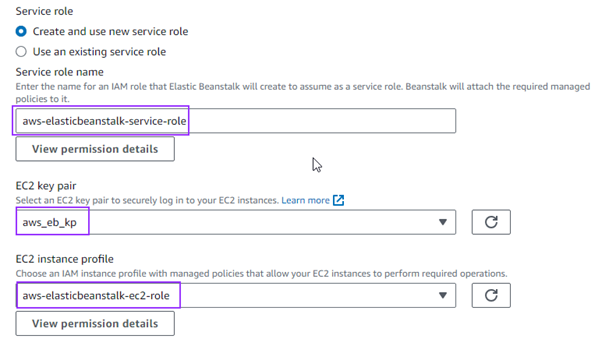
Step 3: Configure the service role, EC2 Key Pair, and EC2 Instance Profile
By default, we can create a service role, but EC2 key pair and EC2 instance profile will be created separately.
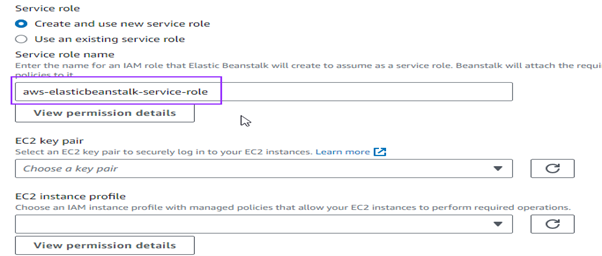
Step 3.1 Create EC2 instance profile
For creating the EC2 instance profile, we need to create an IAM role. Follow below steps
Go to IAM dashboard => Roles => Create role => Choose trusted entity type as “AWS Service” => select use cases as “EC2” => choose Next => Add below three permission policy
“AWSElasticBeanstalkWebTier,” “AWSElasticBeanstalkWorkerTier,” and “AWSElasticBeanstalkMulticontainerDocker” and save it and click on create the role.
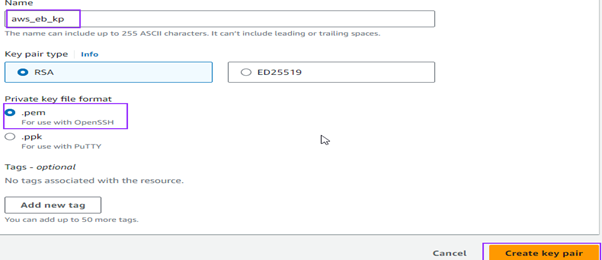
Step 3.2. Create key pair
For creating the EC2 instance key pair navigate to EC2 service of AWS
Go to EC2 => Key Pairs => Create Key Pair => Define name and keep key format as .pem and create EC2 key pair.
Now, create all required configurations, define them in the elastic beanstalk environment, and click on next.
Step 4: Configure VPC
You can configure a new VPC or select the default VPC value. Then, you can assign Public IP to the instance by selecting the subnet value.

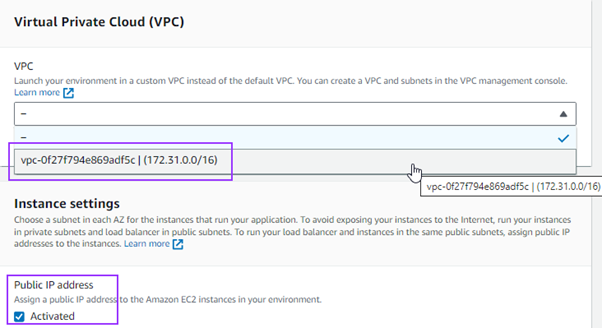
Note: We are not enabling the database because it’s not required in our case.
After configuring the VPC and subnets value, click next for configuring the instance traffic and scaling.
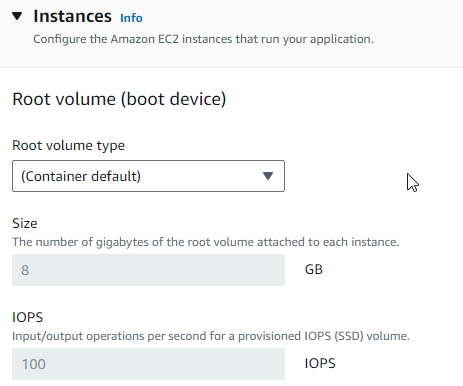
Step 5: Define Value for Instance Configuration
Select the default value of root volume, cloudwatch monitoring configuration, EC2 security group, compute capacity configuration, and click on next.
Step 6: Configure monitoring and logging details
Configure the details for monitoring and logging in the environment.
Select an enhanced health monitoring system by defining the instance health and instance warning as CloudWatch custom metrics for instance and environment.

Configure manage platform updates to auto-install patches on instances.
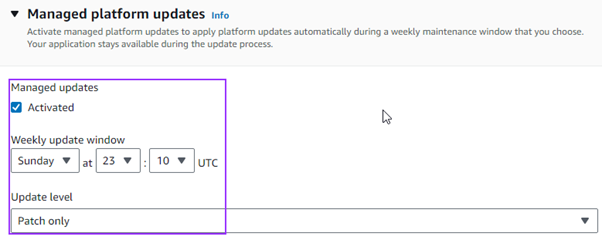
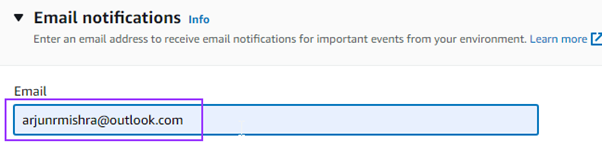
Provide email ID details to get notifications of multiple event triggers in environments.
Keep all other configurations as default; review the whole configuration, and create the environment by clicking on submit.
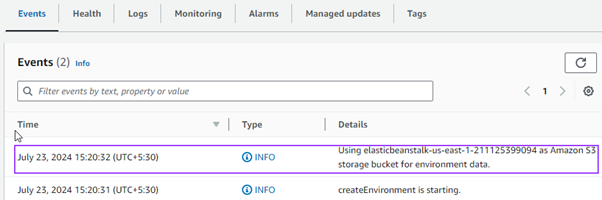
An S3 bucket is created in the backend to store the updated application code and environmental data while the environment is being prepared.
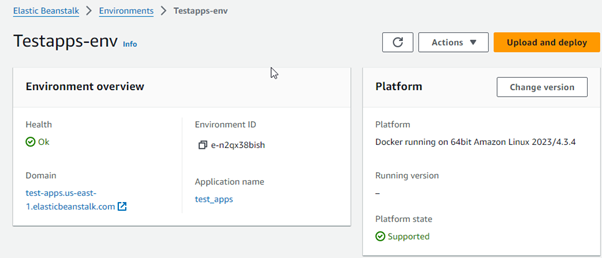
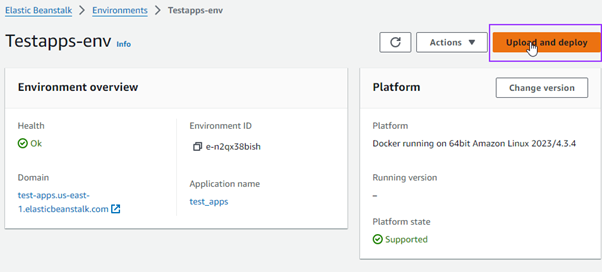
It took some time to prepare the environment. As the environment gets ready, it looks like below
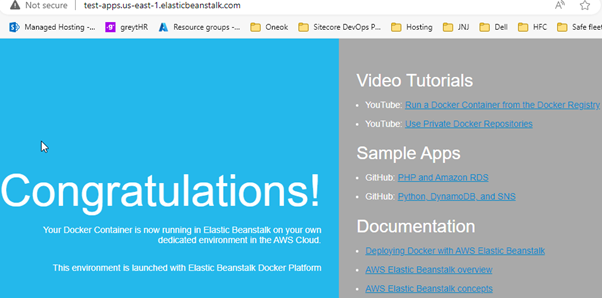
Now hit the domain URL and check the application status:
After testing the domain URL, we get response as follows:
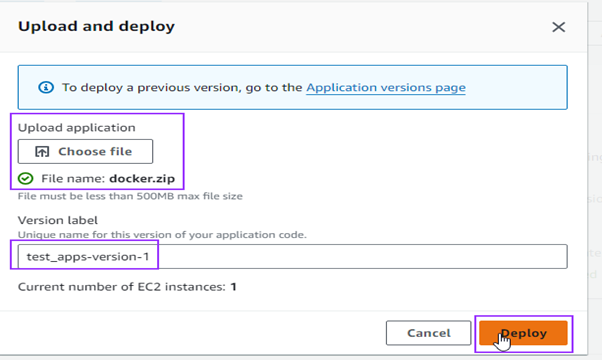
How to Deploy a New Version of Code in the Same Environment
I am trying to upload a new docker.zip file for testing deployments of a new version of the application code.
To download the new version of the docker.zip file, follow this URL: Deploy a new version of your application – AWS Elastic Beanstalk (amazon.com)
Upload the new docker.zip file in the upload application and define the label. Click on deploy.
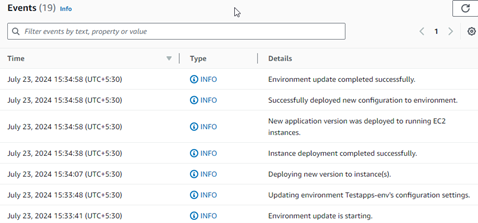
While deploying a new version of the application code, the activities performed in the backend can be traced in events.
Conclusion
AWS Elastic Beanstalk provides a strong, adaptable web application deployment and management framework. Its intuitive design, built-in scaling, and extensive monitoring features make it the perfect option for developers trying to optimize their deployment procedures. Regardless of your level of experience, Elastic Beanstalk can assist you in quickly and easily launching your apps. Take advantage of Elastic Beanstalk’s capabilities right now to start reaping its rewards.