Microsoft’s Power Apps is a flexible platform that empowers users to effortlessly construct custom applications. As applications become more complex, the need for a well-organized and efficient deployment process becomes paramount. In this blog post, we’ll delve into the step-by-step process of implementing deployment pipelines in Power Apps, leveraging the Power Apps Deployment Pipeline App—an indispensable tool designed to streamline and optimize application deployment within the framework of Application Lifecycle Management (ALM).
The Power Apps Deployment Pipeline serves a pivotal role in this process. Acting as a systematic conduit, it ensures the seamless transition of applications across different stages, from development to testing and production. The pipeline enables version control, automated testing, collaboration facilitation, and efficient environment management by adhering to ALM principles. This strategic and controlled workflow enhances your applications’ reliability and promotes collaboration and agility across your development and IT teams within the broader context of the application’s lifecycle. Therefore, the Power Apps Deployment Pipeline plays a central role in orchestrating a well-coordinated and efficient deployment strategy for Power Apps applications, aligning seamlessly with ALM practices.
Prerequisites for Deploying the Power Apps Solution
Before we dive into the process, make sure you have the following prerequisites:
- Power Apps Deployment Pipeline App: Install the Power Apps Deployment Pipeline App from Microsoft AppSource.
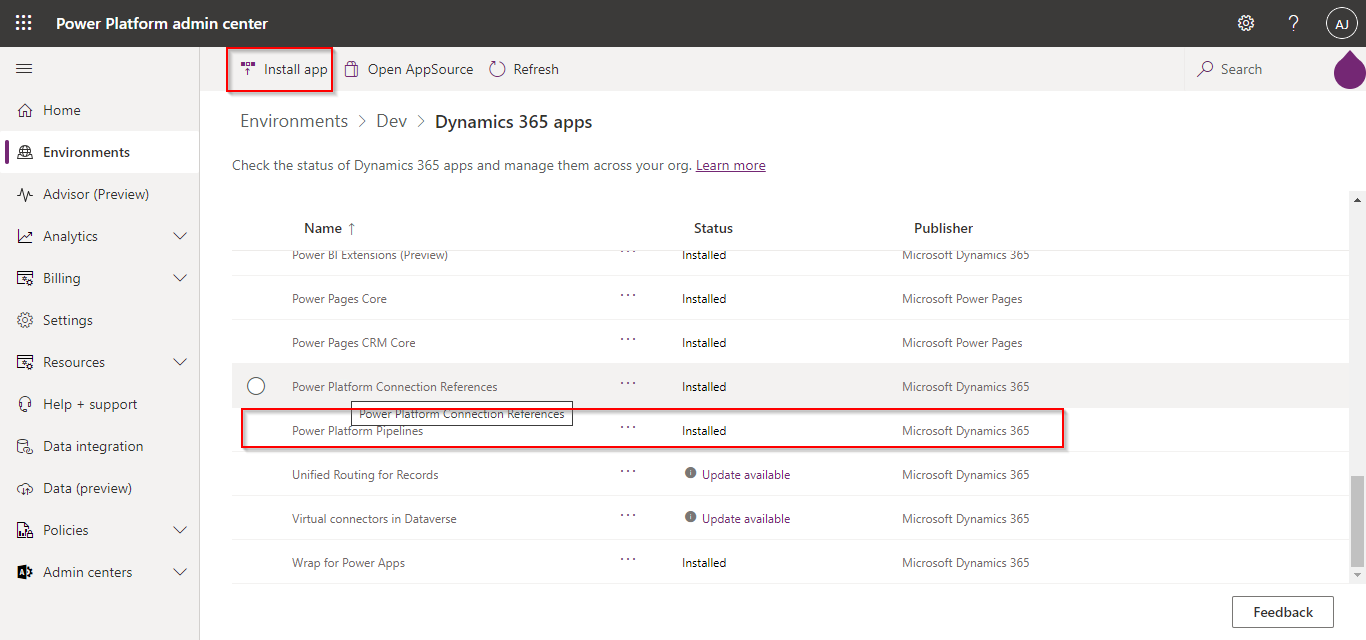
- Power Platform Environment: Ensure you can access a Power Platform environment where your apps are developed and deployed.
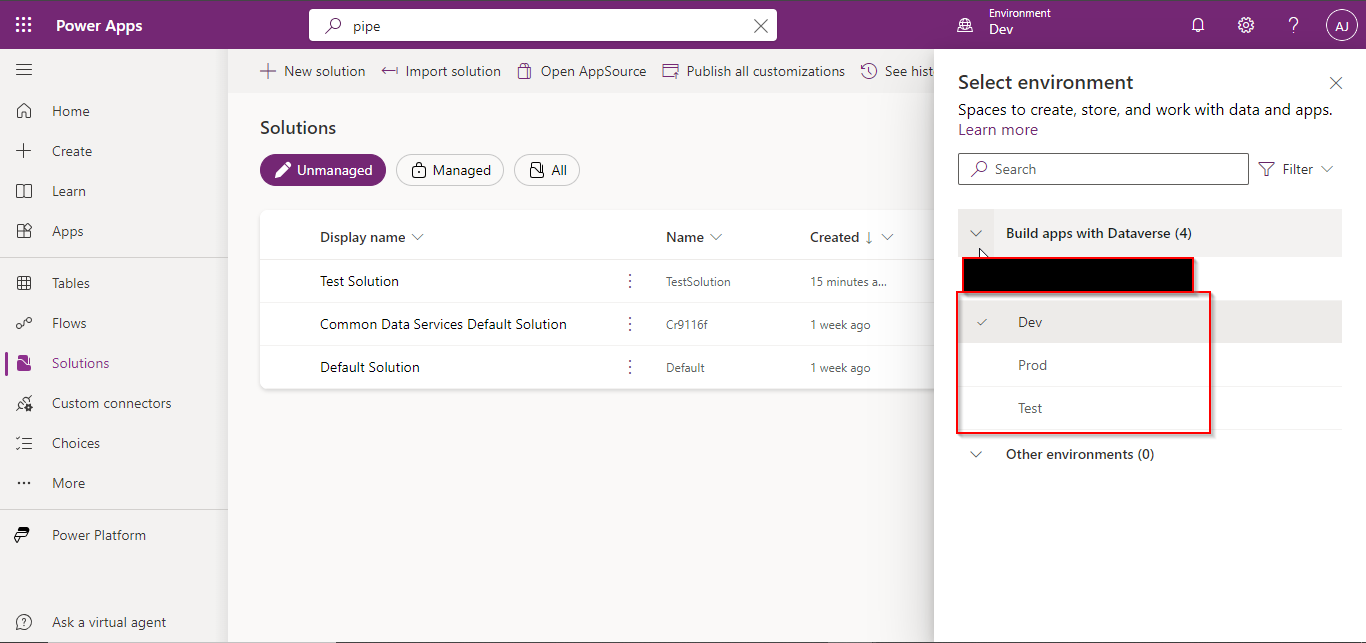
Steps for Power Apps Deployment
1: Install Power Apps Deployment Pipeline App
- Open Microsoft AppSource and locate the Power Apps Deployment Pipeline App.
- Install the app in your Power Platform environment.

2: Configure the Power Platform Environment
- Launch the Power Apps Deployment Pipeline App within your Power Platform environment.
- Configure the app settings, specifying your deployment pipeline’s source and target environments.
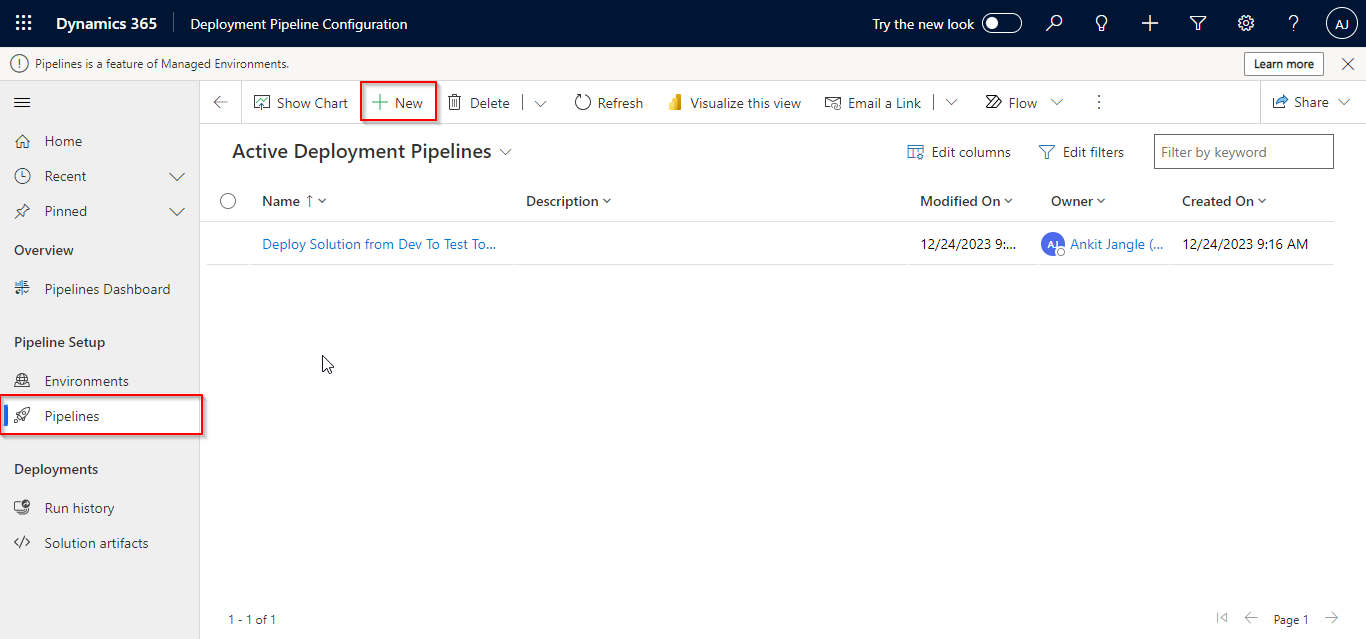
3: Create a Deployment Pipeline
- In the Power Apps Deployment Pipeline App, navigate to the “Pipelines” section.
- Create a new deployment pipeline, naming it according to your project or environment.
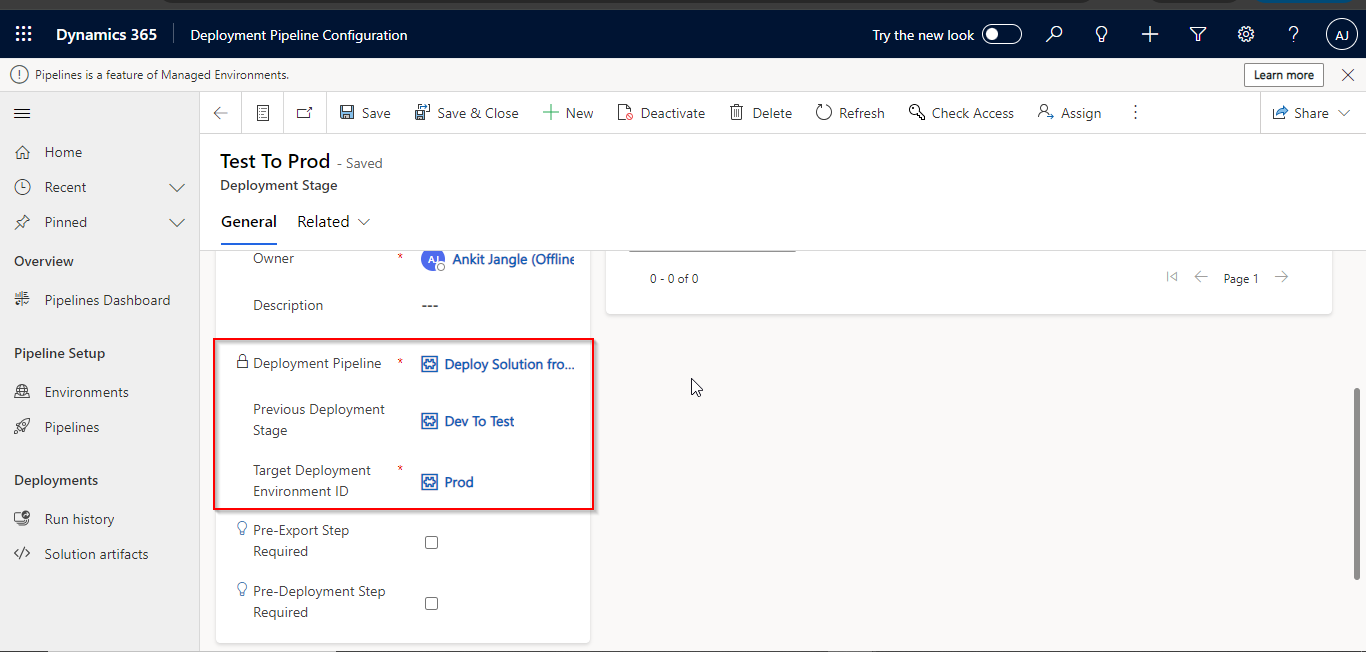
4: Add Deployment Stages
- Define deployment stages corresponding to your environments (e.g., Development, Test, Production).
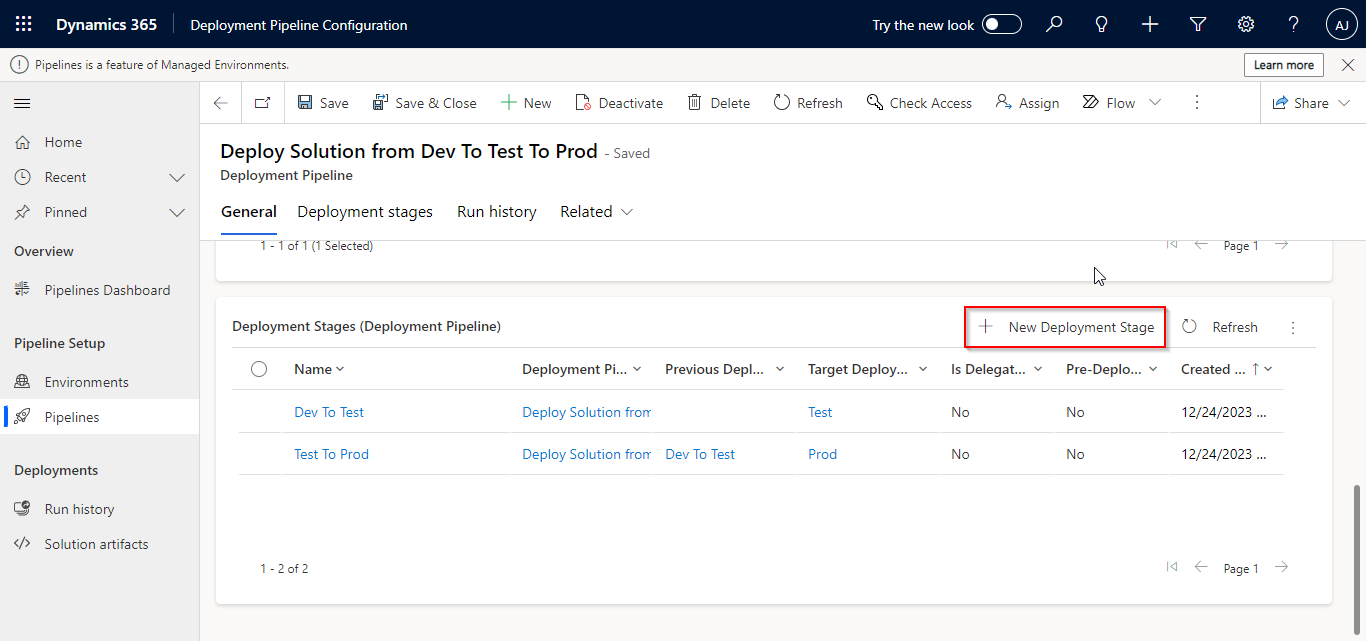
- Configure each stage with the necessary settings for solution import and deployment.
5: Test the Deployment Steps
- Steps for deploying solutions:
-
- Go to the Power Platform environment.
- Navigate to the “Solutions” area.
- Locate the solution to be deployed and click on the pipeline icon.
- Start the deployment process by selecting the appropriate pipeline.
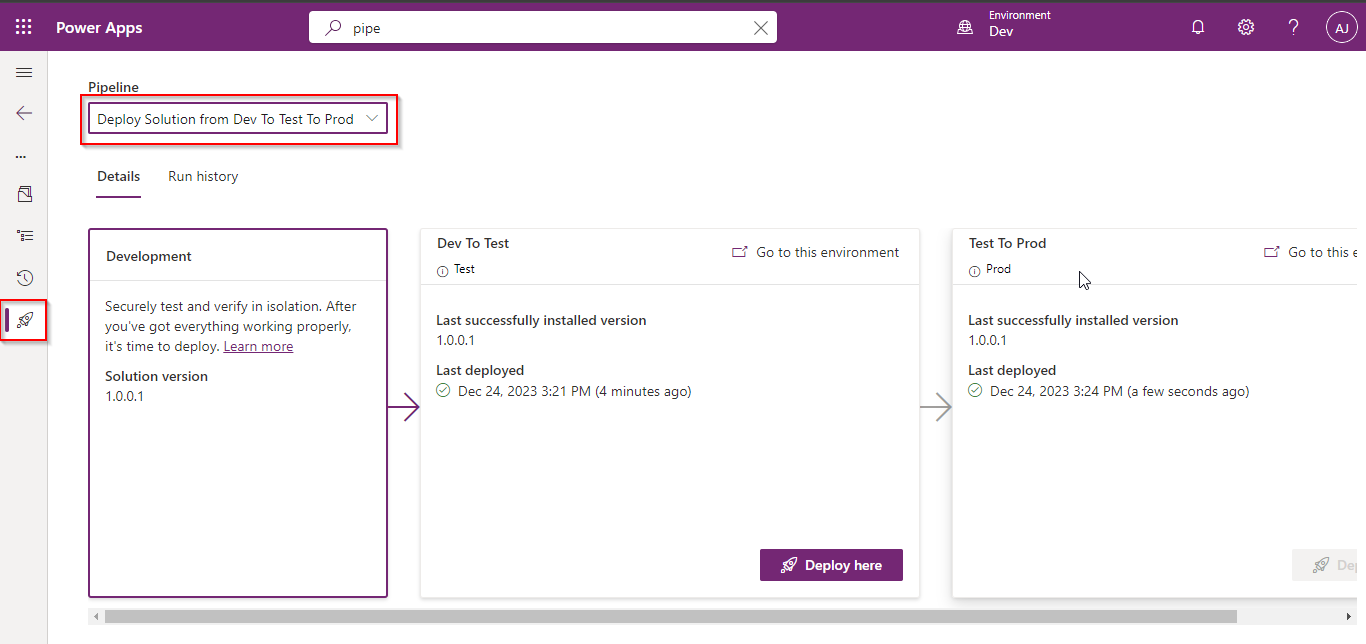
- Run the deployment steps to ensure each stage and manual deployment task executes as expected.
- Monitor the deployment logs for any errors or warnings during the manual deployment.
6: Monitor and Optimize
- Regularly monitor your deployment pipeline for successful and unsuccessful runs.
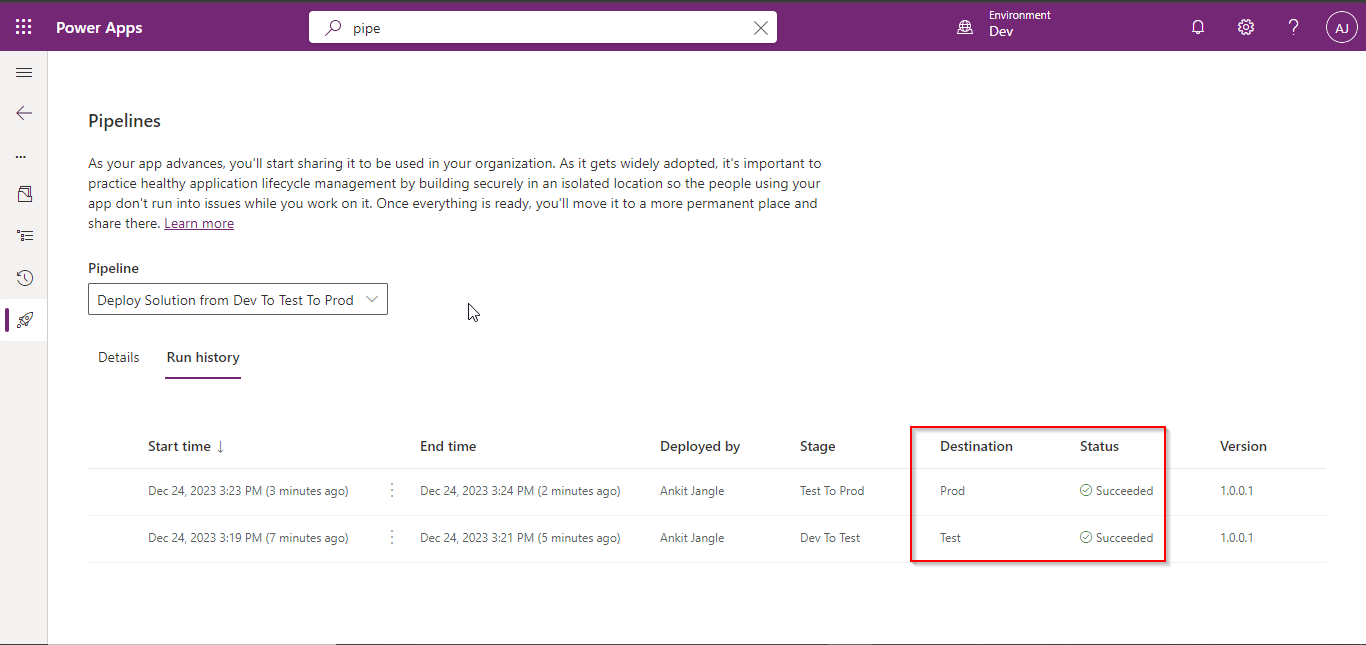
- Optimize the pipeline based on feedback and evolving deployment requirements.
Implementing manual deployment pipelines for Power Apps using the Power Apps Deployment Pipeline App streamlines the deployment process and ensures consistency across environments. By following these step-by-step instructions, you’ll establish an efficient pipeline that reduces errors and accelerates the delivery of your Power Apps solutions. Embrace the power of deployment within Power Apps and take your application deployment to the next level. Explore more about pipeline.

