As we discussed in the last blog post, Burp Suite is an all-in-one platform that is commonly used for testing web applications. One of its most powerful features is the Scanner, which automates the process of testing for vulnerabilities in web applications. In this blog, we will discuss how to use the Scanner in Burp Suite to test web applications.

Steps to use the Scanner in Burp Suite:
1. Install Burp Suite:
You can download Burp Suite from its official website and install it on your machine.
2. Configure your Browser:
In order for Burp Suite to intercept and analyze web traffic, you need to configure your browser to use it as a proxy. To do this, go to your browser’s network settings and set the proxy to “127.0.0.1” on port “8080”.
3. Launch Burp Suite:
Once you have installed Burp Suite, launch the application.
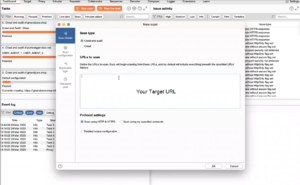
4. Configure the Target:
In Burp Suite, go to the “Target” tab and enter the URL of the web application you want to test. You can also specify any additional settings, such as cookies, headers, and authentication credentials.

Fig: Target URL in Scanner tab
5. Explore the Site:
Browse the site to identify any areas that you want to test for vulnerabilities.
6. Configure the Scanner:
In Burp Suite, go to the “Scanner” tab and click the “New Scan” button. This will bring up a dialog box where you can configure the settings for your scan.
7. Choose the Scan Type:
In the scan settings dialog, you can choose which types of vulnerabilities to test for. You can select from a list of preconfigured scan types such as SQL injection, cross-site scripting, and file inclusion.
8. Set the Scope:
You can specify the scope of the scan by choosing which pages and parameters to include or exclude.
9. Configure Advanced Settings:
You can also configure advanced settings such as rate limiting and authentication.
10. Start the Scan:
Once you have configured the settings for your scan, click the “Start Scan” button to begin the scanning process.
.
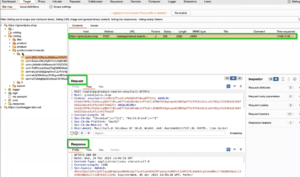
Fig: Request Captured and Responses
11. Monitor the Progress:
You can monitor the progress of the scan in the “Scanner” tab of Burp Suite. You can see how many requests have been sent, how many vulnerabilities have been found, and how much time is remaining.
12. Analyze the Results:
Once the scan is complete, you can view the results in the “Issues” tab of Burp Suite. Each vulnerability is listed with its severity level, location, and recommended remediation steps. 
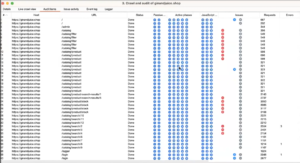
Fig: Crawler tab in BurpSuite
13. Verify the Vulnerabilities:
It’s important to verify the vulnerabilities to ensure that they are not false positives.
14. Exploit the Vulnerabilities:
Once you have verified the vulnerabilities, you can exploit them to demonstrate their impact.
15. Document the Vulnerabilities:
Share the documented vulnerabilities with the development team to fix them.
16. Export the Results:
You can export the results of your scan in various formats such as HTML, XML, and CSV. This allows you to share the results with other members of your team or with the developers responsible for the web application.

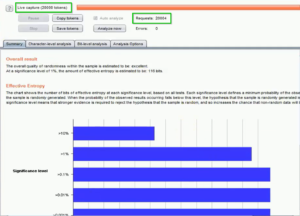
Fig: Report analysis
Conclusion
The Burp Suite Scanner is a highly effective tool for testing web applications for vulnerabilities. Configure and run scans to identify vulnerabilities, generate detailed reports, and communicate findings effectively using the Scanner’s multiple output formats. The Scanner is also a valuable tool for collaborating with team members and developers. With the Burp Suite Scanner, you can confidently test web applications and improve their security posture.


Thank you for sharing good information.