Welcome to the continuation of our multi-part series on using Content Automation in AEM as a Cloud Service to accelerate your creative operations. To gain a more comprehensive understanding, make sure to check out Part 1 of this series which gives an overview of the feature by Adobe, along with helpful use cases and Part 2 for a walkthrough of applying Lightroom filters to Assets. In this third segment, we will take a closer look at the creative operations within Adobe Photoshop, and how this process is replicated in AEM as a Cloud Service.
Creative Operations Process in Adobe Photoshop
In this example, we’re going to walk through the process of running an action script in Photoshop, crafting a processing profile in AEM as a Cloud Service, and running the same actions script on multiple images:
1) Start the process by creating and selecting the primary image from a photo shoot.
2) Configure the image export settings, including quality adjustments such as 100% quality:
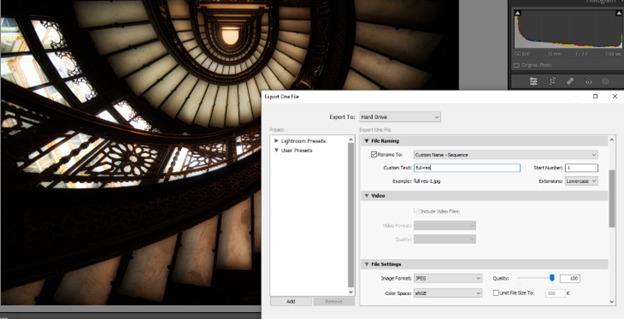
3) Make a request to have the image color-treated in each of the four quadrants of the image, using the out-of-the-box script in Photoshop.
4) In Photoshop, the treated image is created by loading the image and then executing the Quadrant Colors action:
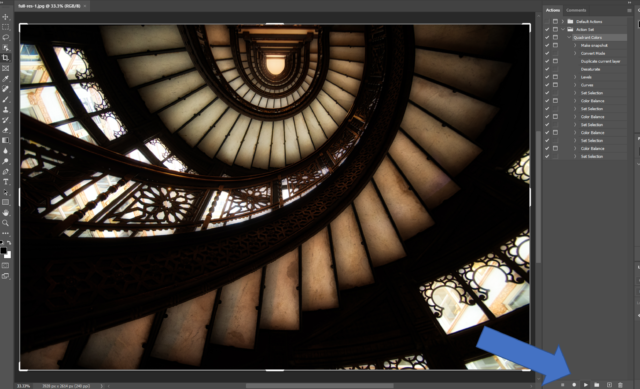
5) Once the image is treated, it can then be exported as another image with default settings and saved:
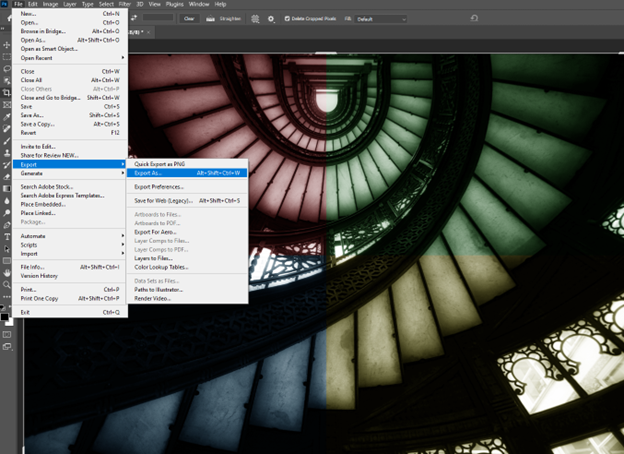
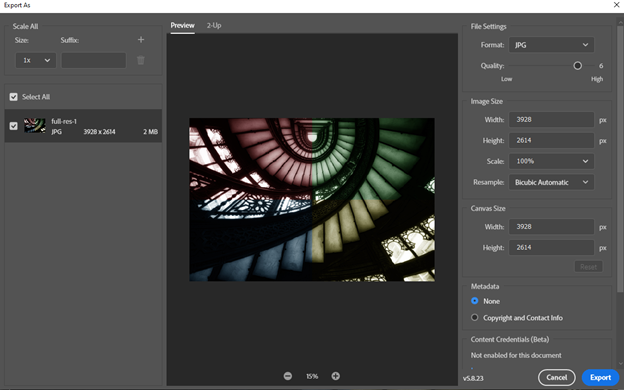
6) Both images are uploaded to AEM Assets, in their respective folders.
Content Automation and Processing in AEM
Content Automation facilitates the following setup and the processing can start taking place in AEM:
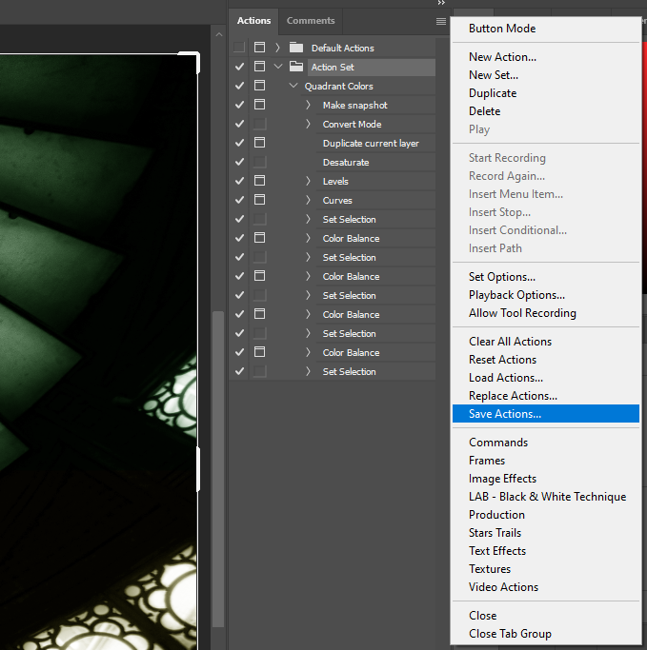
1) Save the Action script from the actions panel. Do this by selecting the Action Set folder and then selecting the Menu, then “Save Actions”. The resulting actions are saved as file with a “.atn” extension:
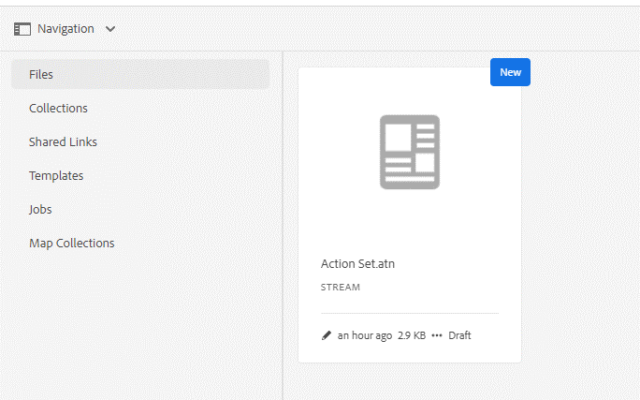
2) Upload the Action Set file to a designated folder in AEM Assets:
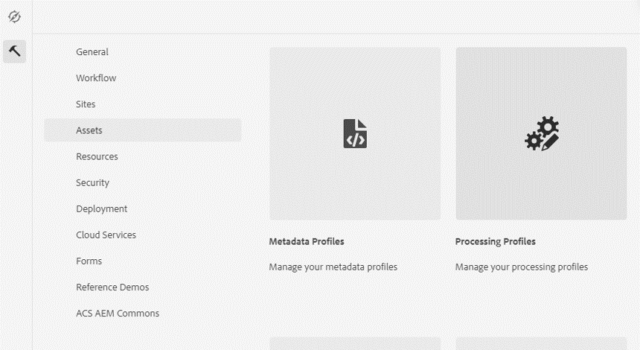
3) Create a processing profile in AEM:
a) Create a new processing profile:
b) Add a creative processing section:
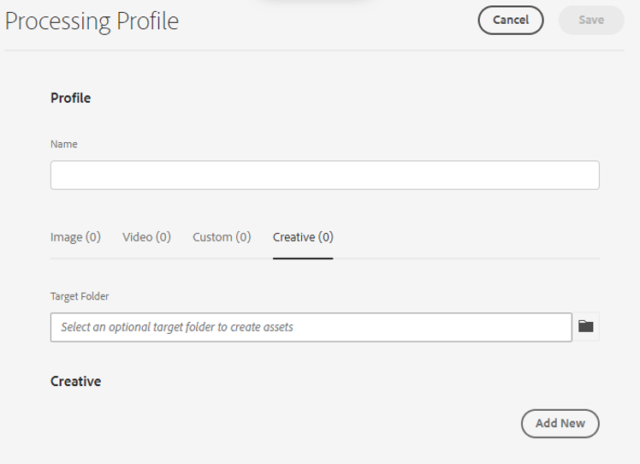
c) Select a target folder, “Apply Photoshop Action” in the Action script uploaded to AEM Assets, including a specific name of the script, or leave it blank to run all actions. Additionally set quality preferences.
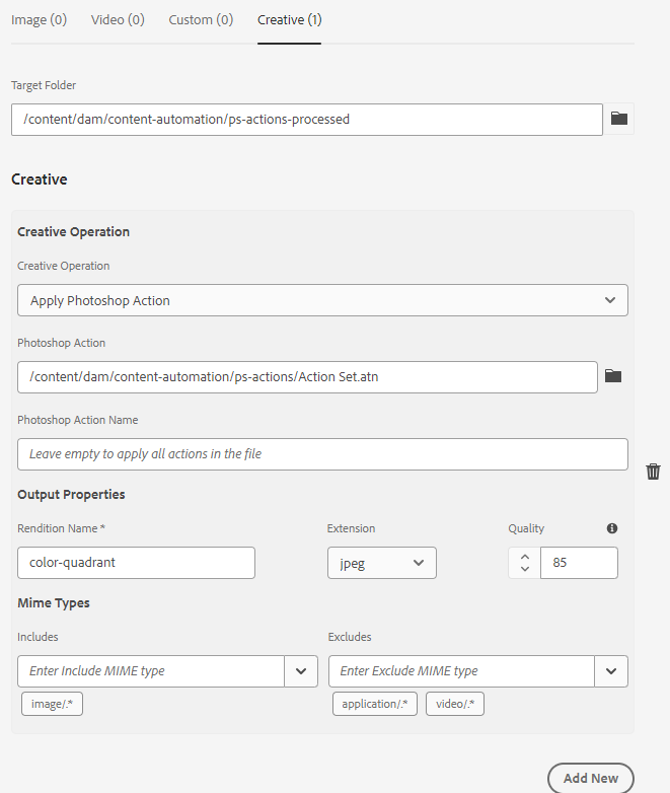
d) Save the processing profile.
e) Apply the profile to a folder so that images uploaded there will run the processing profile.
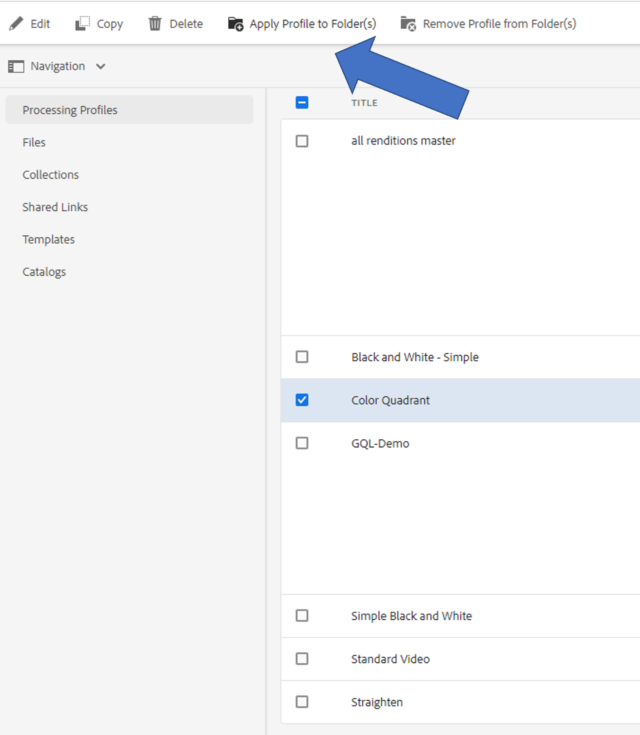
4) Once the processing profile is created, it will be executed via microservices after an image is uploaded to the assigned folder. This will create an additional rendition, and optionally create an image based on the processing profile.
5) In the Card view, the folder will show the processing profile applied:
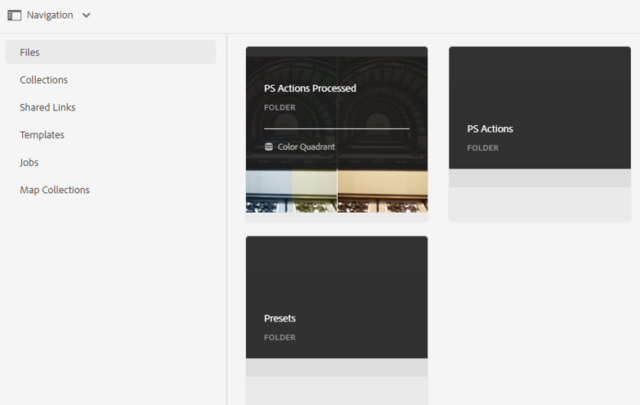
6) Upload one or more images to the folder, and note the additional images created from the processing profile, using the same action script from Photoshop.
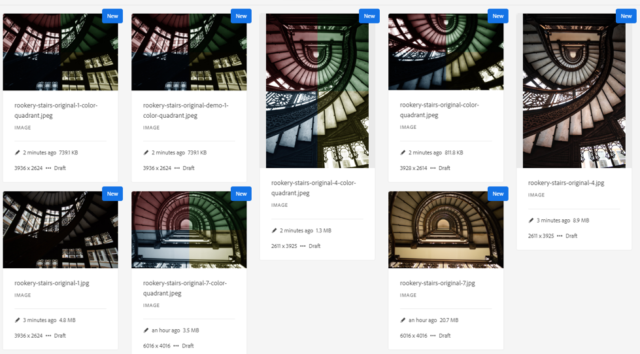
7) Also note the additional rendition that is created by the processing profile.
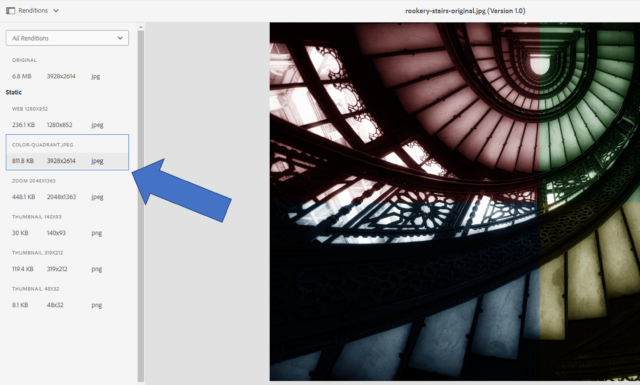
After the initial setup of processing profile, any subsequent images uploaded to the designated folder will generate the additional renditions, complete with the color quadrant action script. This demonstrates the capacity to apply Photoshop actions on Assets in AEM as a Cloud Service, without requiring the intervention of creative professionals. Not only does this save many hours of manual steps, but it also opens the door to storing multiple actions in the Cloud, executed by microservices via the processing profiles.
For reference, there are several more processing profiles available with Content Automation, detailed below:
| Creative Action | Description |
| Apply Photoshop Actions | Actions in Photoshop can be saved, similar to a script, and applied to one or more PSD files |
| Image Cutout | AI can be used to remove parts of the image such as backgrounds |
| Image Mask | Masking can apply settings to parts of an image, such as blurring the background, or brightening the subject |
| Replace Photoshop Smart Object | A smart object can be replaced within a PSD file while retaining effects and adjustments |
| Apply Lightroom Preset | As in the example above, one or more filter presets in Lightroom can be applied to an image, in addition to 50 default presets |
| Auto Straighten | AI can be used to auto-straighten an image, such as level horizons or vertical buildings |
| Auto Tone | AI can be used to analyze the image and make a number of light and color adjustments |
Wrap-Up and Further Reading
In addition to Content Automation, Adobe has several solutions for integrating AEM as a Cloud Service Assets and Creative Cloud applications. See their best practices documentation to explore some of the use cases.
The integration of AEM and Creative Cloud applications offers a multitude of possibilities for efficiency gains. Marketing teams can quickly develop web-focused assets, apply batch color treatments such as demonstrated in this example, and even incorporate logos or remove backgrounds. The potential for additional executed actions is limitless.
We hope this has given a great walkthrough on how to work with Content Automation in AEM as a Cloud Service. Thank you for reading!
