
Functionize is the only browser-driven automation tool that will help to create a test script by using record and play option. It will help to perform function, visual, and end to end cross browser testing. It’s a cloud-based test automation solution that brings together all major areas of testing into a single platform.
Advantages:
- It is a Record and play tool.
- It is easy to work and understand for manual testers also.
- It is easy to execute test cases in different browsers.
- It will help to take a full visual check.
- No software is required to work on it, it’s a SaaS-based solution.
- It is very easy to use and create an automation script.
- It is an AI test automation with machine learning.
Functionize Tool as a User
- Download Functionize Architecture > Run the inside browser.
- Sign up and install a browser plugin (ex. chrome plugin)
Test scripts will be created and saved under Test Cases and Page Objects.
Login into the Functionize account with credentials (URL: https://app.functionize.com/account/login)
Test Creation Steps:
- Creating a new project > Select Add New Project tab to create a new project.
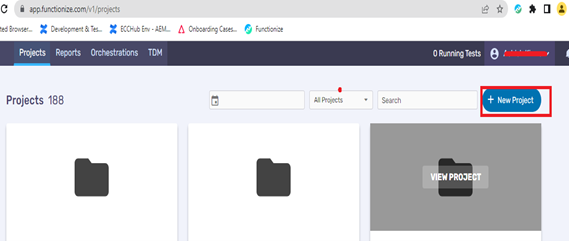
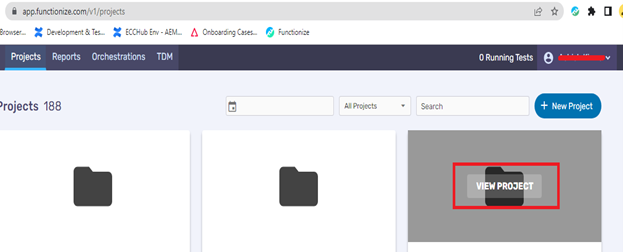
- Select the project and then select View Project.
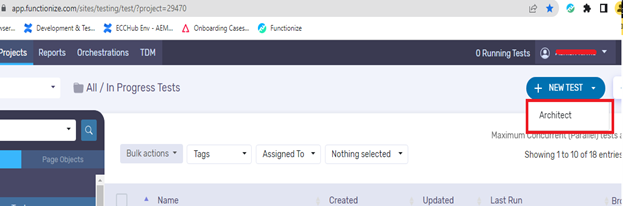
3. Creating a new test under the project in the Functionize – Go to NEW TEST on the top right corner and use the dropdown and select Architect to create a new test.
4. On clicking on the Architect dropdown selection, the ‘Create New Test’ pop-up will open, Enter the AEM URL that is intended to be tested (Author/Publish) and select the 2 checkboxes below and select Start.
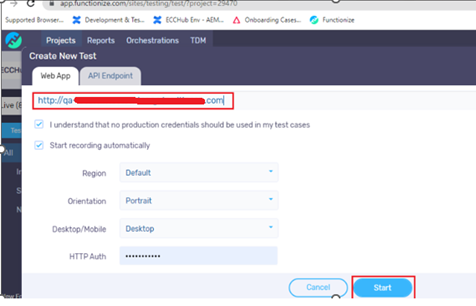
5. This launches Architect from inside the browser. Once started with creating the test, Functionize goes to the AEM page and starts recording as per our testing.
- How to verify the component in publish URL?
Select Flag and click on the Component to Verify.
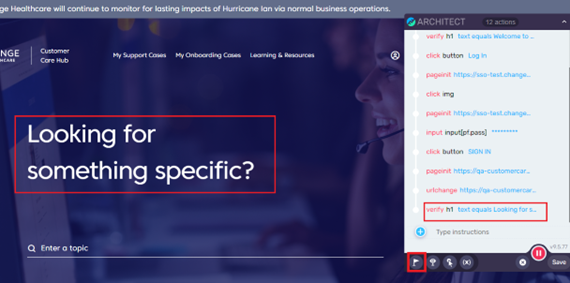
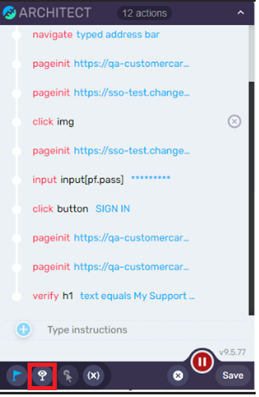
- Select Visual check to verify the image and logos.
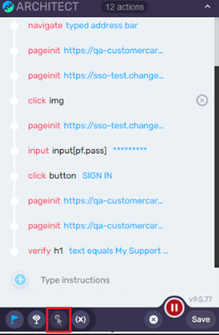
- Select the Icon to verify mouse hover functionality.
- Perform record and play and the test is done and recorded, Save the test using the Save button on Architect > Click on Continue After adding the Test case name.
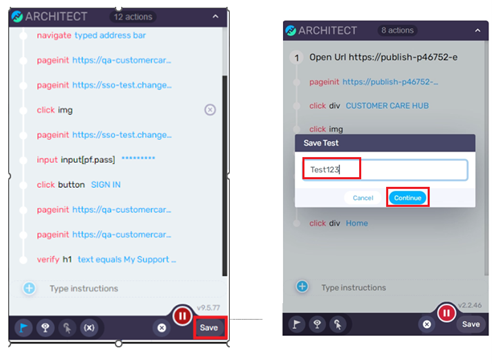
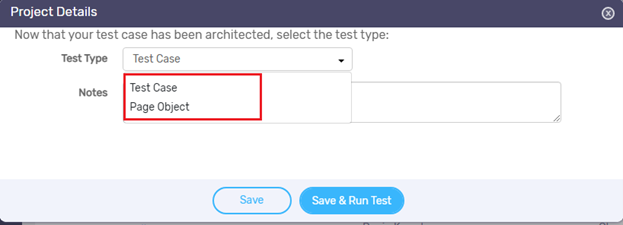
- Once Saved, the user will be asked to save it as Test Case or Page Object, select the option as needed and Save & Run the Test.

Test Case Execution
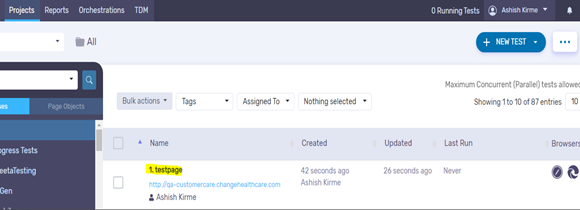
- Once the recorded test is saved, select the test from the list on the Project main page.
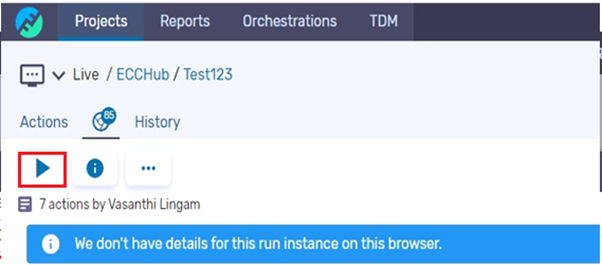
- It will navigate to below test page and select the play button – Live Execution to run the test.
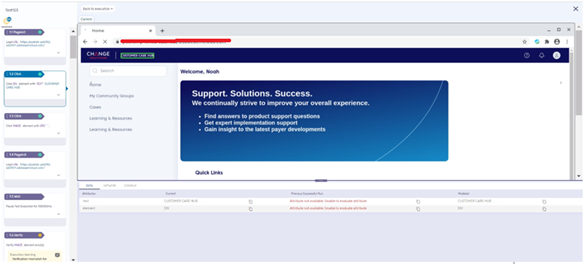
- Once the test is completed, Step actions that are passed will display in a green dot and failed steps will have a red dot and a yellow dot representing as warning.
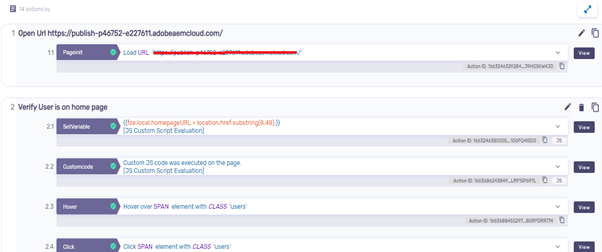
- View button on the right of each step will take you to the screenshot and details of that step action which will determine the action details and list any issues.
Test Reports
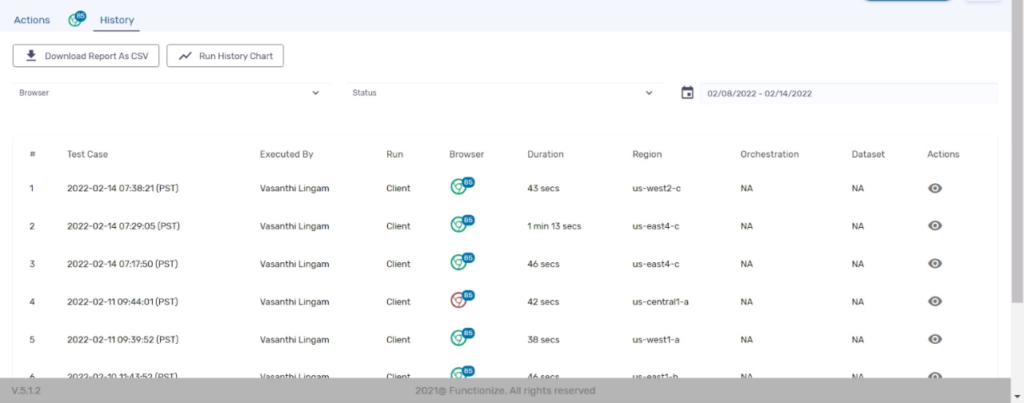
- Test Run history and status can be obtained from the History tab of each test.
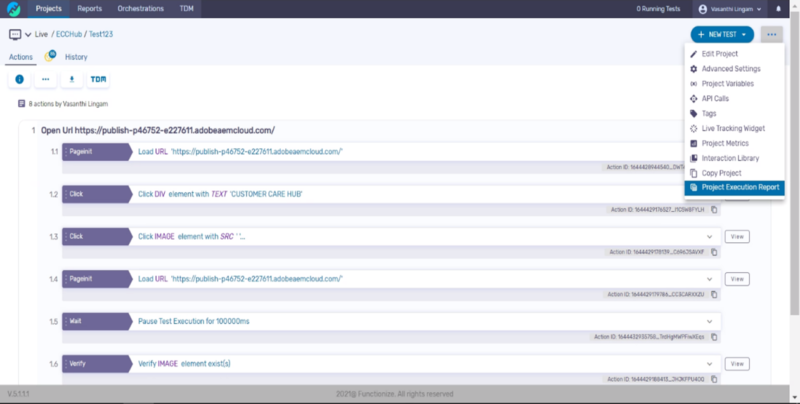
- One can pull the project execution report by clicking on the 3 dots on the far right and selecting from the dropdown.
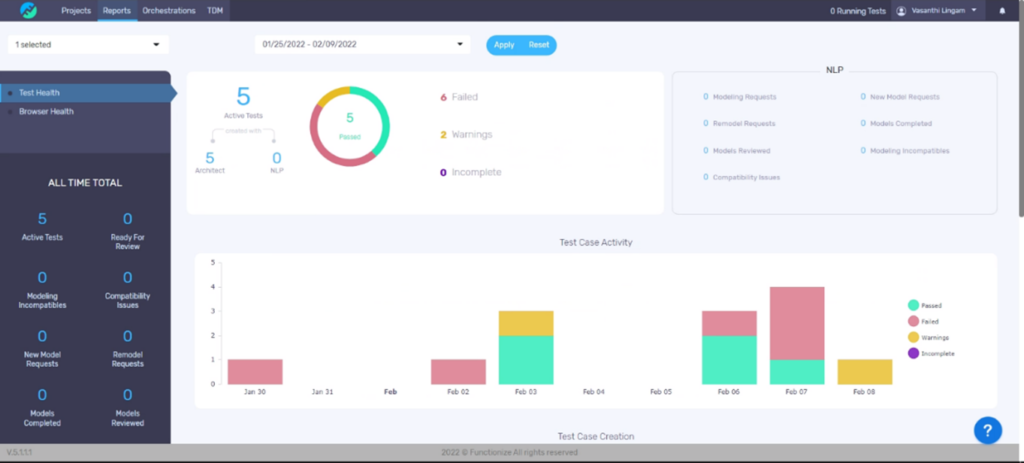
- And the overall project report can be pulled by selecting the Reports tab and selecting the project name as below.
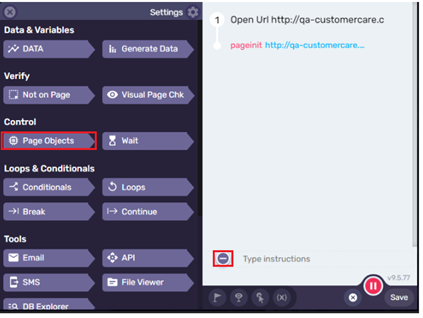
How to use Page Object in Test case:
- Follow Test Creation Steps 1 to 4
-
Click on the icon before the instruction > Click on the Page object from the setting section.
- Click on the select page object text area and select the common function which you want to add.
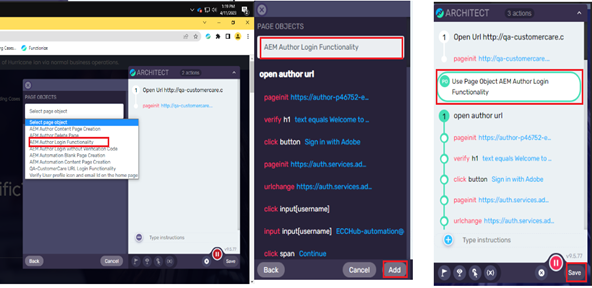
- Click on Add button, it will automatically add in the script area and then finish all test script creation and save.
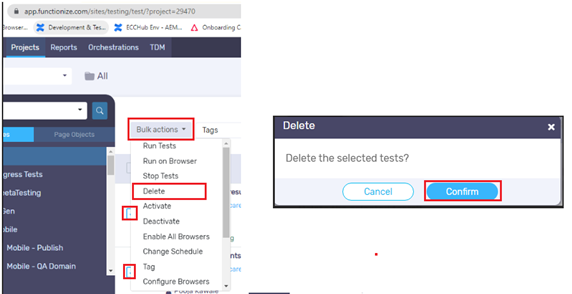
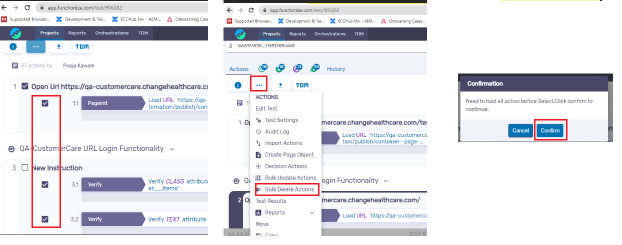
Test Case Deletion:
- Select the test case using the checkbox > Click on Bulk action dropdown > Click on Delete Option > Click on confirm button to delete test cases (User can delete multiple test cases by selecting checkbox).
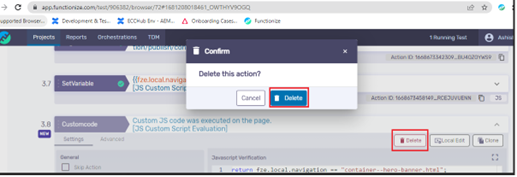
Script Steps Deletion:
- Navigate to test script steps > Expand steps which want to delete.
-
Click on the Delete button > then click on the Delete confirmation.
Delete Multiple Steps:
- Navigate to test script steps > Select steps which want to delete.
-
Click on Action dropdown (…) > Click on Bulk Delete Action.
-
Click on Confirm button from the popup.
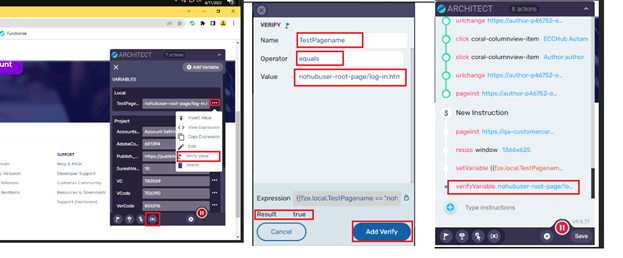
How to create a variable with value:
1. Set Variable:
-
- Click on the Variable icon > Click on Add variable.
- Add Scope (Local/Project) > Add Variable name > Select Type
- Select Operator > Add start and end point if substring selected (Value will display in Result section).
- Click on the Save button > Set variable display in the script section.

2. Add Assertion steps.
-
- Click on the Variable icon > Click on … icon from the right side or test page > Select Verify value.
- Add Name, Operator, and Value > Click Add Verify.
- Verification step will add in the script.
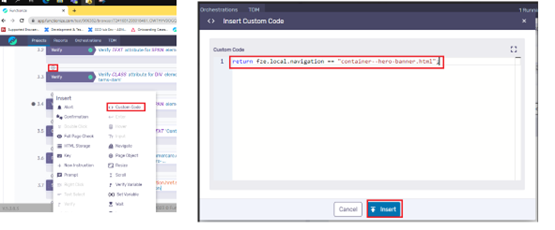
How to Add Custom Code:
- Follow Test Case Execution Step 1.
-
Click on the + icon > Click on the Custom code option > add custom script > click Insert button (Custom code will add into the steps).
Other Important Notes:
- Screenshots are taken automatically by the tool at every executed step and are saved for viewing.
- Page Objects by itself cannot be run, they need to be inserted as part of the Test case to be executed.
- Page Object script steps cannot be deleted from the test script.
- Multiple tests can be run at one go by selecting all the tests and clicking on Bulk actions ->Run Tests.
- To watch the live test execution step by step in progress, the user may select Watch Now at the time of running the test; this will mostly be useful for debugging purposes.
- One can perform live editing using ‘Local Edit’ which is in each step option that will allow to add/edit more step actions to the test. Another way is to use (+) button between the step actions to add/edit.
Test Data Notes:
- Test data can be included at the step level or by using the TDM tab.
- Functionize provides many ways to add Actions to your Test Cases. Insert Actions directly from the Test Detail page or Slider View. You can also use Local Edit and Live Debug to make test alterations.
- A test case can be executed in a variety of ways: By default, a test case is run in the background where you are unable to view the live interaction with the browser. Live Execution allows you to see how the test is interacting with the browser while it is running on the VM. Live Debug allows you to interact with the test while it is running. During a Live Debug execution, you can pause the test, set breakpoints (to run the test to a certain step), and make edits to the test.
- Add in the Notes section regarding which story is this test written for, as this info will help link the test with the user story.
- Also, we can add notes later after we save the test by clicking on 3 dots and going to Test settings as seen in the picture.
Test Settings:

- Please make sure to add Instructions in the Test to describe the use cases/split of the use cases being tested.
Nicely explained step by step, easy to understand the process.
Thanks Sachit…!