I work on multiple projects at the same time. In my daily workflow, I switch between projects throughout the day. It is important for me to keep my projects separate for security reasons. To accomplish this, I have a separate virtual machine for each client. I am able to stay logged in to required systems, install different versions of software, keep client specific information separate from other clients, and run a local development environment for each client. When I complete a client project, I simply delete the virtual machine. I know that all the logins and data for that client are fully deleted. I know that the client data did not leak into or mix with another client’s data.
Recently, more of my projects have switched to using Docker for local development. With my current workflow, each client VM running Docker needs to pull down all the layers and images required to run the containers. This takes up a massive amount of hard drive space on my host machine and defeats the purpose of Docker’s ability to reuse layers. There has to be a better way! Let’s create a new virtual drive that we can share between virtual machines and tell docker to store its data in the shared drive.
Create a Shared Virtual Drive
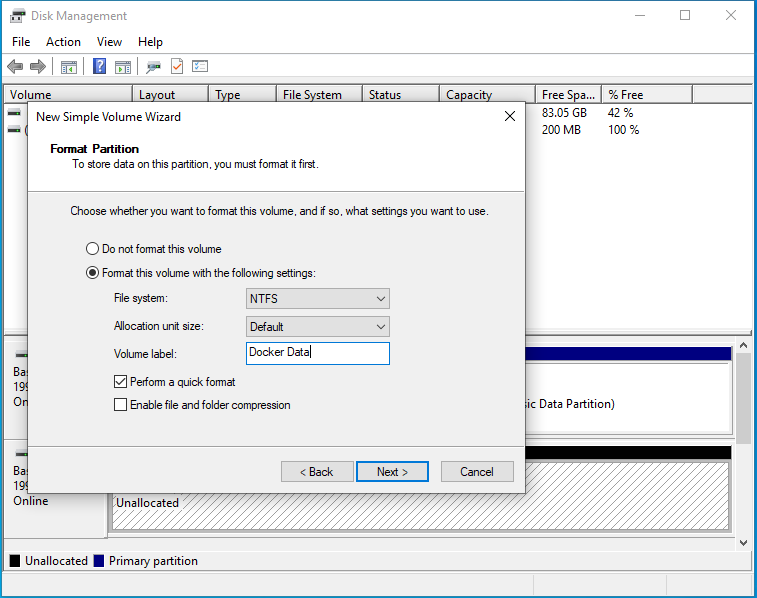
I made sure all of my virtual machines were shut down and stopped. I created a new virtual disk with maximum size of 300GB. I like to store my vm disks as one file that expand as needed. Attach the virtual disk to VM as a second hard drive. The first time you run the vm, you will need to initialize the new virtual disk so the guest operating system can see and use the disk.

Before You Change Your Data Root
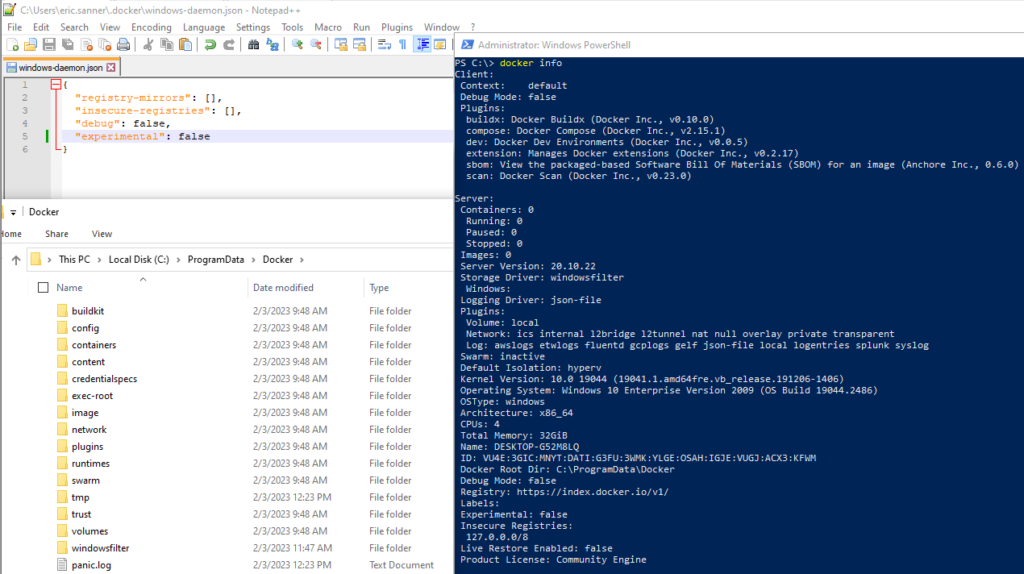
Unfortunately, docker won’t automatically move its current data to the new location on the shared drive. We want to reclaim all the space on our C drive before we make the switch. Make sure to stop all containers. Then do a “docker system prune” to remove all the images. I had to do this a couple of times to actually delete all the images. I validated this by ensuring the C:\ProgramData\Docker\windowsfilter folder was empty and windows reported more free space in windows explorer.
Changing Your Data Root
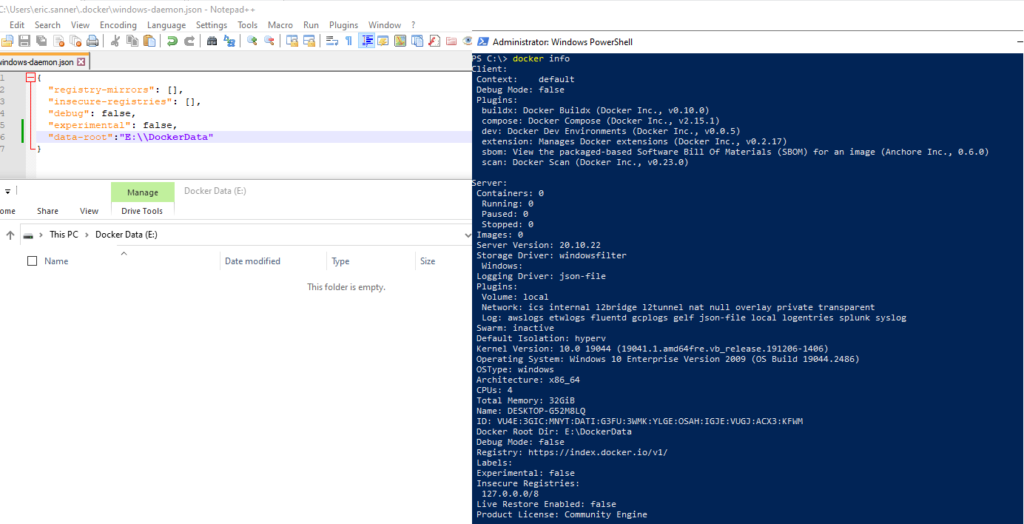
By default, Docker stores its data in C:\ProgramData\Docker. You can change this directory by modifying the Docker daemon config files The config files are located at C:\Users\<your_user_folder>.docker. For linux containers, modify the daemon.json file. For windows containers modify the windows_daemon.json file. Simply stop docker, add a new key value pair “data-root” that points to the new desired location, restart docker.
Beware!!
When changing your data root, there are several things to keep in mind:
- Be sure to add escape the back slashes in the data root path with a backslash
- “E:\DockerData” should be entered as “E:\\DockerData”
- Do not set the data root to the root of the drive (ie E:\)
- Docker takes control of the folder specified as the data root
- You will not be able to browse the drive via windows explorer
- Do not create the last folder in the path used in your data root path (ie E:\DockerData)
- E:\ should be available
- E:\DockerData should not exist
- Docker will create the DockerData folder
- Before downloading new images, ensure docker can find the path correctly
- Run the command “docker info”
- Look for the “Docker Root Dir” entry and confirm it matches what you entered in the config file
- If it is not configured correctly, you will get a message “The system cannot find the file specified”
- You will have to redownload your images

Using Your Shared Virtual Drive
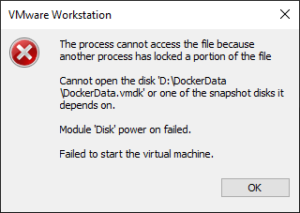
At this point you can attach the new virtual disk to any number of virtual machines. But shared drive can only be used by one virtual machine at a time. If you try to power on a second vm using the shared disk, you will get an error.
This isn’t a problem in my case. I only have enough ram to run one VM that uses docker at a time. But it does save space within each VM since they can reuse the shared images. It also saves time by only having to download the shared layers once.
Reclaim Your Space
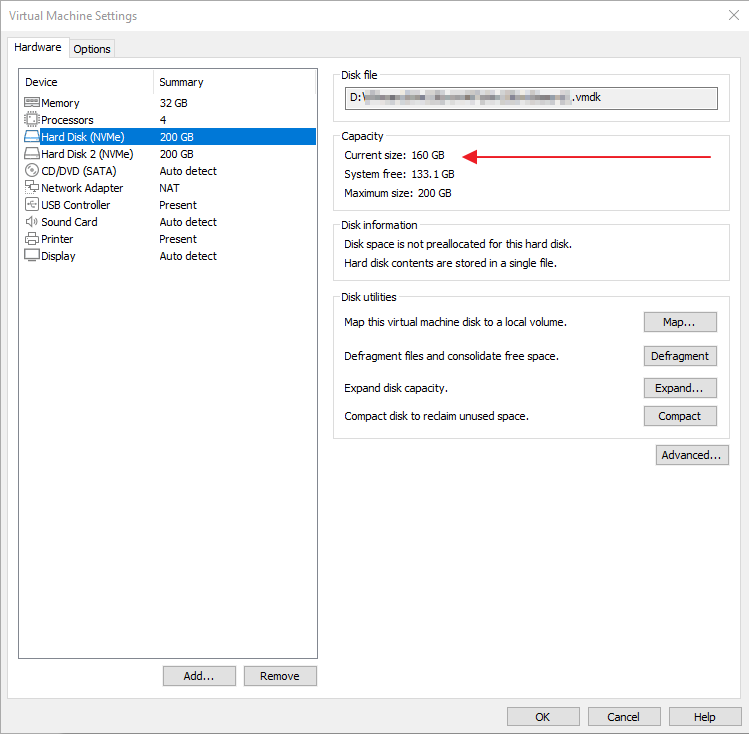
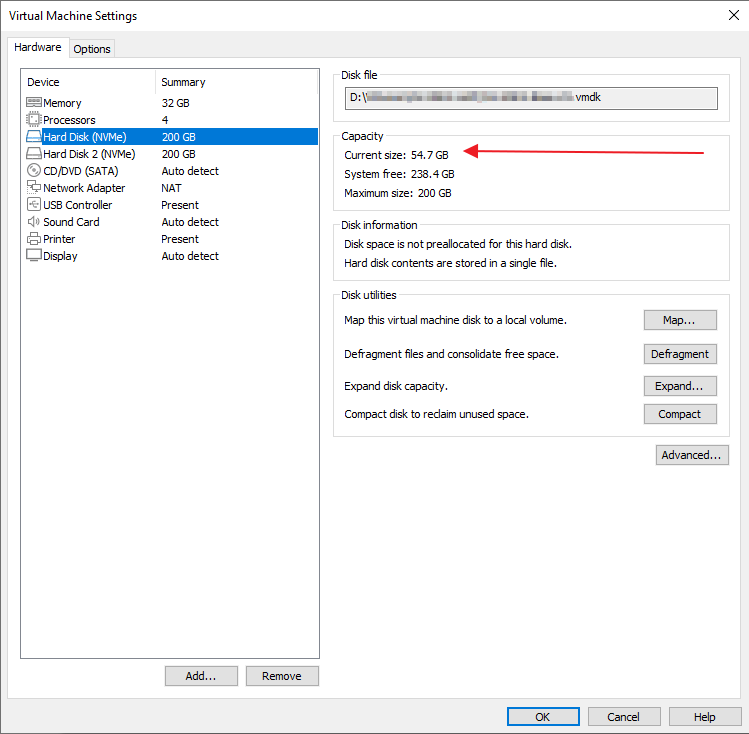
Now that you have freed up space on the C drive of your guest vm, it’s time to reclaim the space on your host machine. Use the tools in your vm software to compact disk space.
Final Thoughts
This technique saved me a ton of space within my guest vms. I did have to redownload my images, which did take some time. But now, I am able to reuse those images within multiple client vms and save time in the future. Since we are using a shared drive, each vm can see all the images and containers. I do not see this as a security risk since all of my work is for local development. You may not want to do this in a production environment. It is interesting that I can start a container in one vm, power down that vm, turn on another vm, and restart the same container. Though, in practice I won’t actually be doing that. It is also worth noting that each vm can be running a different version of docker. By design, images and layers are not dependent on the version of docker.
If you want to know more about docker, check out my series Docker Bootcamp.


