Data Functions in TIBCO Spotfire
Data Functions in TIBCO Spotfire allow people to create scripts based on their custom logic for transforming data, adding features to a visualization, establishing connections to the database, and so on. It maps the input to the output, specifying what field/value to use and which variable to assign it to. They are calculations based on S-PLUS, open-source R, SAS®, MATLAB® scripts*, R, or python scripts.
In this blog, I will be providing detailed steps on the following:
- How to install the libraries that are required for the data function.
- Registering the data functions.
- Data Function – Use Case
Installing the Libraries Required for the Data Function:
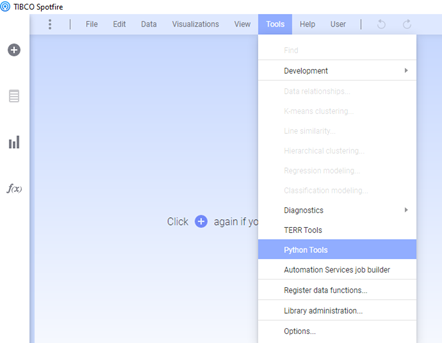
In TIBCO Spotfire, open Python tools from the Tools menu.
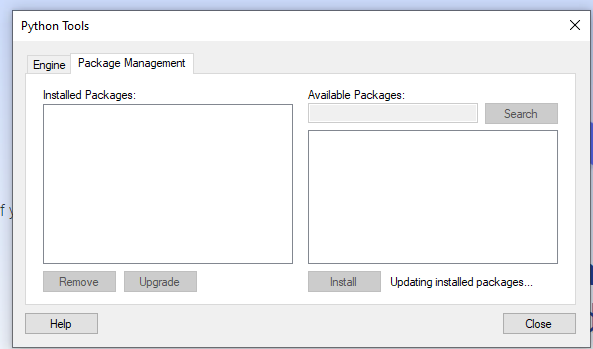
The dialogue box shown below will appear. You can enter the packages you need to install here. The search results will appear in the box below, which you can install by clicking the Install button. We can install all the necessary packages and libraries in this manner.
Registering Data Function:
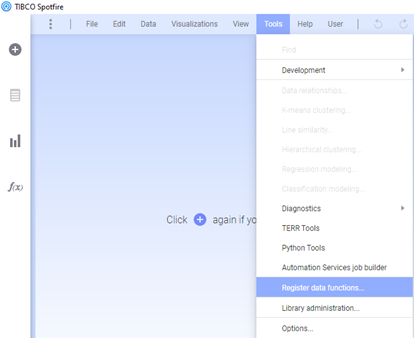
We can register a Data function by navigating to the Register Data function option under the Tools menu, as shown below:
Once we click on it, the below dialog box will appear.
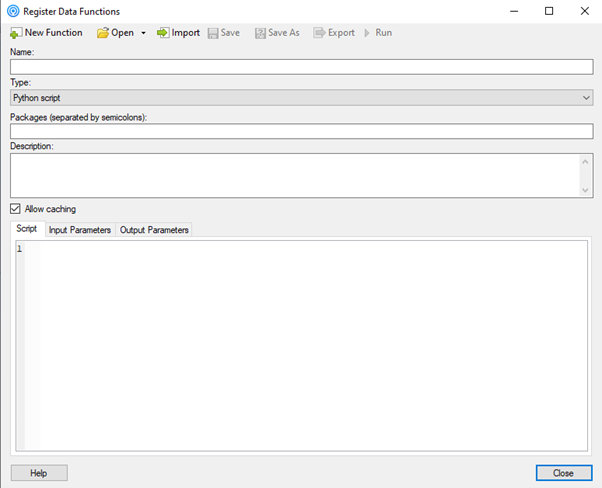
Name – Enter the name of the Data function.
Type – The script language that you wish to use. In our case, we will be using Python.
Packages – Mention the packages you will use in the script separated by semicolon.
Description – You can mention the description of the Data function if required.
Script – Enter your Script here.
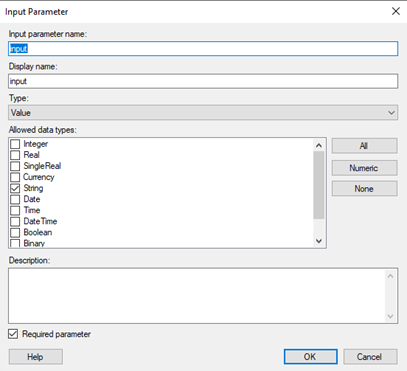
Input parameters – After clicking Add in the input parameters section, the dialogue box shown below will open, where you may enter the input values and the data types you plan to input into the program.
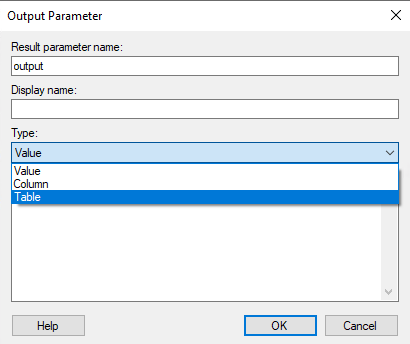
Output parameters – When we click Add in the output parameters area, the dialogue box below will display. Here, we can initialize the output and specify whether the output will be a value, table, or column.
Once you have filled out all the fields, click Run to start the implementation. The dialogue box below will then appear.
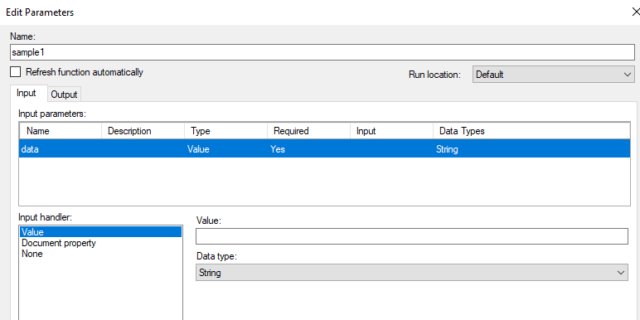
Here there are two different methods in which you can feed in your input in the input tab.
- Value – Used to specify the value of the input directly.
- Document Property – Document properties can be used when you require the value of the input to be applicable throughout the document.
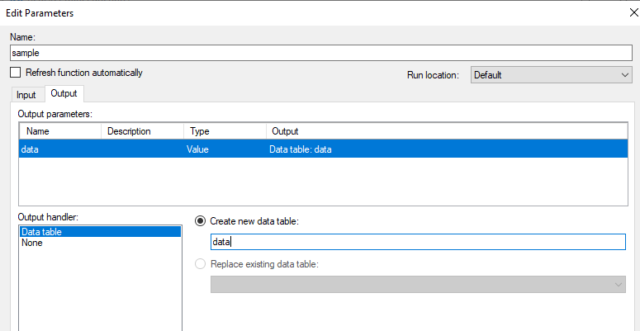
On the Output tab, you can mention the name of the data table as per your preference.
Data Function Use Case
I have used the FIFA 2022 Dataset to demonstrate the use case here.
In the use case, I have created a data function – to import libraries (Pandas, NumPy), retrieve data from a CSV file, execute data cleaning and manipulation tasks like removing null values, creating new columns, and assigning the values to it based on predefined criteria, and creating calculated columns.
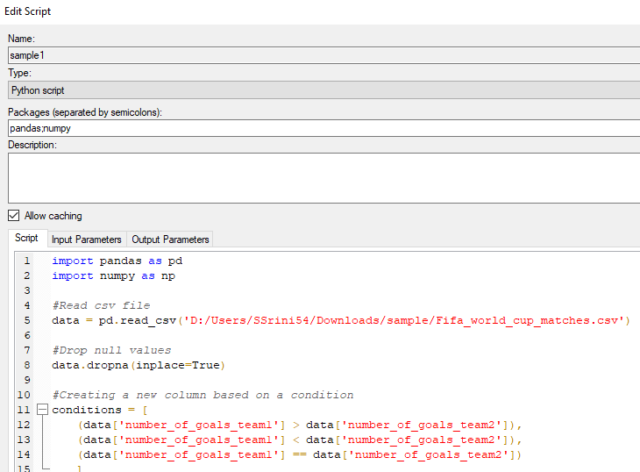
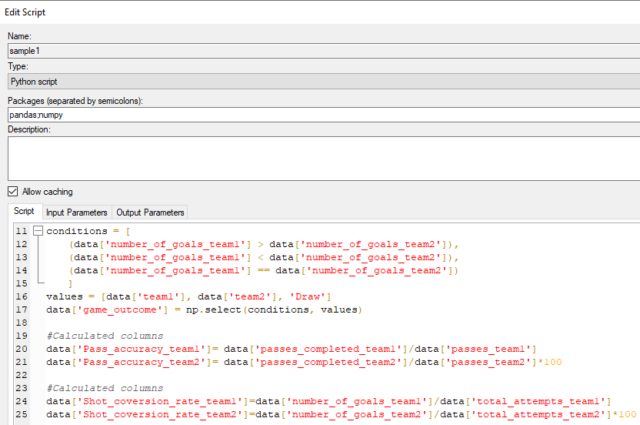
In this instance, I have not used an input parameter, but you are free to create one if you want to mention something that needs user input.
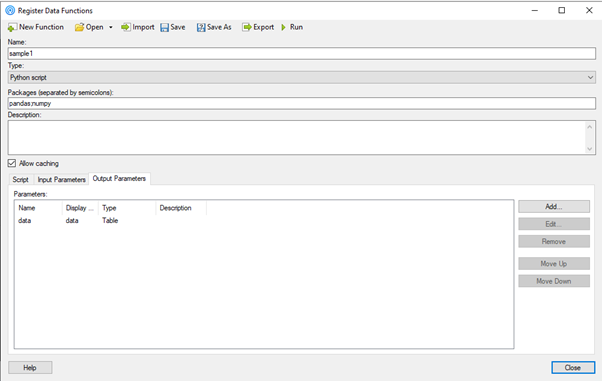
Additionally, I have defined one output parameter (as shown below) and specified the type as “Table” to return the data as a table.
After utilizing the existing data manipulation techniques, I retrieved the result set by executing the above code.
The Data is currently ready for visualization!
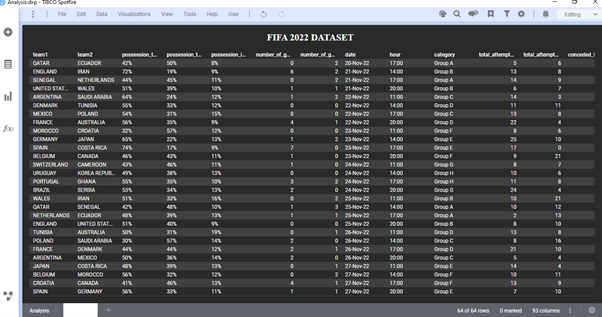
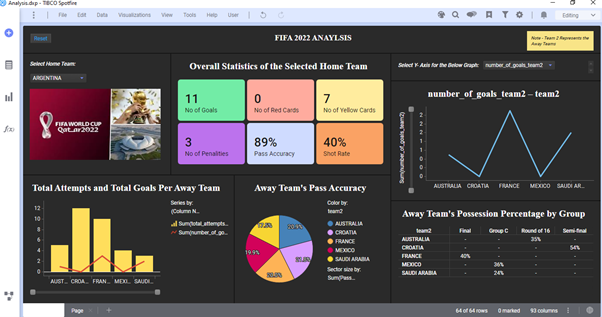
This is how we can feed data into a data function and transform it to meet our requirements.
Thanks for reading!

