Denodo Virtual DataPort tool can import data coming from different systems and with different structures or formats. To Retrieve Data from the source, views are created in Denodo.
I will be using an Oracle 11g data source to fetch the data here and Denodo Web Design studio to create views.
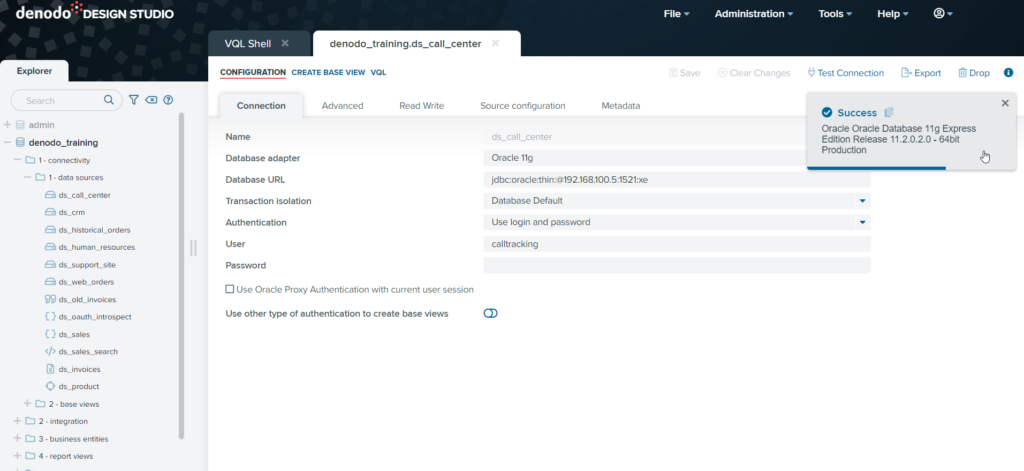
To Connect Data Source
“To know more about connecting different data sources with Denodo click here.”
So basically, There are two types of views available in Denodo.
- Base View
- Derived View
- Base View
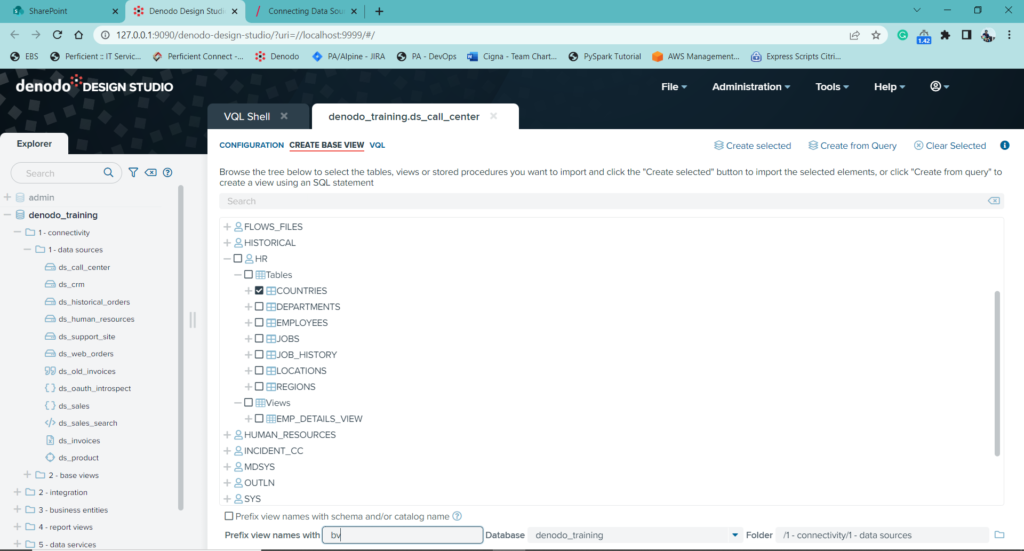
To Create a base view, we will be selecting “create base view” in the data source. A list of all the Databases and Tables will appear on the screen.
- We must select tables we want in our view.
- We can also add a prefix in your view name like in Denodo standard prefix for a base view is ‘bv’.
- Select the Database in which you are working in Denodo and select the path where you want to store your base view and then click on “create selected”.
Execution of Base view
- To execute the base view, we need to click on the “Execute Panel” option present at the top of our base view.
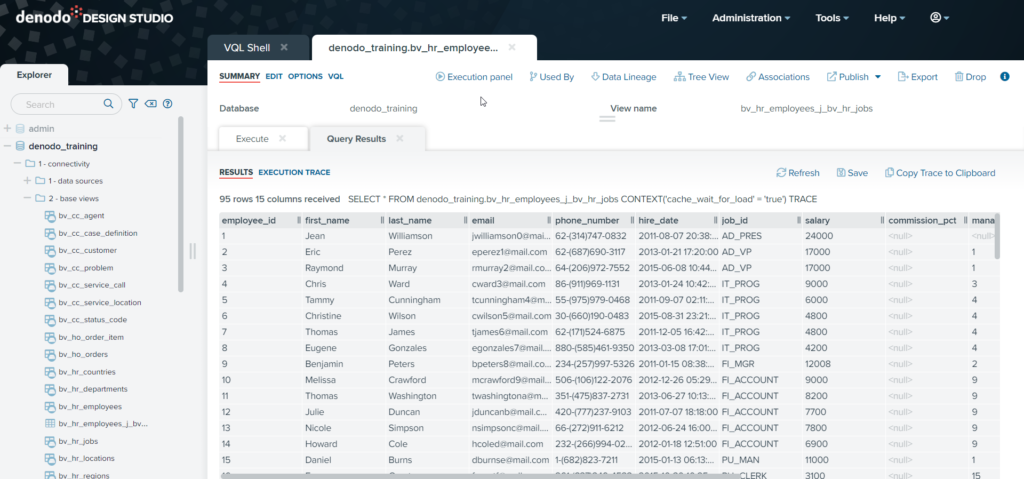
- An execute panel with a select query will appear. Click on Execute to retrieve view data from the data source.
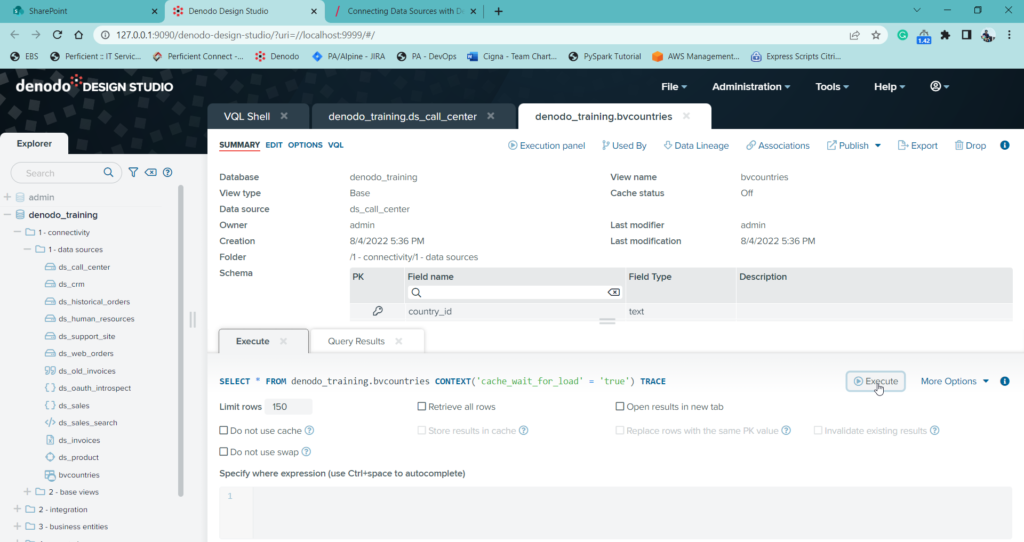
After execution, two tabs will appear “Result” and “Execution Trace”.
- Data related to the view will be displayed in the Results tab.
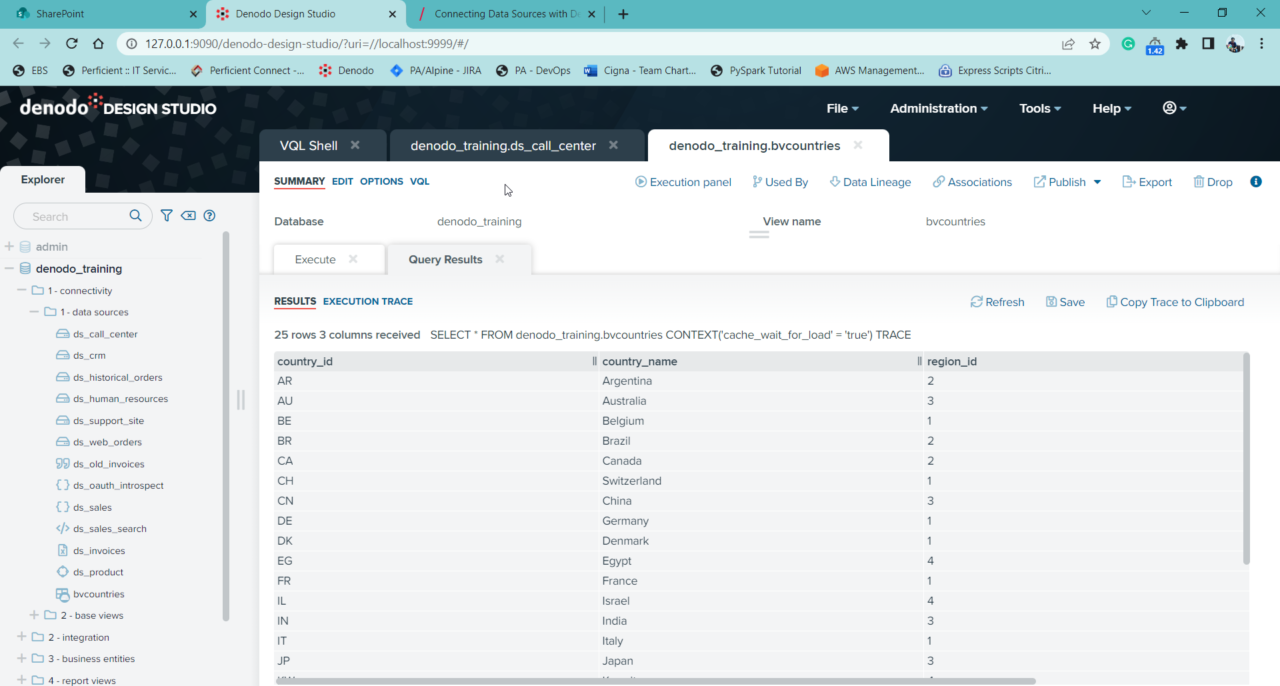
- Details of data coming from the data source, and in which view it is displayed will appear in Execution Trace.
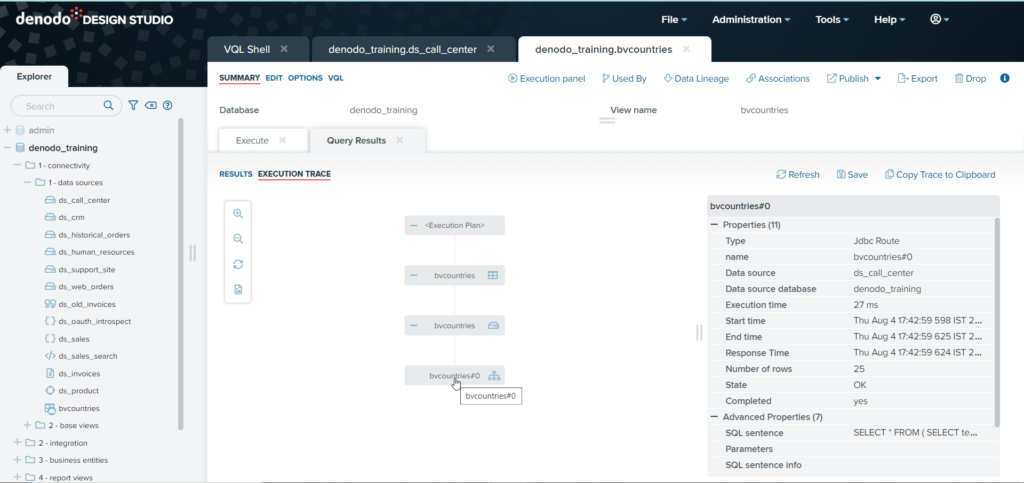
-
Derived Views
The creation of derived views is based on relational algebra and involves the most common operations:
- Selection and Projection
- Union and Extended Union
- Minus and Intersection
- Join
- Aggregation
- Flatten
The creation of a derived view for an operation is almost identical for every operation, and we will do the same for the join operation.
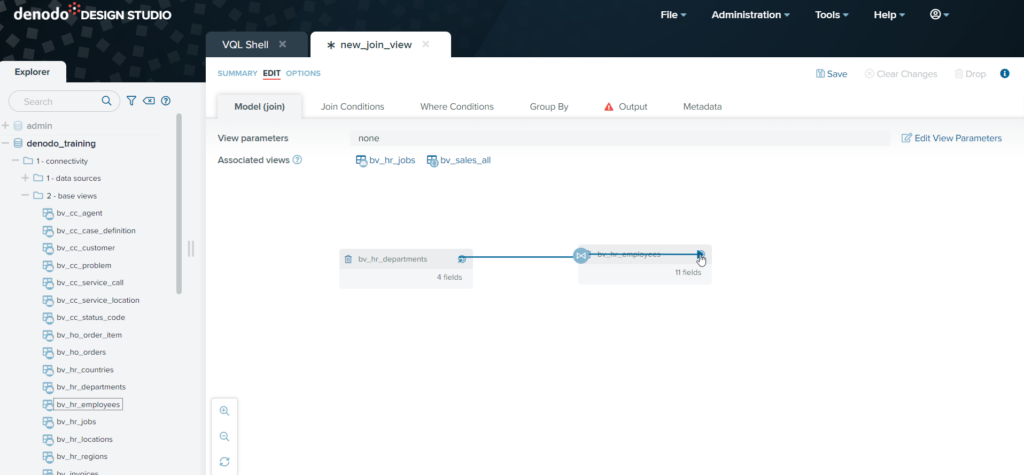
In order to create a Join-derived view, we will use two base views.
- Click on File -> New -> Join
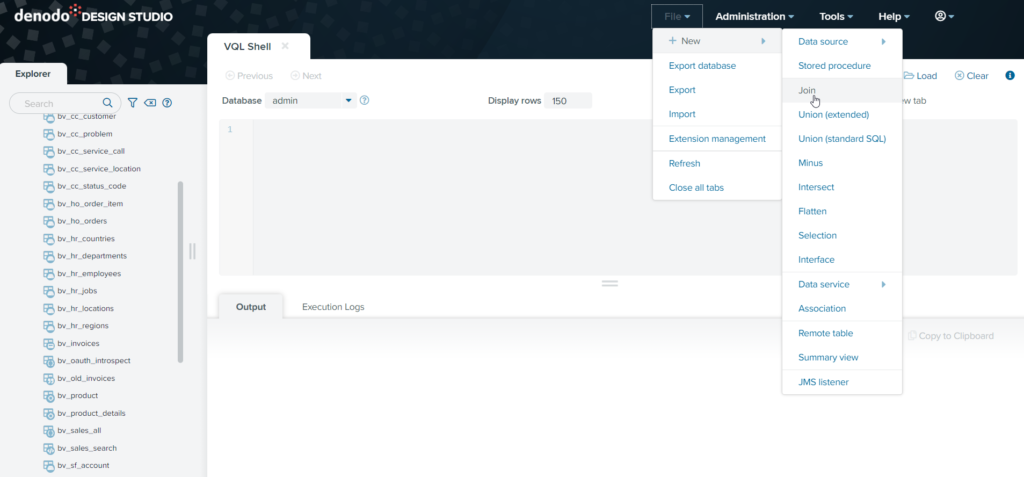
- As shown in the figure below, drag both Base views to the middle of the screen and connect them.
- Connect Id’s and create a join condition for the derived view.
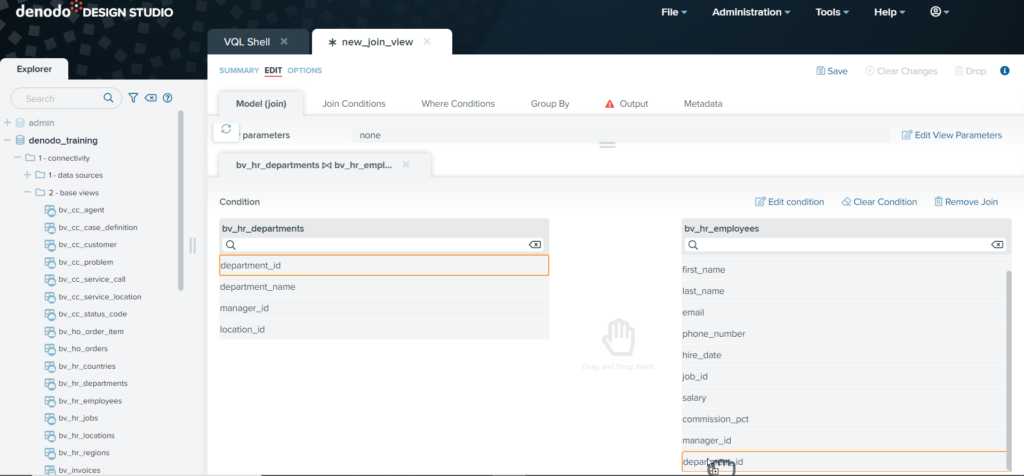
If you use clauses such as Where and Group By, you can also add conditions.
Save and Execute view just like the base view to see the results.
“For more details about Views in Denodo click here.”

