It is a common practice in most of the organizations that a departmental manager should have access to all accounts under his/her own department but only certain accounts in other departments. With the regular metadata security this manager will have access to all accounts under all departments. Oracle recently introduced cell-level security in PBCS & EPBCS. This feature enables the administrators to deny access to groups or users to specific cells that a group or user would normally have access through their regular security. In this blog I will explain how cell level security can be used to fulfill this functionality.
The user in the subject has access to both the finance and workforce cubes for all the entities under US i.e. Sales US, Marketing US, Financials US, Operations US, Manufacturing US & IT US. We will discuss how this user can be restricted access to Manufacturing US in Workforce cube below.
Smart View retrieval from the Finance Cube before applying the cell-level security

Smart View retrieval from the Workforce Cube before applying the cell-level security

Below are the steps to apply the cell level security.
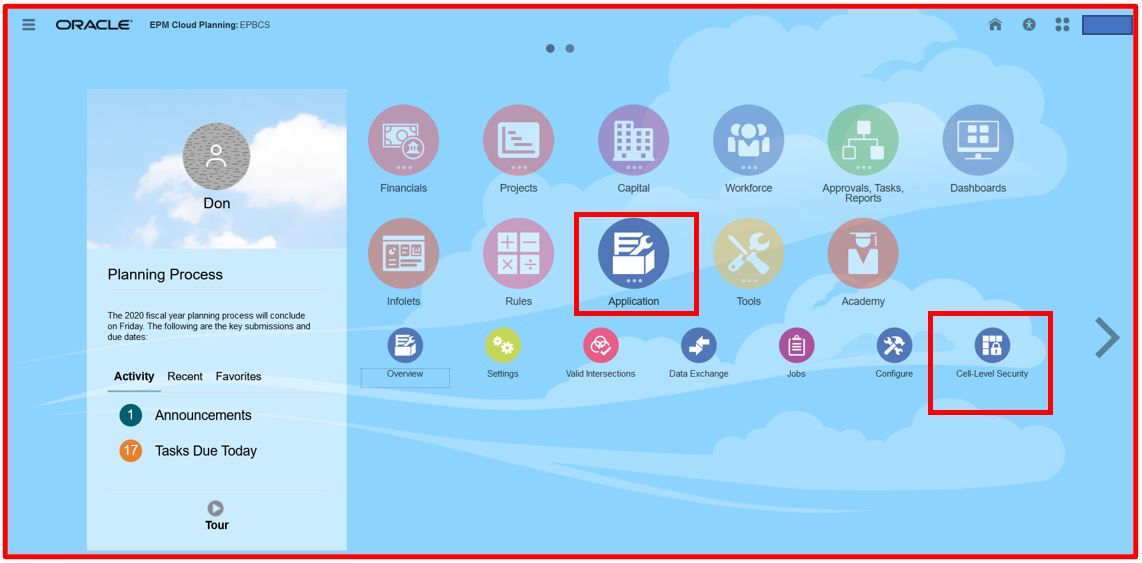
Navigate to Cell Level Security by following the navigation as an administrator
Navigator -> Application->Cell-Level Security

Click the Create button as shown in the below screenshot

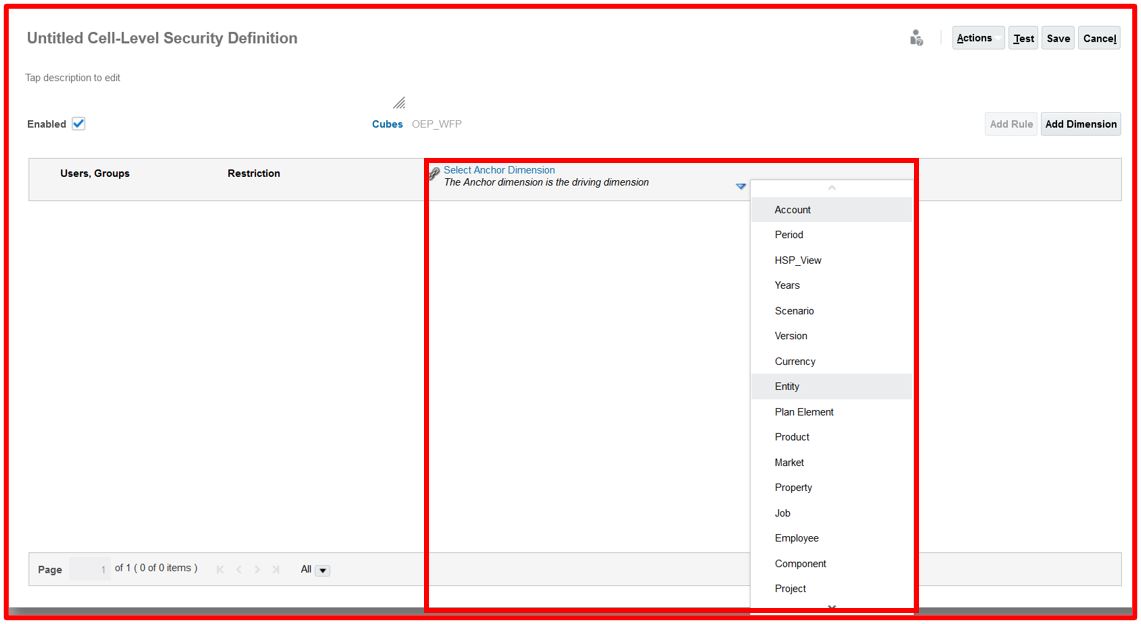
Click Cubes

Choose the OEP_WFP cube as shown in the below screen shots


Then choose the Anchor dimension by clicking the drop down and choosing the Entity.(Here Entity is the dimension where the Sales US, Marketing US, Financials US, Operations US, Manufacturing US & IT US members exist). Anchor dimensions are the required dimensions in the cube that is used in the cell-level security definition.

Click “Add Rule”

Enter the Rule Name. In this case “Manufacturing US – Cell Level Security”

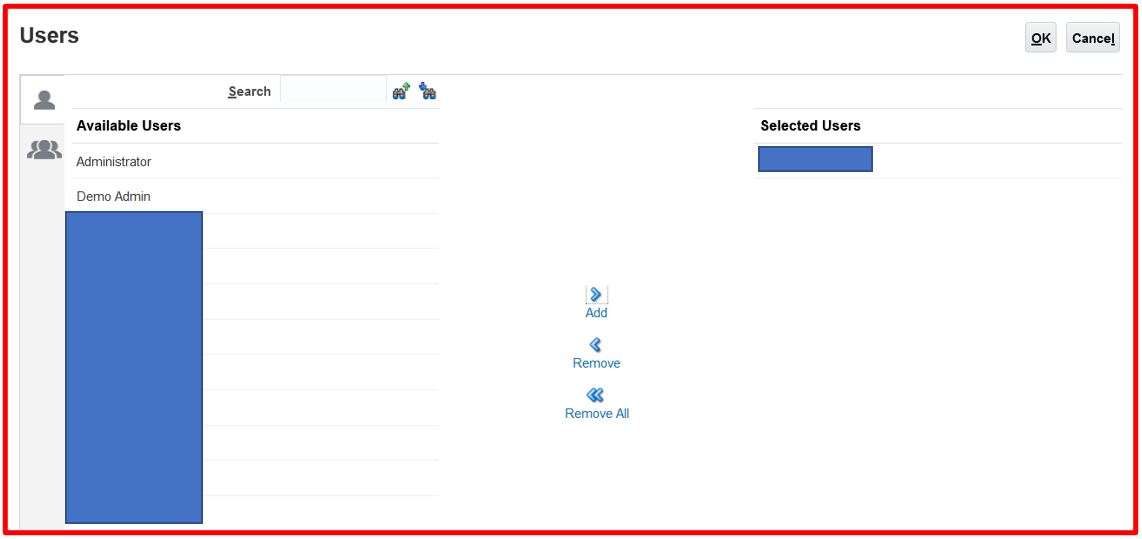
Click the search button next to Users, Groups and select the user or group to be included in the Rule as shown below. Here I selected the user to be included in the rule.

Choose Restriction “Deny Read”.
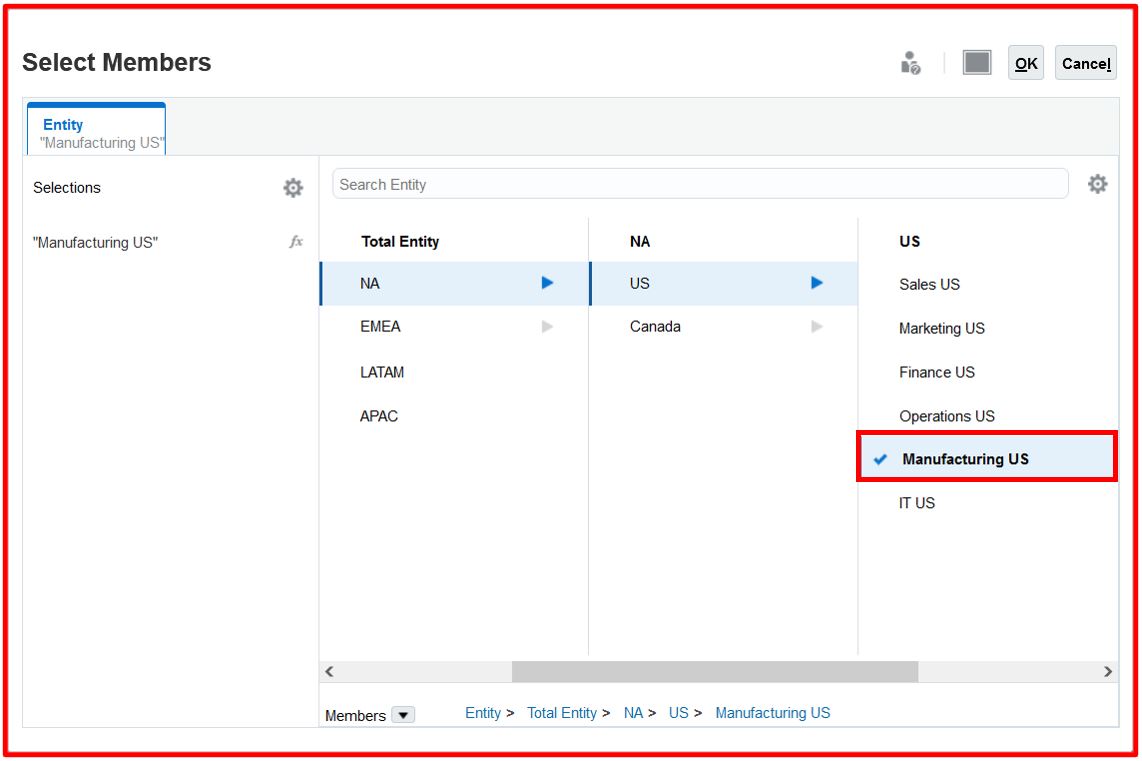
Choose “Manufacturing US” entity to be denied the access for the user we have selected.


Once the rule is completed it will be displayed as below. Click Save.

Now log in as the user who is assigned the cell-level security rule “Manufacturing US – Cell Level Security” into smart view and query the data using the same queries used before.
Smart View retrieval from the Finance Cube after applying the cell-level security
Smart View retrieval from the Workforce after applying the cell-level security
Please observe the “Manufacturing US” entity is denied access for Workforce Cube whereas the Finance cube still has the access.

