OneStream offers a variety of options to visualize reports with the power of Dashboards. Components such as cube views, combo charts, pivot tables, and data grids are commonly used in dashboards. In this post, I would like to demonstrate how to incorporate a text editor component into an OneStream dashboard.
Create the Text Editor Dashboard Component
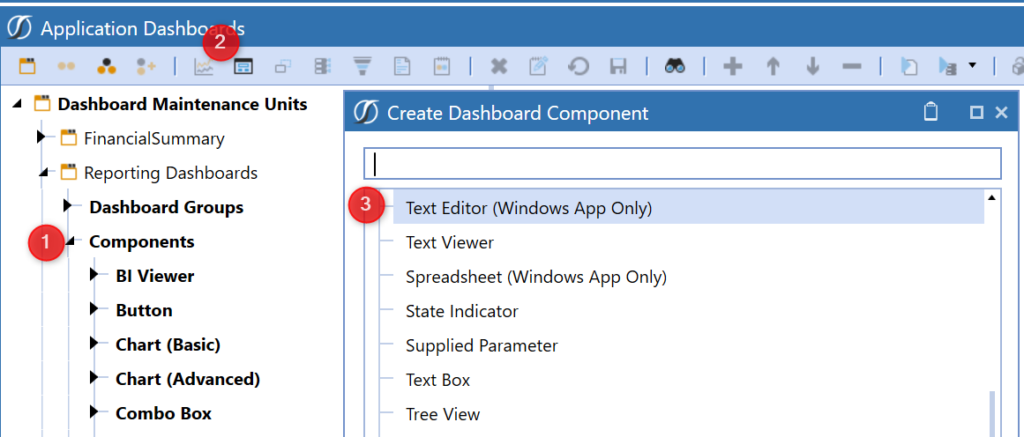
First, navigate to Components -> Select “Create Dashboard Component” -> Select “Text Editor”
Note: The text Editor feature is only available in the OneStream Windows App. Information will not display if attempting to launch files in the OneStream browser version.
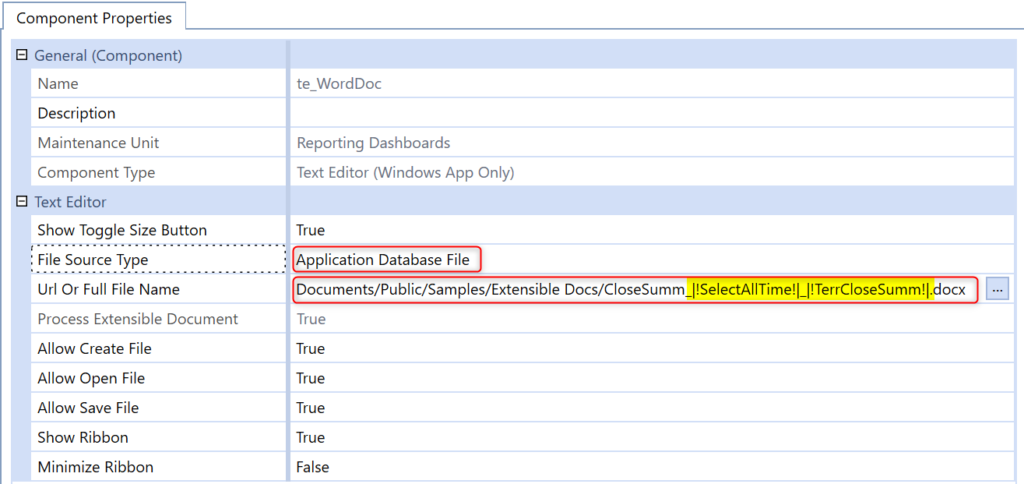
Next, in the component properties section, fill in the file source type and file name as needed. The example below demonstrates a word document stored as an “Application Database File,” embedded in a dashboard for commentary purposes.
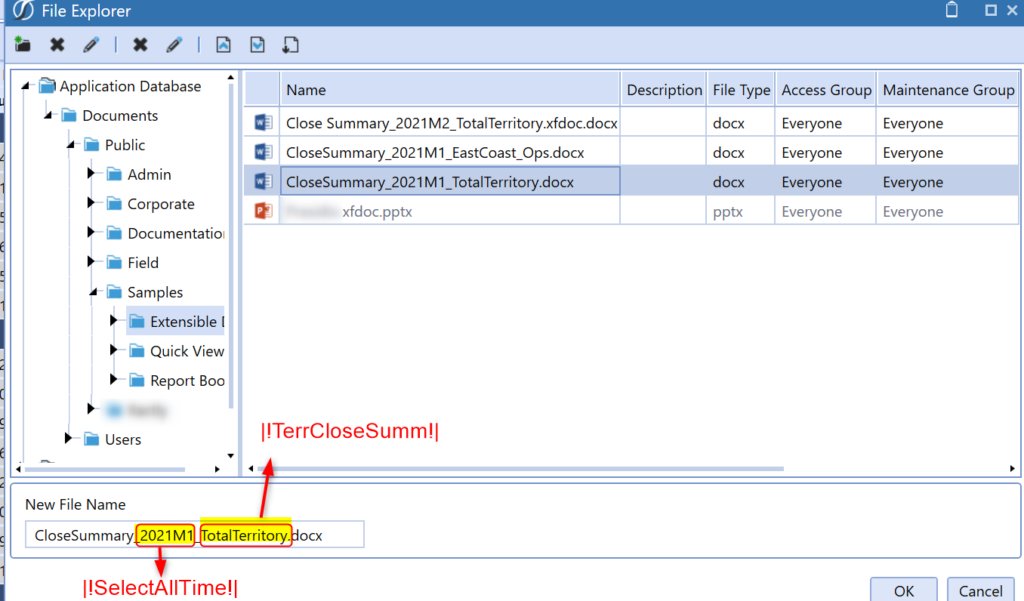
Note: Adding parameters to the full file name makes documents versatile by dynamically return results based on the selected parameters. The screenshot below shows an example of a dynamic file name.
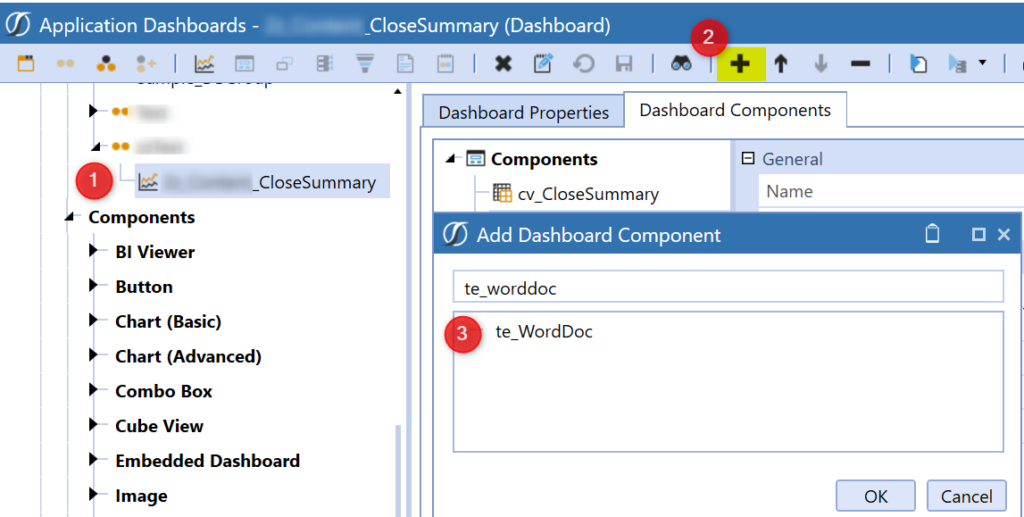
After creating the text editor component, add the word document to the dashboard by the following steps.
- Click the dashboard you want to insert the word document
- Select “Add Dashboard Component”
- Select the dashboard component you just created and click “OK.”
Using the Embedded Word Document
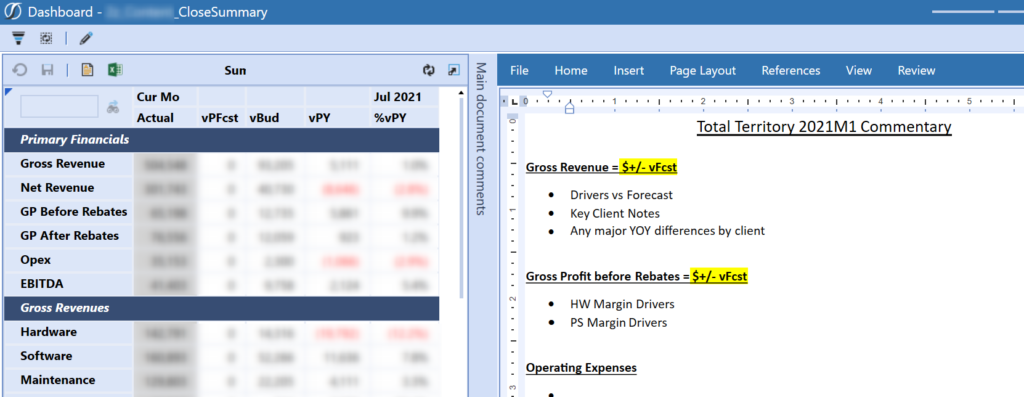
To use the embedded word document, launch the dashboard and input commentary.

Saving the Embedded Word Document
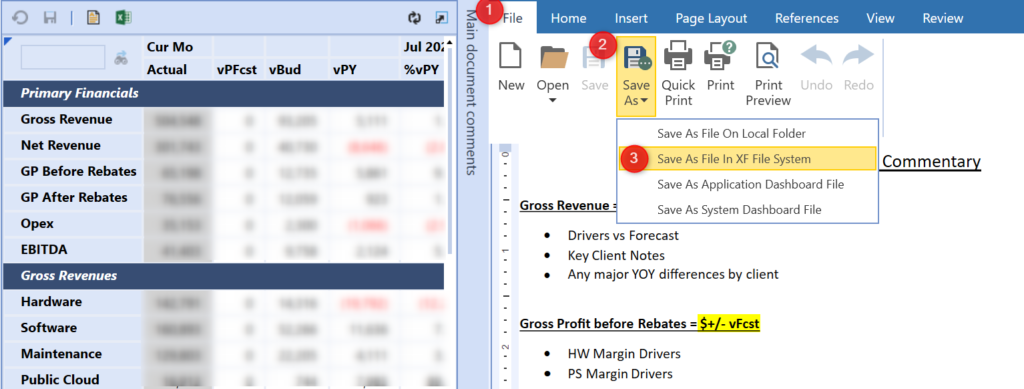
To save the file for the first time, follow the steps below.
First, navigate to File -> Save As > select “Save As File In XF File System.” This way, the file can be stored in the File Explorer in OneStream and shared across users.
Note: If the file has already been created and saved before, you will only need to use the shortcut key “CTRL+S” to save your updates.
Next, insert the file name the same as the one you set up in the Text Editor, and replace the parameters in the file name with actual member names accordingly. For instance, if you want to save this document in 2021M1 for Total Territory, and if the file name you created previously in the dashboard component section is “CloseSummary_|!SelectAllTime!|_|!TerrCloseSumm!|.docx.” Then, the file name you should insert here is “CloseSummary_2021M1_TotalTerritory.docx” This way, each time period and territory will have their own files saved in OneStream.
Note: The texts you insert to replace the parameters should correlate to the member list/ delimited list parameters you created.

Ways to View the Embedded Word Document
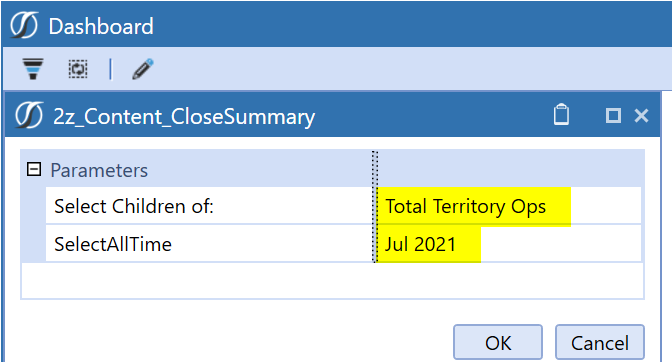
The first way to view the files created within Text Editor is via dashboards. Simply launch the dashboard and select your parameters; the updated word document will render.
The other way to view files created in the Text Editor is in the OnePlace tab. Navigate to OnePlace -> Documents -> Select the folder where you saved your files previously.


