The database is a core part of any type of application. The database scheme is constantly changing during the application development phase. It is important to deploy the database changes while deploying the application code to a different instance, such as dev, QA, stage, or production.
However, manually deploying database changes is a tedious process. By setting up automated deployment, you will save time and deploy the database changes seamlessly along with your application code deployment. In fact, we can use an Azure DevOps pipeline to deploy a .dacpac file by building an SQL Server Database project and using .NET.
What is a DACPAC File?
A Data-Tier Application Package (DACPAC) is a single file containing the database model and all the files representing database objects. It’s a binary representation of a database project compatible with SSDT. The name comes from an extension of these files.
How to Create a DACPAC Using Visual Studio
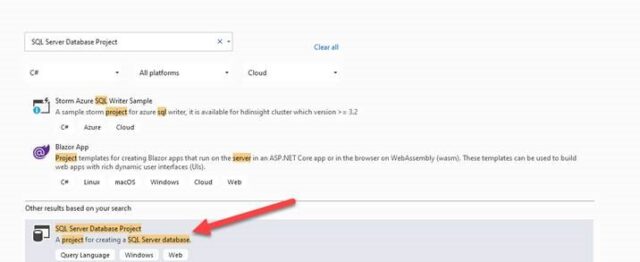
- Create SQL project using Visual Studio.

- After creating the project, you can see the database project in Solution Explorer.

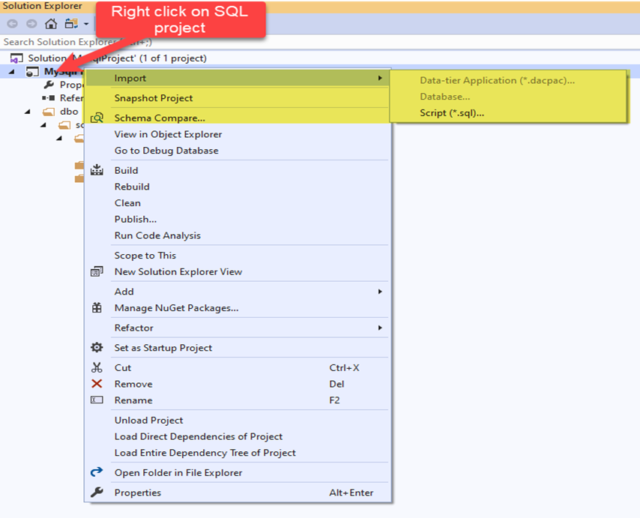
- Once the project is created, you can import .dacpac or database/script to import scripts from the existing database or generate the script using SQL Server Management Studio (SSMS) and add it into the visual studio project.

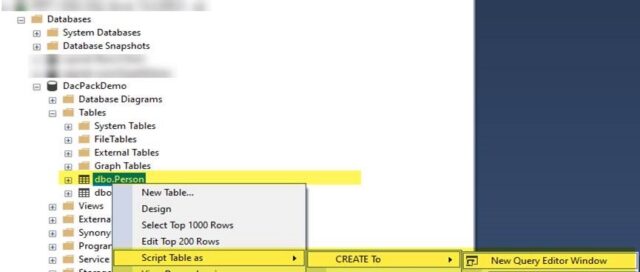
- You can create the script in an SQL server and add it to the visual studio project.
- Before adding the script to the visual studio project, you need to set up the folder structure.

- Go to the SQL Server to generate the SQL Server scripts and add them to the visual studio.


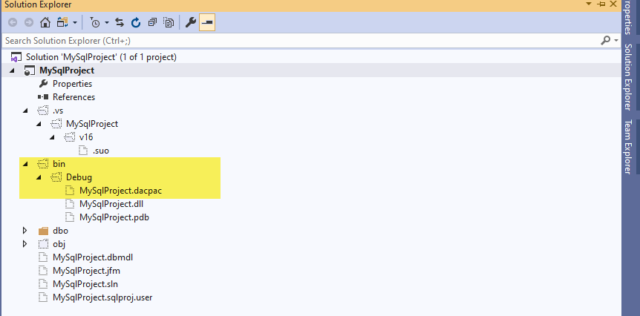
- Build the solution once all the steps are completed.

- Once the solution is built successfully, the .dacpac file will generate.

- Once all these steps are executed, you need to set up the Azure SQL DacpacTask in the release pipeline, which will deploy the database changes to a different instance, such as dev, QA, stage, or production.
Setting up Automated Deployment Using Azure DevOps
Start by setting up the build pipeline. This pipeline will build the solution and generate the .dacpac as an artifact taken by the release pipeline. Follow these steps:
- Login into the Azure DevOps Portal (dev.azure.com)
- Navigate to the Pipeline and Click on New Pipeline
- To set up the Pipeline, follow the steps shown in the below video presentation.
https://youtube.com/watch?v=6986Rk12whg%3Frel%3D0
Next, you will set up the release pipeline. Once the build pipeline generates the artifact (.dacpac file), the release pipeline will take the .dacpac file and execute it in our SQL instances, such as in dev, QA, state, or production.
To start setting up the release pipeline, click on the pipeline, then the new pipeline, and then releases.

Follow the steps shown in the below video presentation to set up the release pipeline.
https://youtube.com/watch?v=EQeYSU8e_Ec%3Frel%3D0
Automated Processes in Just a Few Steps
These steps can help you turn your manual deployment processes into an easily automated deployment process in no time. To learn more, contact our technical experts today, and always stay tuned for more.


In case of azure devops, when azure git repo has been added to azure synapse workspace. When same build pipeline is developed as shown above input would be “sqlscript\*.json”, It is unable to create daps file from it. Could you see workaround for same?