
Health checks are an important part of containerized application deployments in Red Hat OpenShift. In OpenShift 4.5, Red Hat added startup probes as a third option besides readiness and liveness probes. Also, it brought the configuration of these checks back to the web interface, making it easier for developers. In this article, I’ll describe the three types of health checks, the three different methods for implementing them, and give some recommendations for making the most health check capabilities.![]()
Types of Health Checks
As mentioned above, there are three types of health checks in OpenShift 4.5: readiness check, liveness check, and startup check. The readiness check checks whether a container is ready to handle service requests. If this check fails, traffic will not be routed to the container. The check will continue to monitor the container’s health, and if the container returns to a state where it can service requests, traffic will resume.
Liveness checks determine whether a container is still running. Containers can hang, either from a deadlock or some other condition. When a liveness check fails, it follows the pods’ restart policy, which is normally to kill and restart the container.
Startup checks are the latest addition to the health check suite. A startup check determines whether the application within a container is started. While the startup check is running, any readiness or liveness checks are disabled. If the startup check is not successful within the timeframe allotted for it, it follows the restart policy, similar to a liveness check (again, normally a kill and restart of the container).
The flow for these health checks is this: The startup check runs first, running until it is successful or times out. If it is successful, it stops probing, and readiness and/or liveness checks commence and run for the container’s life.
Types of Probes
Three different types of probes can be configured for each of the three health checks: an HTTP probe, a command probe, and a TCP probe. The HTTP probe is the most common. It basically pings a path and passes; if it receives a return code in the 200-399 range, the probe is considered successful.
A command probe runs a command inside of a container. If the command runs successfully and exits, it returns a status code of 0 and is considered successful.

The TCP probe is the final option. It attempts to establish a TCP socket connection to the container on a specified port. If it establishes a successful connection, the probe is considered successful.
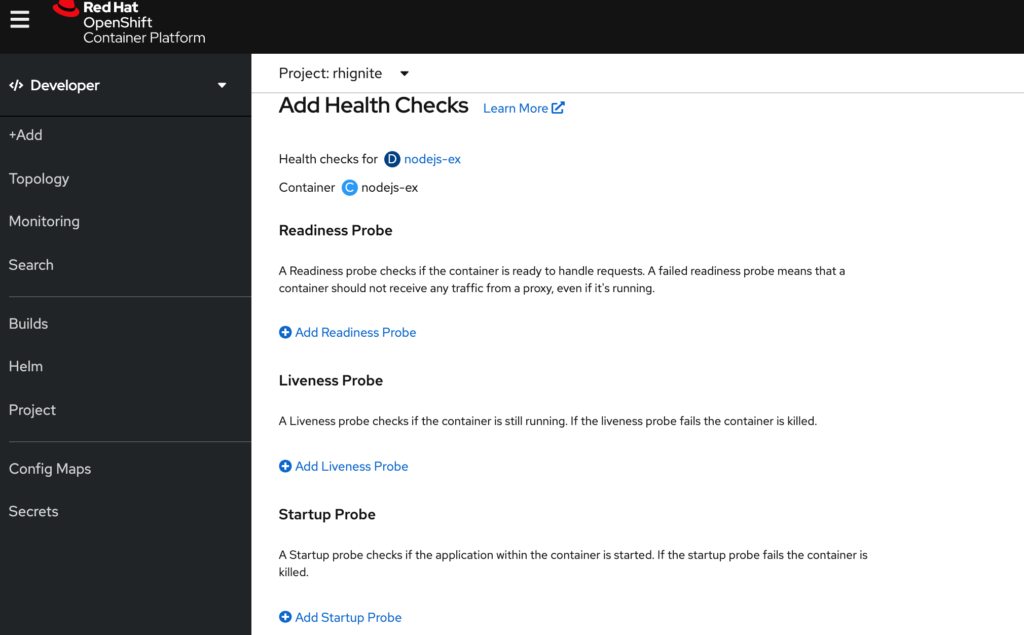
The health checks are easily reachable from the developer view in the web console. Simply click on your deployment, and an option to add health checks will be presented.
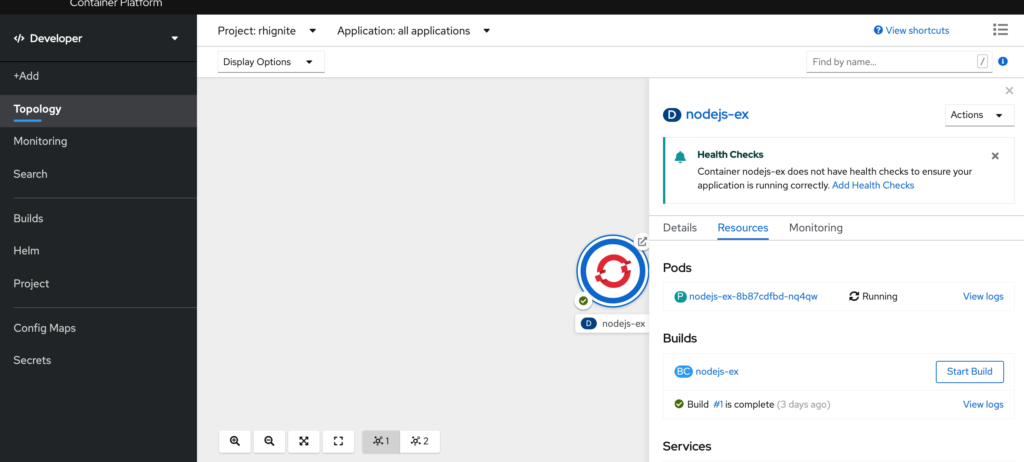
All three probes are available from this view.
All three checks look the same, so I’ll just show an example from the readiness check:
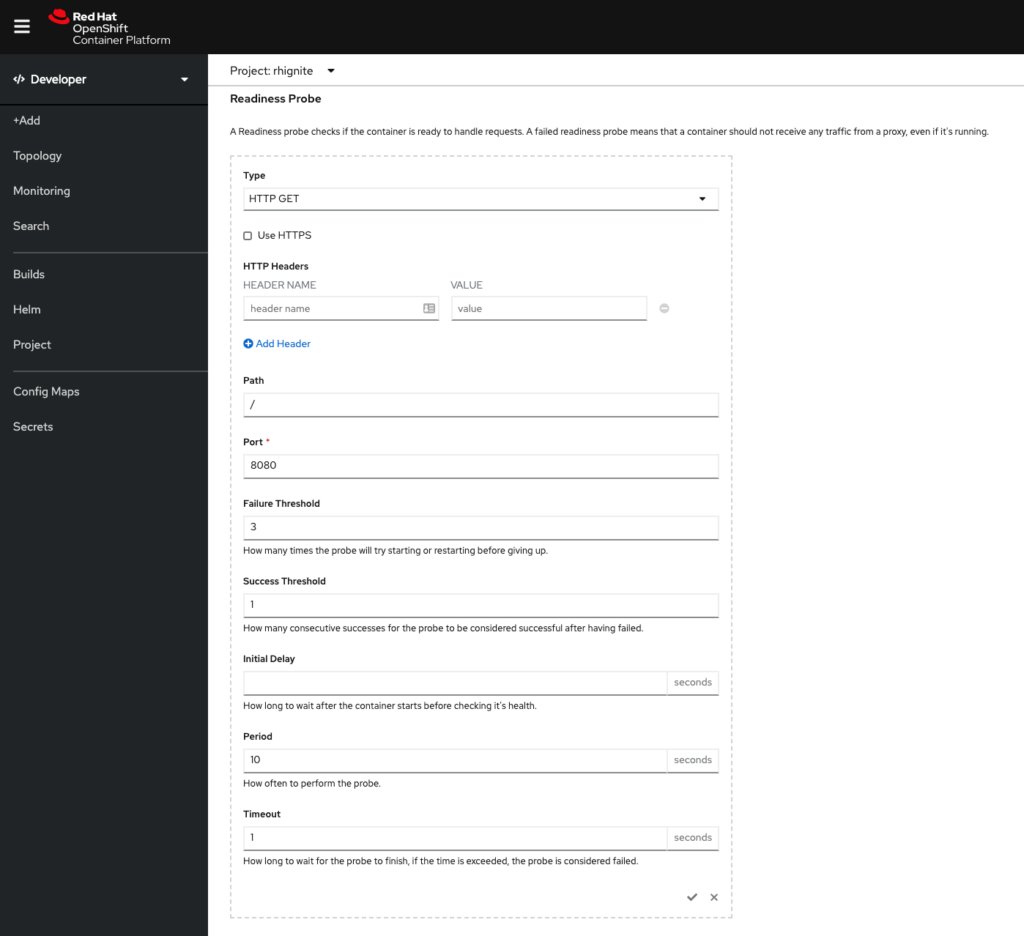
(Note: Although the checks can be configured here and it is a good way to test, you’ll want to make these configurations in your code repository for consistency.)
Configurable Fields
As you can see, there are some configurable fields. Here’s a quick summary of each field:
- Failure threshold – The number of times that the probe is allowed to fail; the default is 3
- Success threshold – The number of times that the probe must report success after a failure to reset the container status to successful; the value must be 1 for a liveness probe
- Initial delay – The time, in seconds, after the container starts before the probe can be scheduled.
- Period – The delay, in seconds, between performing probes
- Timeout – The number of seconds of inactivity after which the probe times out and the container is assumed to have failed
You’ll need to do some testing with these various fields to ensure you’re getting the desired behavior from your health checks.
Tips and Recommendations
- Use health checks with all of your containerized applications. You’re missing out on some of the key values of containerization if you don’t use health checks. Health checks can help manage the routing of traffic away from troubled containers and restart containers that are stuck without requiring human intervention.
- Think about the behavior you want from your health check. People have a tendency to get caught up in the terms readiness and liveness, but it helps to think about the remediation your container needs. If your service running on a container is unresponsive, can it recover itself if given some time without traffic? If so, a readiness check is probably the right path. If the fix needs to be a restart of a container, then a liveness check is a better option.
- Try to not use the health checks for more than their intended purpose. While it is technically possible to use them to check the full application stack, the purpose is to check the health of the containers in your pod. Trying to check back-end resources or other infrastructure component connectivity is likely to create some unintended consequences.
- Rigorously test your health checks before you go live. While the health checks may seem pretty straightforward, the various configurable fields in the checks can greatly change the check’s behavior. I recommend doing a walkthrough of some scenarios with your pods and determining the optimal timings around failures and probes’ frequency to create the best user experience for your service.
Want to get started? Perficient can help you institute health checks in your Red Hat OpenShift 4.5 environment.