GitLab Introduction:
GitLab CE, or Community Edition, is an open-source application primarily used to host Git repositories, with additional development-related features like issue tracking. It is designed to be hosted using your own infrastructure. It provides flexibility in deploying as an internal repository store for your development team, a free way to interface with users, or a means for contributors to host their own projects.
The GitLab(https://gitlab.com/) project makes it relatively straightforward to set up a GitLab instance on your own hardware with a secure installation mechanism. In this guide, we will cover how to install and configure GitLab on an Ubuntu 18.04 server.
Pre-Requisites
- Ubuntu 18.04 Server
- 8 GB Ram Min or Max
- Processor 2 cores
- Storage – 10 GB
- DNS – (We are using gitlab.perficient.com or server IP)
Step 1: Installing the Dependencies and Package
Before we install GitLab, it is essential to install some of the software that it leverages during installation and on an ongoing basis. Fortunately, all the required software can be easily installed from Ubuntu’s default package repositories.
- sudo apt update
- Sudo apt install ca-certificates curl OpenSSH-server postfix
For the postfix installation, select an Internet Site when prompted. On the next screen, enter your server’s domain name to configure how the system will send mail.
Step 2: Installing GitLab
This is a straightforward process that leverages an installation script to configure your system with the GitLab repositories. Move into the /tmp directory and then download the installation script
- cd /tmp · curl -LO https://packages.gitlab.com/install/repositories/gitlab/gitlab-ce/script.deb.sh
Once you verified the script, proceed to install
- sudo bash /tmp/script.deb.sh
The script will set up your server to use the GitLab maintained repositories. This lets you manage GitLab with the same package management tools you use for your other system packages. Once this is complete, you can install the actual GitLab application with apt:
- sudo apt install GitLab-CE
Step 3: Firewall Configuration
Before you configure GitLab, you will need to ensure that your firewall rules are permissive enough to allow web traffic.
- sudo ufw enable
- sudo ufw to allow http
- sudo ufw to allow https
- sudo ufw to allow OpenSSH
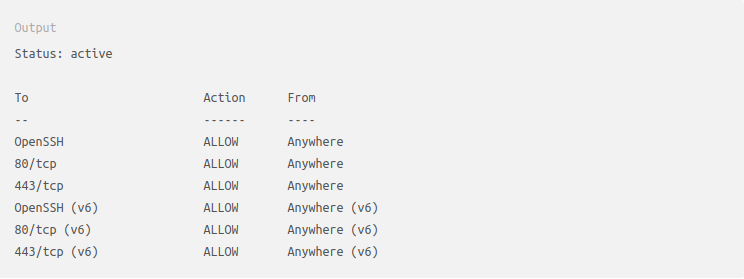
And then verify the status of the active firewalls
- sudo ufw status

Check Firewall Status in Ubuntu
Step 4: Editing the Configuration Files
Before you can use the application, you need to update the configuration file and run a reconfiguration command. First, open Gitlab’s configuration file:
- sudo nano /etc/gitlab/gitlab.rb
Near the top is the external_url configuration line. Update it to match your domain. Change http to https so that GitLab will automatically redirect users to the site protected by the Let’s Encrypt certificate:
- external_url ‘https://gitlab.perficient.com’
Next, look for the letsencrypt[‘contact_emails’] setting. This setting defines a list of email addresses that the Let’s Encrypt project can use to contact you if there are problems with your domain. It’s a good idea to uncomment and fill this out so that you will know of any issues:
- letsencrypt[‘contact_emails’] = [‘lokeshkumar.ravi@perficient.com’]
Save and close the file. Run the following command to reconfigure Gitlab:
- sudo gitlab-ctl reconfigure
This will initialize GitLab using the information it can find about your server. This is an entirely automated process, so you will not have to answer any prompts. The process will also configure a Let’s Encrypt certificate for your domain.
Step 5: Performing Initial Config through Web Interface
Logging In for the First Time. Visit the domain name or IP address of your GitLab server in your web browser:
- https://gitlab.perficient.com or http://192.168.58.134
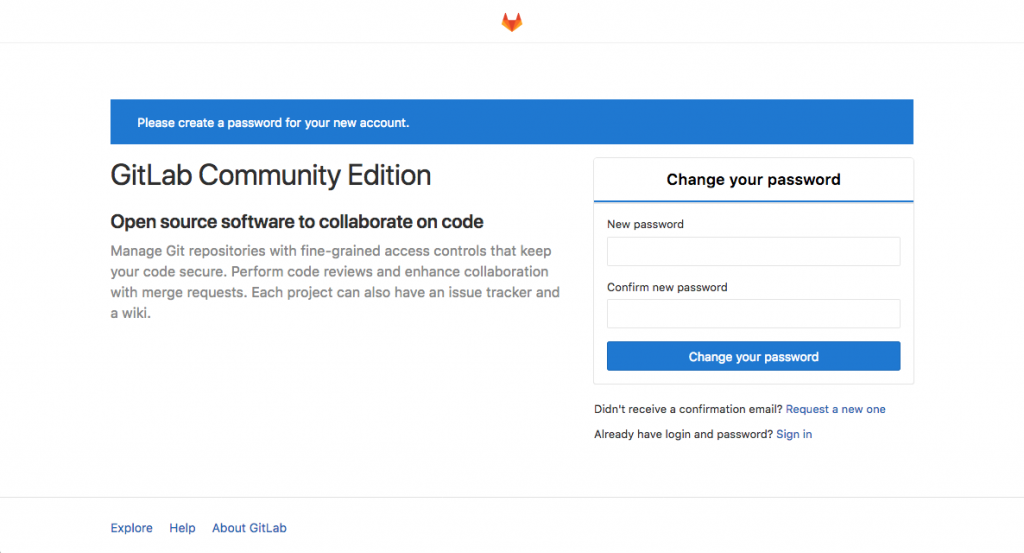
On your first time visiting, you should see an initial prompt to set a password for the administrative account:

In the initial password prompt, supply and confirm a secure password for the administrative account. Click on the Change your password button when you are finished.
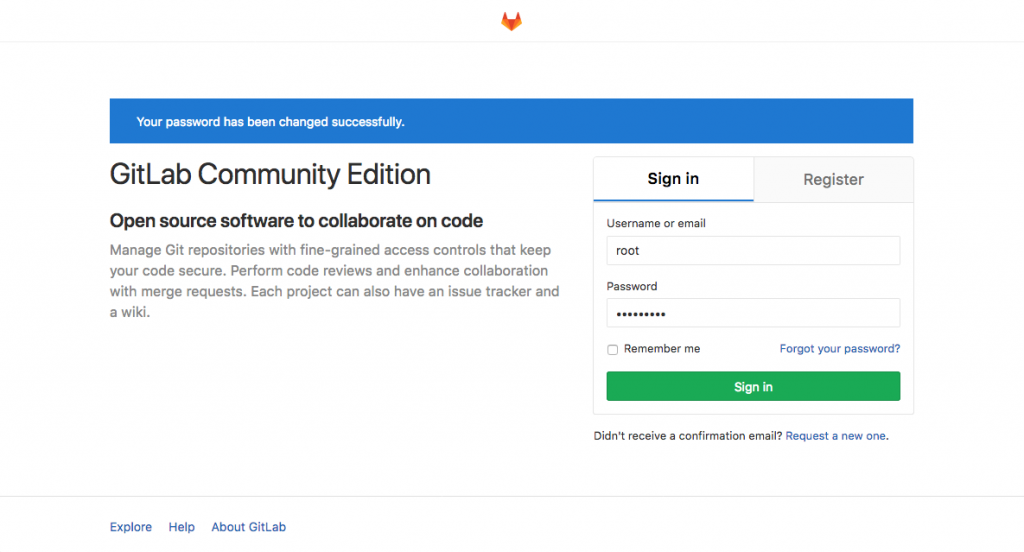
You will be redirected to the current GitLab login page:

Here, you can log in with the password you just set. The credentials are:
- Username: root
- Password: [the password you set]
Enter these values into the fields for existing users and click the Sign in button. You will be signed into the application and taken to a landing page that prompts you to begin adding projects:

You can now make some simple changes to get GitLab set up the way you’d like.
Step 6: Adjusting your Profile Settings
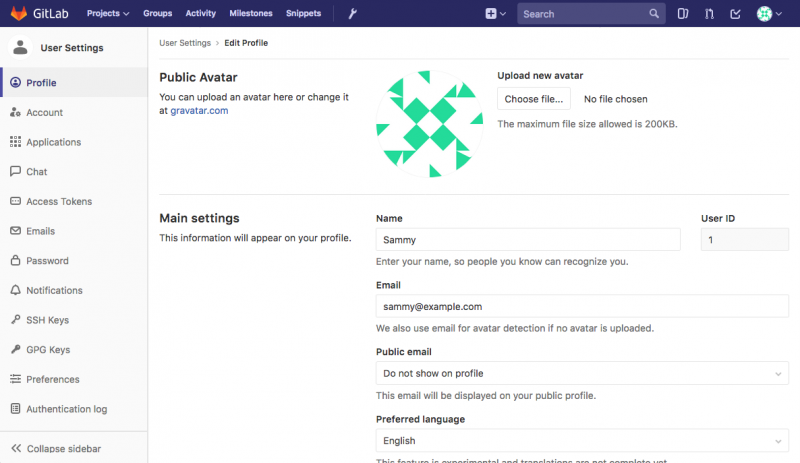
One of the first things you should do after a fresh installation is to get your profile into better shape. GitLab selects some reasonable defaults, but these are not usually appropriate once you start using the software.
To make the necessary modifications, click on the user icon in the upper-right hand corner of the interface. In the drop-down menu that appears, select Settings:

Step 7: Adding SSH to Account
In most cases, you will want to use SSH keys with Git to interact with your GitLab projects. To do this, you need to add your SSH public key to your GitLab account. You can create your own SSH Key Pair by typing:
- ssh-keygen
Accept the defaults and optionally provide a password to secure the key locally:
Output
Generating public/private rsa key pair.
Enter file in which to save the key (/home/ub18/.ssh/id_rsa):
Enter passphrase (empty for no passphrase):
Enter same passphrase again:
Your identification has been saved in /home/ub18/.ssh/id_rsa.
Your public key has been saved in /home/ub18/.ssh/id_rsa.pub.
The key fingerprint is:
SHA256:I8v5/M5xOicZRZq/XRcSBNxTQV2BZszjlWaIHi5chc0 lokeshkumar.ravi@perficient.com
The key's randomart image is:
+---[RSA 2048]----+
|          ..%o==B|
|           *.E =.|
|        . ++= B  |
|         ooo.o . |
|      . S .o  . .|
|     . + .. .   o|
|      +   .o.o ..|
|       o .++o .  |
|        oo=+     |
+----[SHA256]-----+
Once you have this, you can display your public key as above by typing:
- cat ~/.ssh/id_rsa.pub
Output
ssh-rsa AAAAB3NzaC1yc2EAAAADAQABAAABAQDMuyMtMl6aWwqBCvQx7YXvZd7bCFVDsyln3yh5/8Pu23LW88VXfJgsBvhZZ9W0rPBGYyzE/TDzwwITvVQcKrwQrvQlYxTVbqZQDlmsC41HnwDfGFXg+QouZemQ2YgMeHfBzy+w26/gg480nC2PPNd0OG79+e7gFVrTL79JA/MyePBugvYqOAbl30h7M1a7EHP3IV5DQUQg4YUq49v4d3AvM0aia4EUowJs0P/j83nsZt8yiE2JEYR03kDgT/qziPK7LnVFqpFDSPC3MR3b8B354E9Af4C/JHgvglv2tsxOyvKupyZonbyr68CqSorO2rAwY/jWFEiArIaVuDiR9YM5 lokeshkumar.ravi@perficient.com
Copy the block of text that’s displayed and head back to your profile Settings in GitLab’s web interface.

Conclusion
You should now have a working GitLab instance hosted on your own server. You can begin to import or create new projects and configure the appropriate level of access for your team.


Great Job, Thank you for spending some time to share you’re Knowledge through Blog. Looking forward for more.