In my previous blog post, I demonstrated how members meeting the appropriate criteria could be deleted from an OneStream XF application with a XML file. In this blog, I will demonstrate how a member relationship “parent / child” can be deleted and more importantly changed using a XML file which is a necessary part of the process when creating an automated dimension build.
The approach presented will be to create one XML file to delete the member relationship and then create a second XML file to add the updated relationship for the member(s). This method will take an input file and generate the necessary XML syntax for both files. All you need is access to Microsoft SQL Server with the appropriate permissions. This solution is applicable for other dimensions Entity, UD1-UD8 and can be re-used whenever the need arises if properly setup. The complete approach assumes that:
- The parent and child members are members of the application.
- You have already identified which members require an updated relationship e.g. new parent.
- You have a list of these members in a text file or format that can be imported or queried. An example of a source that could be queried would be a Data Warehouse table which stores a parent / child structure that is used to derive a hierarchy.
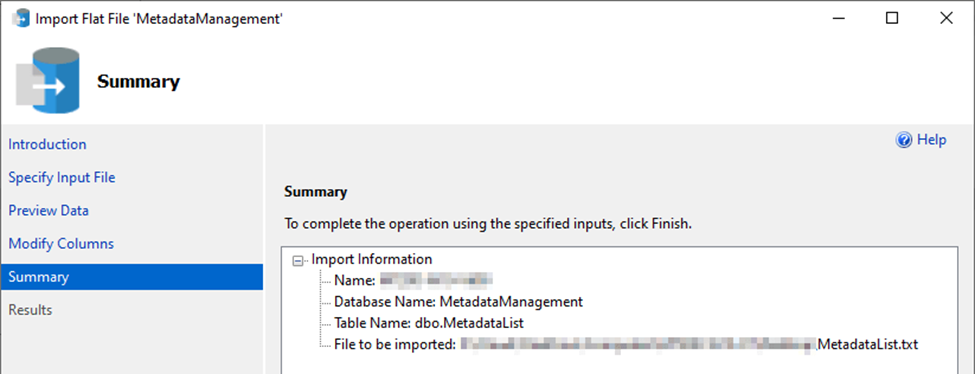
If you don’t have a list or applicable source, you can use a Cube View, Quick View, or another method to generate the list. The next step will be to import the list of accounts which require an updated parent into a Microsoft SQL Server database using the standard flat file import.
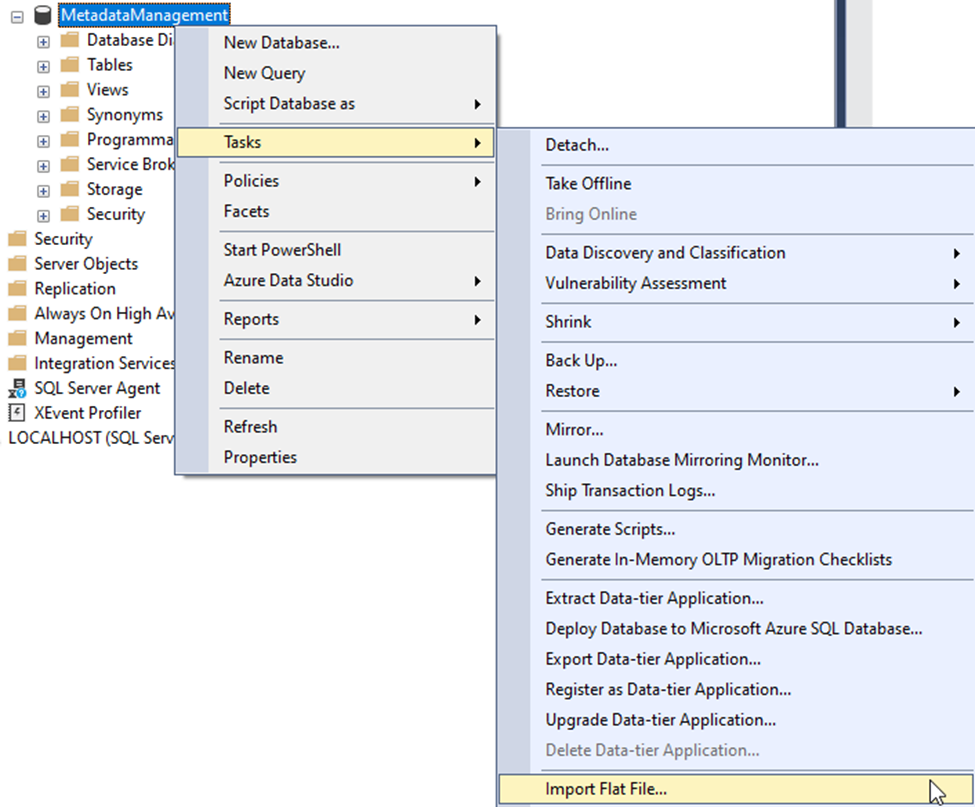
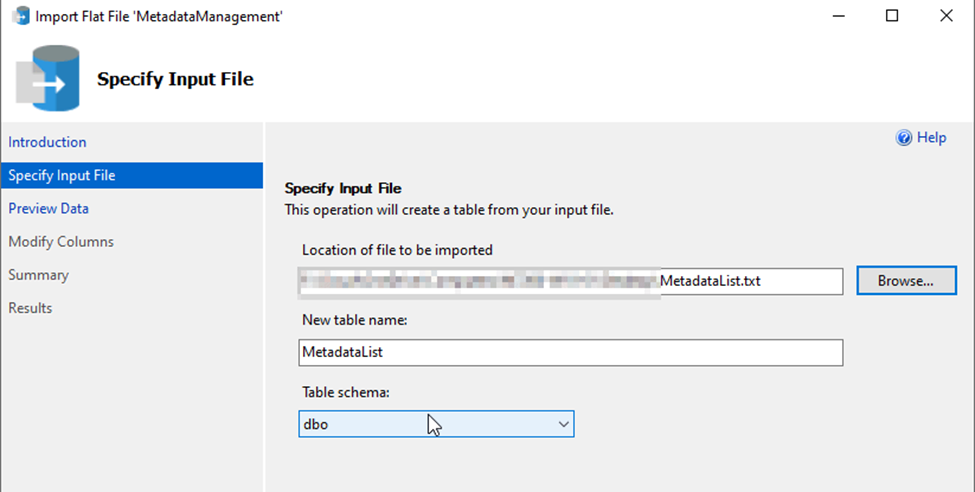
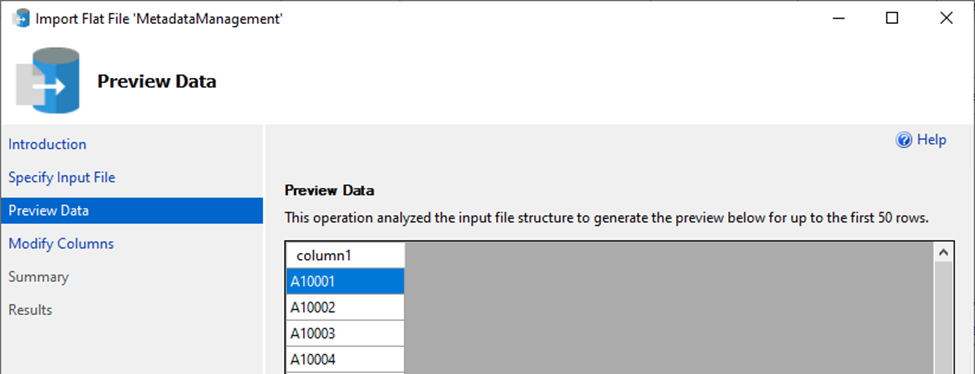
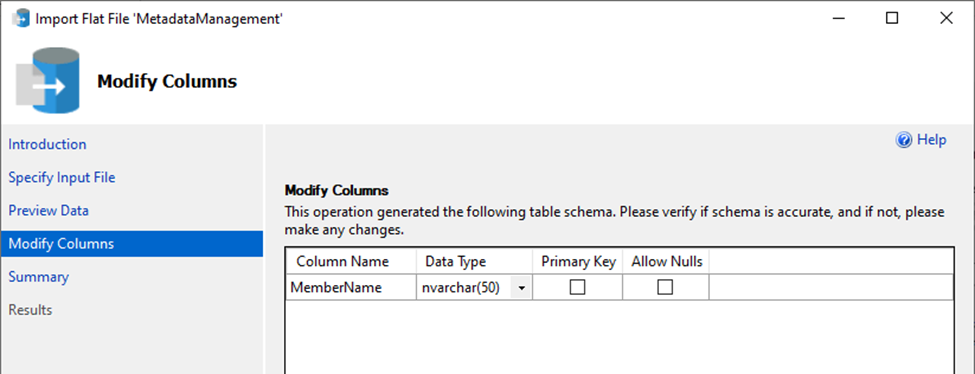
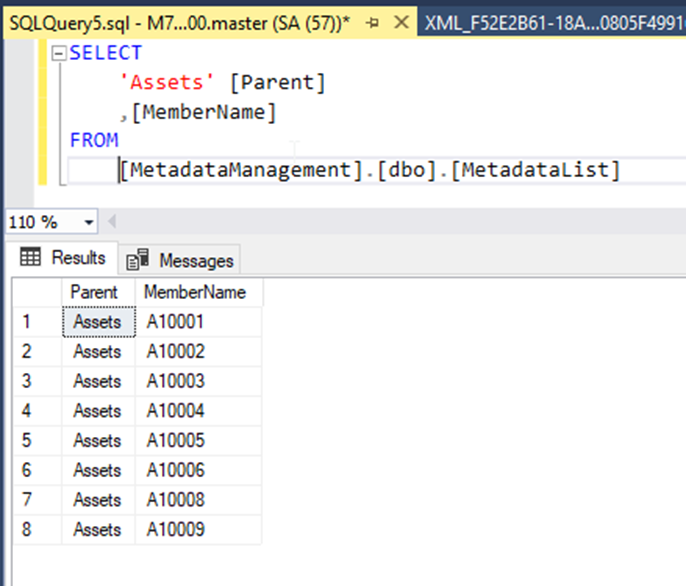
For reference, a sample of the imported data is displayed.
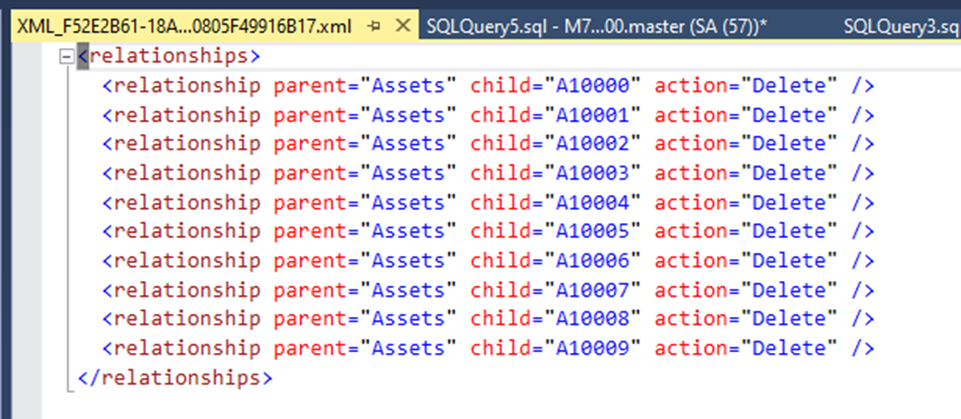
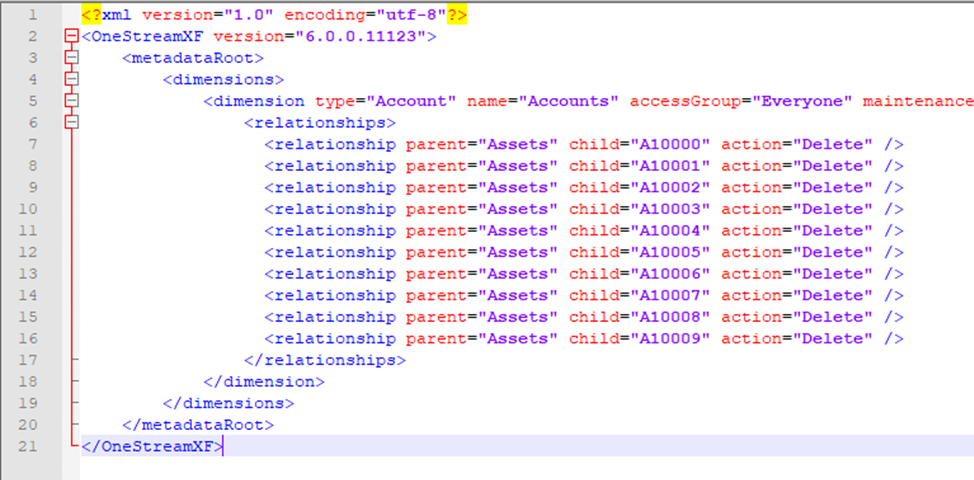
With the file successfully imported, the next step will be to create a SQL statement that will output an XML file in the correct format to delete the existing relationship. The format is shown below.
Notice that each <relationship> element has three attributes: parent which will be the parent member name, child which will be the child member name and action which is specified as =”Delete”. The action instructs the import process to delete the relationship defined with the parent and child attributes. If the child has more than one parent only the relationship defined will be deleted “removed” with the other relationship(s) retained in the approach. In the circumstance of a single parent, the child member will be listed in Orphans of the respective dimension.

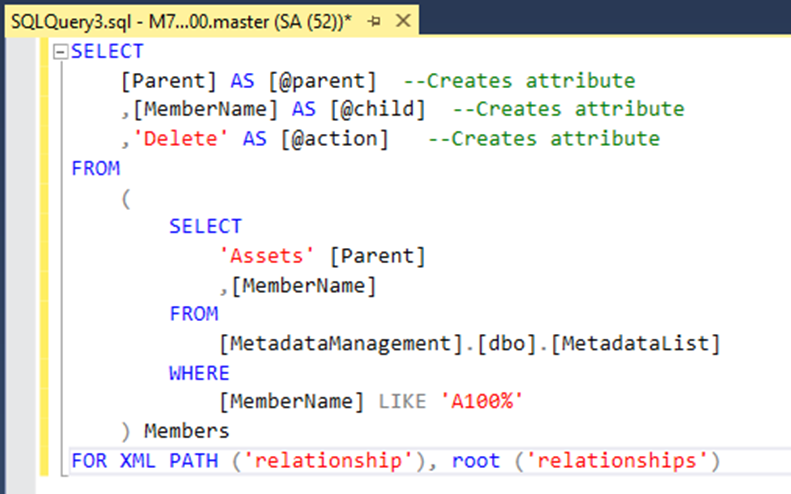
The next query creates the XML file. It has three parts: a SELECT clause, a FROM clause, and a FOR XML PATH clause.
The SELECT clause “SELECT [Parent] AS [@Parent], [MemberName] AS [@child], ‘Delete’ AS [@action]” will order the results as attributes of the <relationship> element. The ampersand “@” indicates this is an attribute of an element instead of a row element.
The FROM clause is simply the same SQL statement from earlier that returns our list of accounts.
The FOR XML PATH clause specifies the format of the output. It creates a root element called <relationships> and each row in our list will become an <relationship> element.
The remaining required XML elements are displayed in the next image on lines 2-5 and 9-12.
Note: the <dimension> element has additional attributes which are not displayed.

To make things easy, we just overwrite line 7 in the first image with our XML results. The second image displays the file after the copy and paste operation. Save this new file as Step01Orphan with the extension .xml.

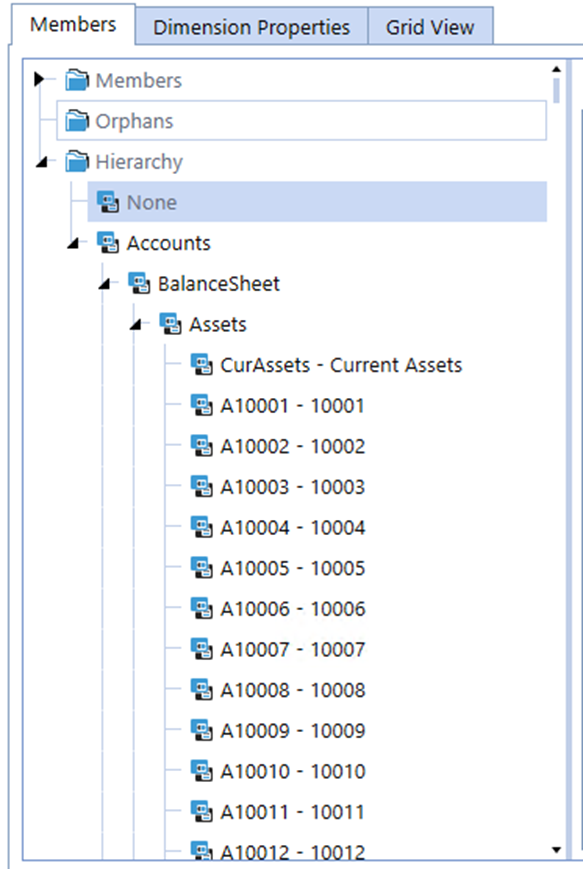
Before we import our XML file, we demonstrate in the next image that our OneStream application has an Account dimension currently with no Orphans and the members which start with A100 are children of Assets which are the members which will have the relationship changed. With the first step, the members will be orphaned.
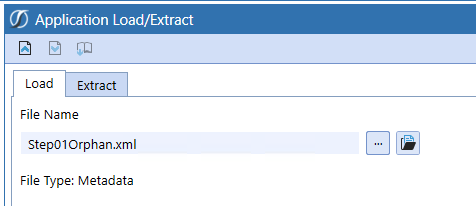
Now, log into the OneStream application. Select and expand Application > Tools > Load/Extract.
Navigate to and select the XML file previously created. Once this is done, select the Load icon. The load will complete without error which is confirmed by the second image after this paragraph.

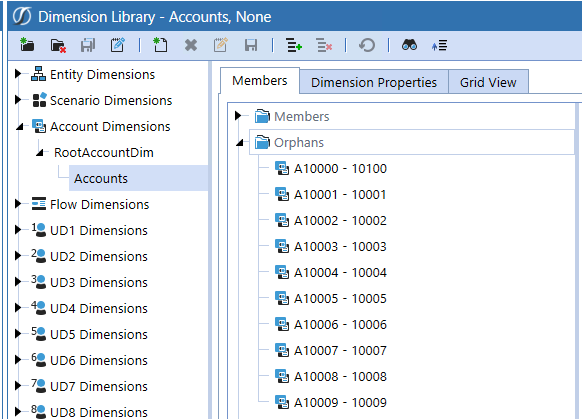
To confirm the upload did delete the relationship, close all Pages and then refresh the OneStream application. Once the application refresh completes, navigate to the Account dimension and expand Orphans. The account members displayed in the XML file will be listed as Orphans after a successful import.
Next, the updated relationship for the members will be imported. This query has the same syntax as the query used to delete the relationship with the following changes: the action attribute was removed as the delete of the relationship does not need to occur, an aggregationWeight attribute with a value of 1.0 is added which is the default when keying a relationship and the hard coded Parent of Assets is changed to CurAssets which is the updated relationship.
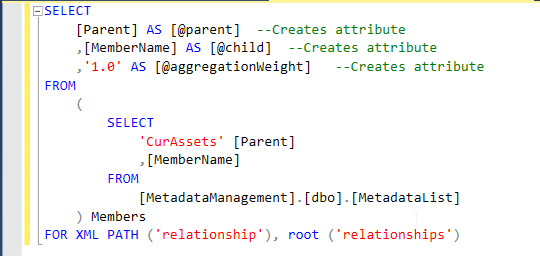
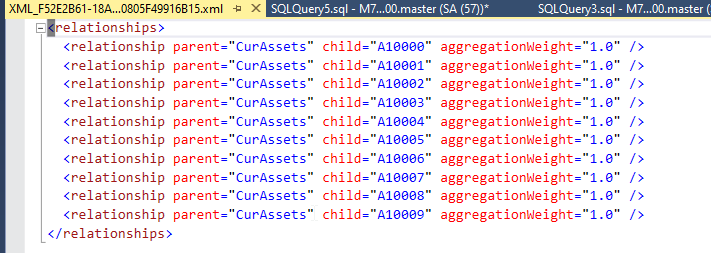
To continue the make things easy approach, save file Step01Orphan.xml as Step02AddParentToOrphans.xml. Once this is done, line 6-17 can be replaced with the XML created to add an updated member relationship. The second image displays the file after the copy and paste operation. Please save the updated file as Step02AddParentToOrphans.xml
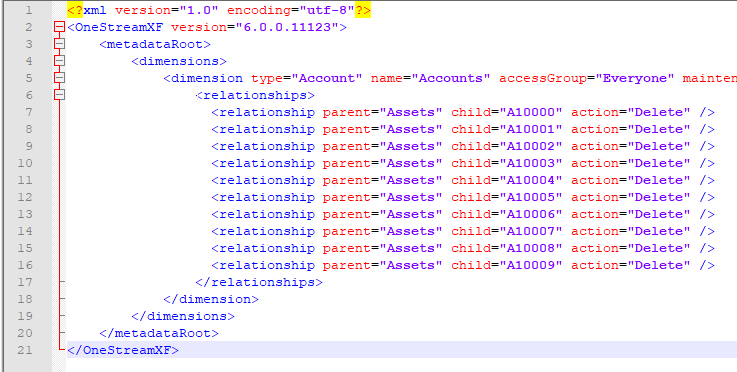
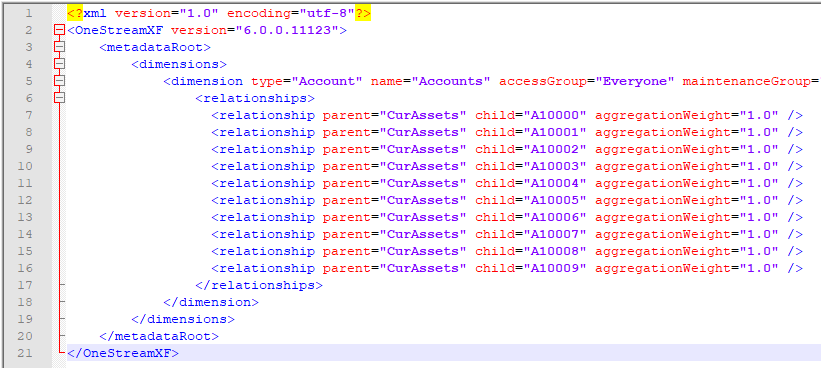
Return to the OneStream application, select and expand Application > Tools > Load/Extract.
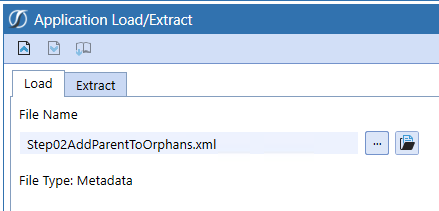
Navigate to and select the Step02… XML file previously created. Once this is done, select the Load icon. The load will complete without error which is confirmed by the second image after this paragraph.

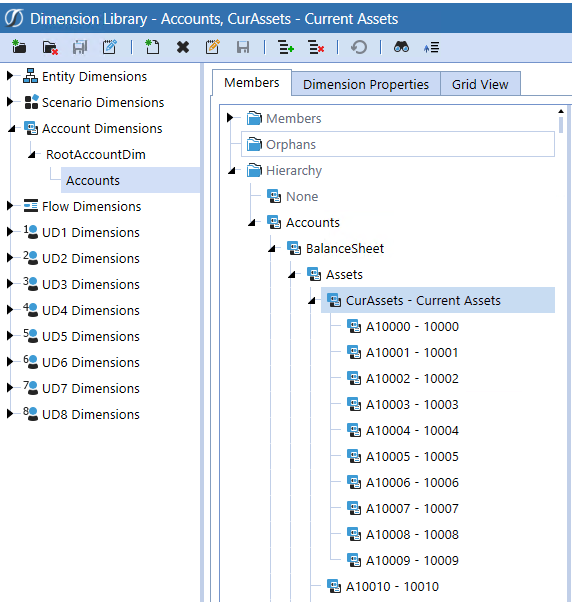
To confirm the upload did update the relationship, close all Pages and then refresh the OneStream application. Once the application refresh completes, navigate to the Account dimension and expand CurAssets. The account members displayed in the XML file will be listed as children of this member after a successful import.
I hope this solution is helpful if you are interested or have begun the process of automating an OneStream dimension build. If you have any questions, feel free to either post a comment to the blog or email me at terry.ledet@perficient.com.

