The Microsoft Ignite Conference took place last week (9/25/17 – 9/29/17) and to no surprise, we were flooded with a plethora of exciting news for Skype for Business and Teams. One of the exciting announcements regarding Microsoft Teams that came out just before the conference (and discussed further at Ignite) revolved around Guest Access. However, most admins that went into the tenant to enable Teams have found out the hard way that you will actually need to “flip the switch” in more than one place. To put it simply, Teams has multiple places where you can allow/disallow Guest Access. Namely, this will include your Azure Active Directory, O365 Groups, SharePoint, and finally Teams itself.
| Responsibility | Description |
|---|---|
| Coordinate release process | I coordinate with all of the relevant stakeholders (e.g. Product Owner, Operations Coordinator, Infrastructure Lead, Development Lead) to ensure a timely and correct deployment of a particular application/system. |
| Product release readiness | I ensure that all product release readiness states are complete prior to the product release date. Once a product is placed on the release calendar by the Product Owner, it is assumed that the Product and Security readiness states are complete. The remaining Operation and Organization readiness states are addressed during the release scheduling process workflow. |
| Audit release process fidelity | Periodically, I review with all of the development teams the release process mechanics. This includes a review of the release readiness state assurance; if issues are found with compliance to the organization requirements regarding a particular readiness state then a remediation is determined. Audits are performed on an as-needed basis to ensure that the process remains effective and efficient. |
That being said, if you were to allow Guest Access in Teams, SharePoint, and O365 groups but left this disabled with Azure AD, guess what…. it won’t work (shocking I know!). In order to clear up any confusion this may cause, I am going to briefly walk you through where you should go to enable Guest Access within each O365 service so we can get you adding guests in Teams in no time!
- Teams
A) Within the O365 Admin Center navigate to Settings > Services & Add-ins > Microsoft Teams
B) Scroll down and select the drop down arrow for Settings by user/license type and select the Guest user/license type in the drop down. Then make sure the “Turn Microsoft Teams on or off for all users of this type” is set to “On”.

2. SharePoint
A) Within O365 Admin Center navigate to Settings > Services & Add-ins >Sites
B) Select the first toggle switch so External Sharing indicates “On”

3. O365 Groups
A) Within O365 Admin Center navigate to Settings > Services & Add-ins >Sites
B) Make the second toggle switch “Let group owners add people outside the organization to groups” is set to “On”.

4. Azure Active Directory
A) Within the O365 Admin Center navigate to Admin > Azure AD > On the left pane select Users and Groups > Within the Users and Groups tab select User Settings. Scroll down to the External Users section. These preferences can vary based on your organization, but you will need to at least have the “Admins and users in the guest inviter role can invite.” If you would like regular non-admins to have the capability as well you would have “Members can invite” set to “Yes” as well.

Now that you’ve enabled Guest Access in each of these areas you should be ready to start testing this, right? WRONG… This will take some time to propagate throughout Azure AD and Microsoft informs admins that this can take anywhere from 2 to 24 hours before the changes go through completely. That being said, I would recommend giving this some time to bake in and then come back the following day to test this. After (anxiously or patiently) waiting for this to propagate within Azure AD now comes the fun part, adding a guest! You can do this by following the steps below:
- Open up your Microsoft Teams client
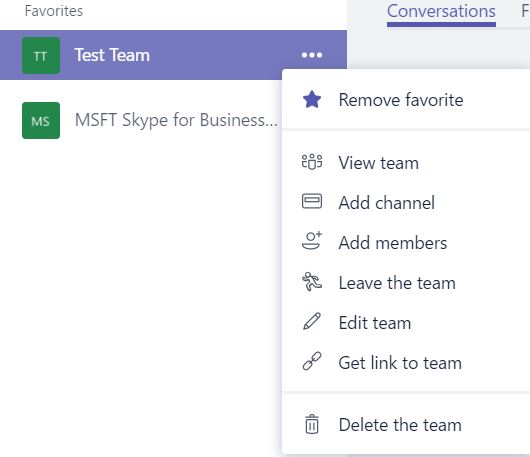
- Go to your Teams tab on the left hand side and select the team you want the user to have Guest Access to by Right clicking on the team name. For example, in the picture below I created a team call “Test Team” you will be presented with the option to “Add Members”. This will allow you to add members from inside and outside of your organization.
3. After selecting Add Members you will be prompted to enter the name, distribution list, or security group of the user you are wanting to add. In the example below I was logged into Teams on my test account and chose to add my Perficient account as a Guest. However, if I wanted to add someone within my organization I would add them here as well.
Note: You can see that Teams recognizes that the user I am adding is not part of the organization thus it asks to add the user as a “Guest”.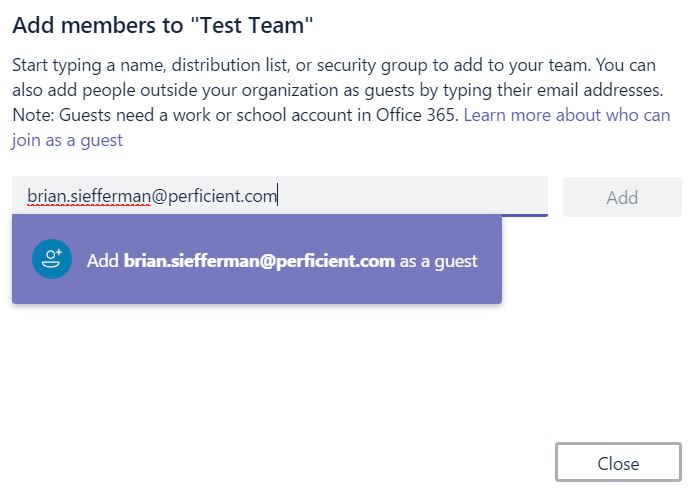
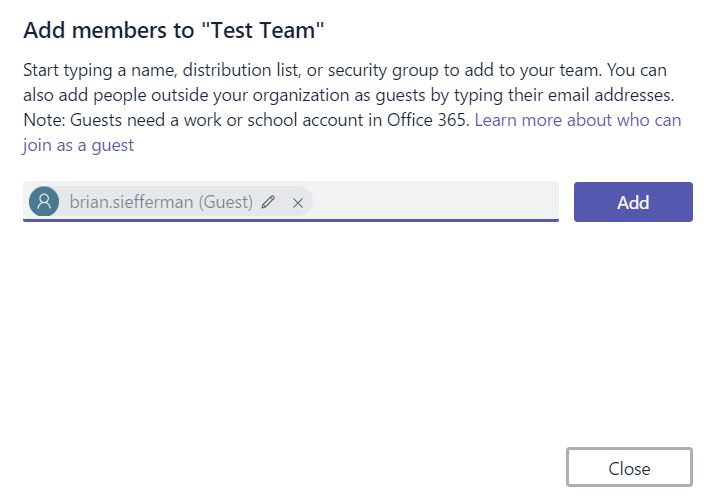
4. After you select the option to add the user as a guest you will notice that the “Add” button is now lit up. Once you have added all users that you want to have access to that given team you can select “Close”.
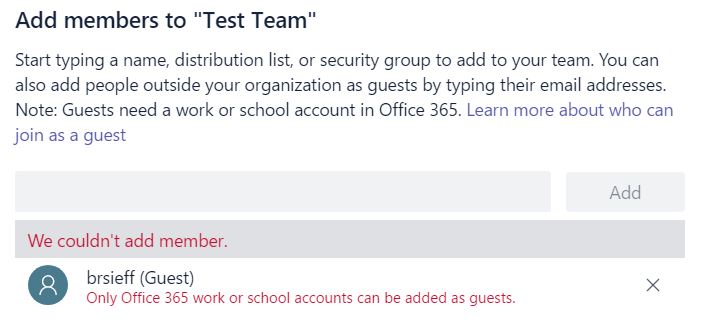
Note: As of the writing of this article guests need at least a work or school account in Office 365 in order to be added as guests. In the example below you will see what happens when you try to add an account that does not have either a school or work O365 account.
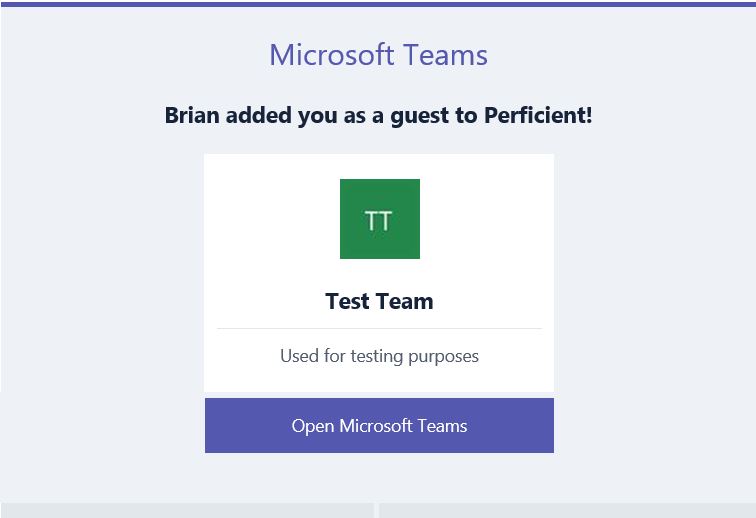
5. You have now successfully added a Guest to your Team! Congrats! That wasn’t so hard, right? On the guest’s end he/she will receive an e-mail stating that *Name* has added you as a guest to the team.
I hope this quick run through on where to enable Guest Access was helpful. As you can see there are multiple areas/services that must be looked act to ensure Teams works as intended. This is not to say that Microsoft won’t come out with an update in about a month that centralizes all of these areas to make it more admin friendly. However, in the meantime please use this as a guideline to get you on your way to adding guests in Microsoft Teams. Stay tuned for more Teams and Skype for Business content to come!
