
TestLink is an open source test management tool. It integrates both the requirements specification and the test specification. Both manual and automated executions of test cases will be supported by this tool. Selenium Webdriver is a web automation framework which executes tests on different browsers.
TestLink Installation:
1. Download XAMPP from the below link.
https://www.apachefriends.org/download.html
2. Upon successful installation, Tomcat will be started by default.
3. Start the Apache and MySQL services from XAMPP Control Panel.

4.Download the latest stable version of TestLink from the below link. Currently, the latest version of TestLink is 1.9.16.
https://sourceforge.net/projects/testlink/files/TestLink%201.9/
5.Extract TestLink and place it on XAMPP’s “htdocs” directory.
6.Hit the below URL in any browser.
http://localhost/phpmyadmin/
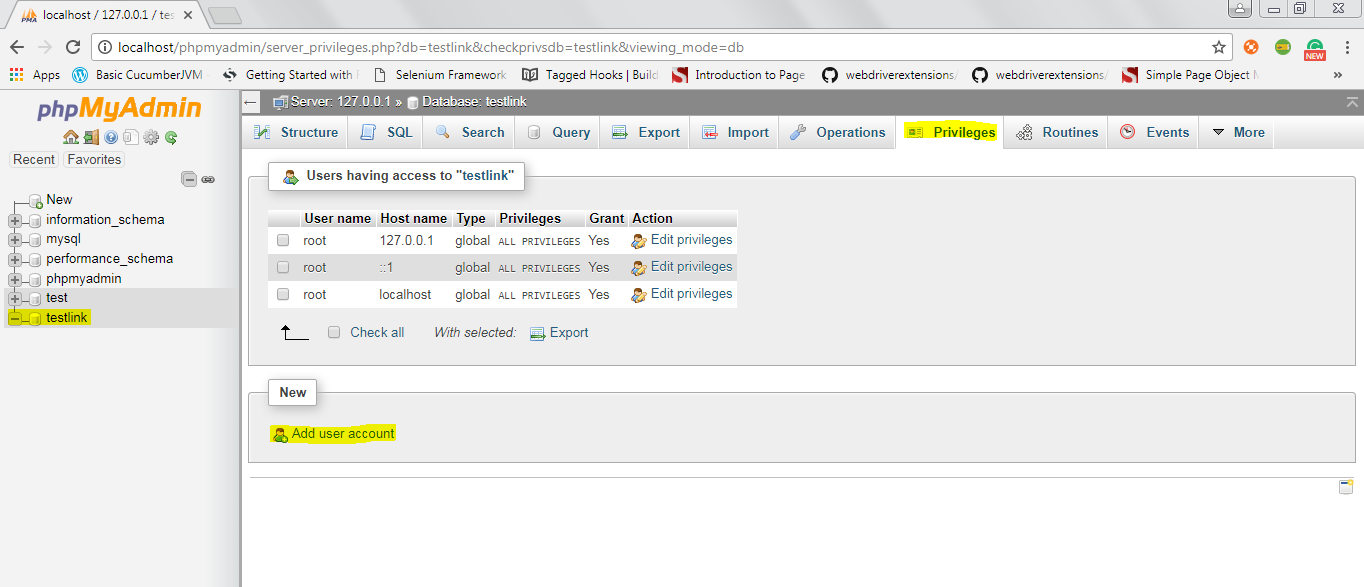
7.Create a new database called “testlink” from the database menu.
8.Add a user account from the “Privileges” tab under “More” options for “testlink” database.

9.Hit the below URL in any browser to open the testlink installation setup.
http://localhost/testlink-1.9.16/install/index.php

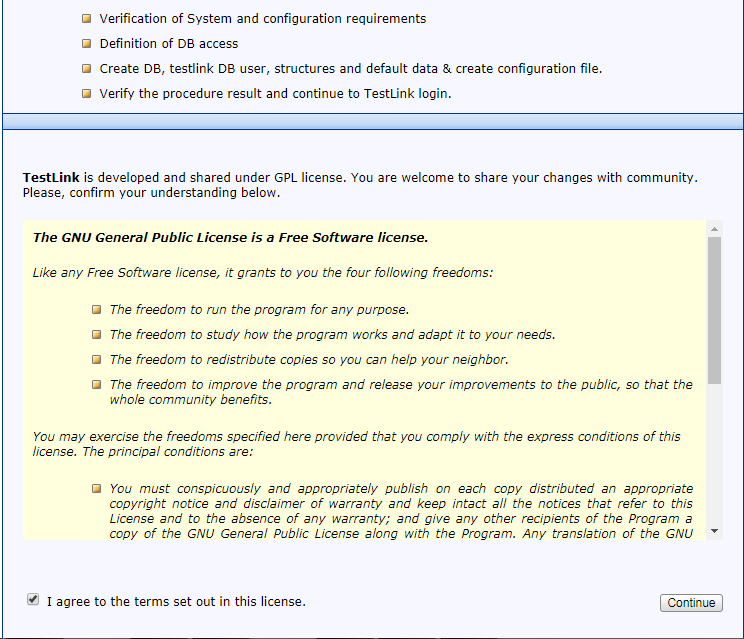
10.Check the “I agree to the terms set out in this license” checkbox and click “Continue” button.
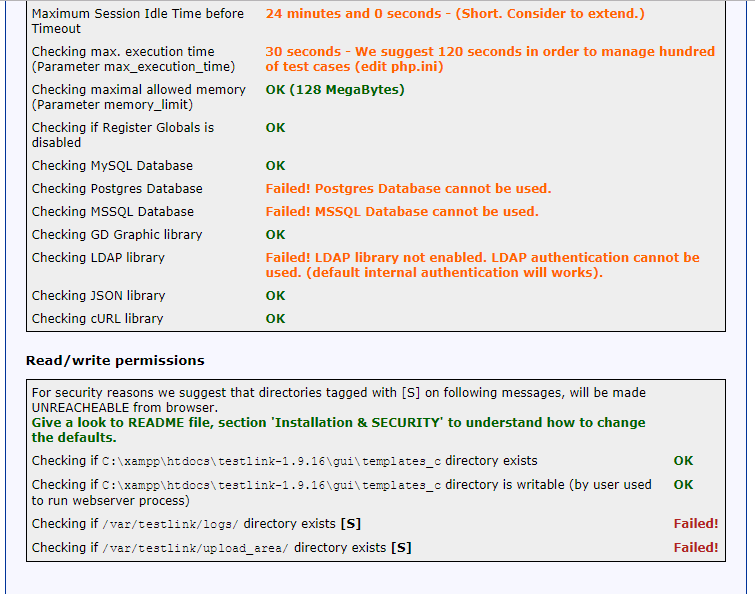
11.The below permissions will be failed.
12.Navigate to the testlink package and open the “config.inc.php” file.
13.Update the parameters as below
$tlCfg->log_path = ‘D:/xampp/htdocs/testlink-1.9.7/logs/’; (Path of testlink package)
$g_repositoryPath = ‘D:/xampp/htdocs/testlink-1.9.7/upload_area/’; (Path of testlink package)
14.Refresh the page and the above “failed” status will be resolved.

15.Click the “Continue” button.
16.Enter the Database name as “testlink”.
17.Enter the Database admin login and password as “admin”.
18.Enter your database username and password for “TestLink DB login and password”.

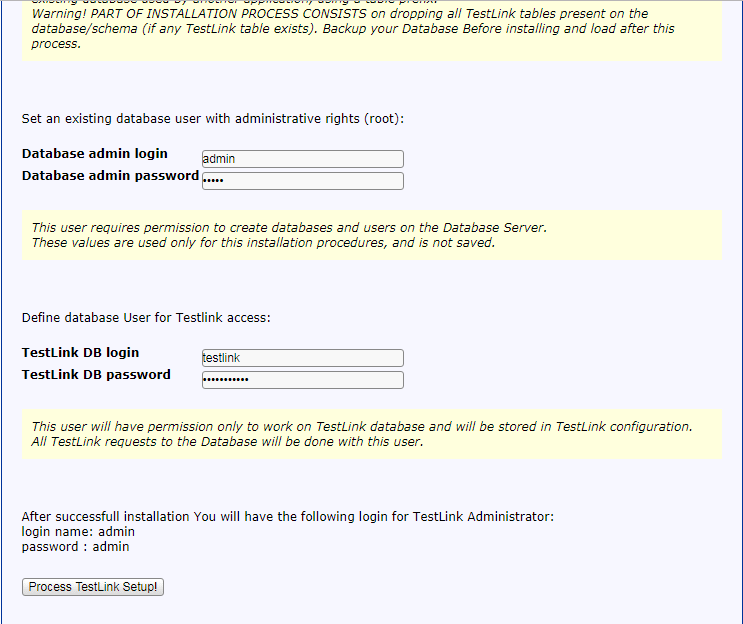
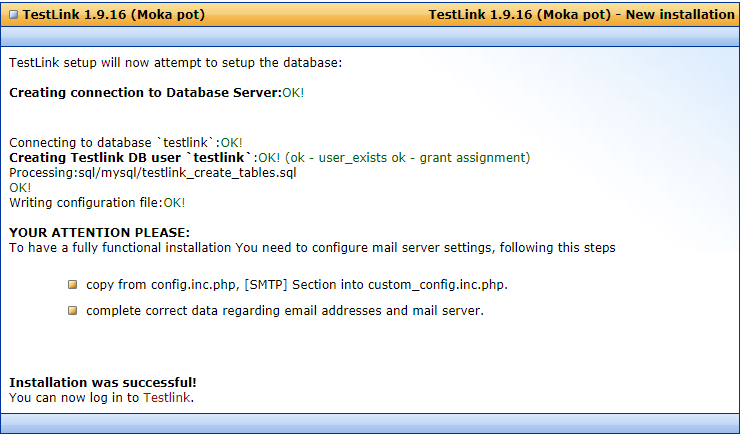
19.Click the “Process TestLink Setup!” button.
20.Once the installation is completed, the below window will be displayed.
TestLink Login:
1.Hit the below URL to login to TestLink.
http://localhost/testlink-1.9.16/
2.Enter the Login Name and Password as “admin” to login as admin.

3.Once you login to TestLink, it prompts to create a Test Project.
4.Create a Test Plan, Build, Test suite with Test cases by selecting the corresponding links from the Dashboard.
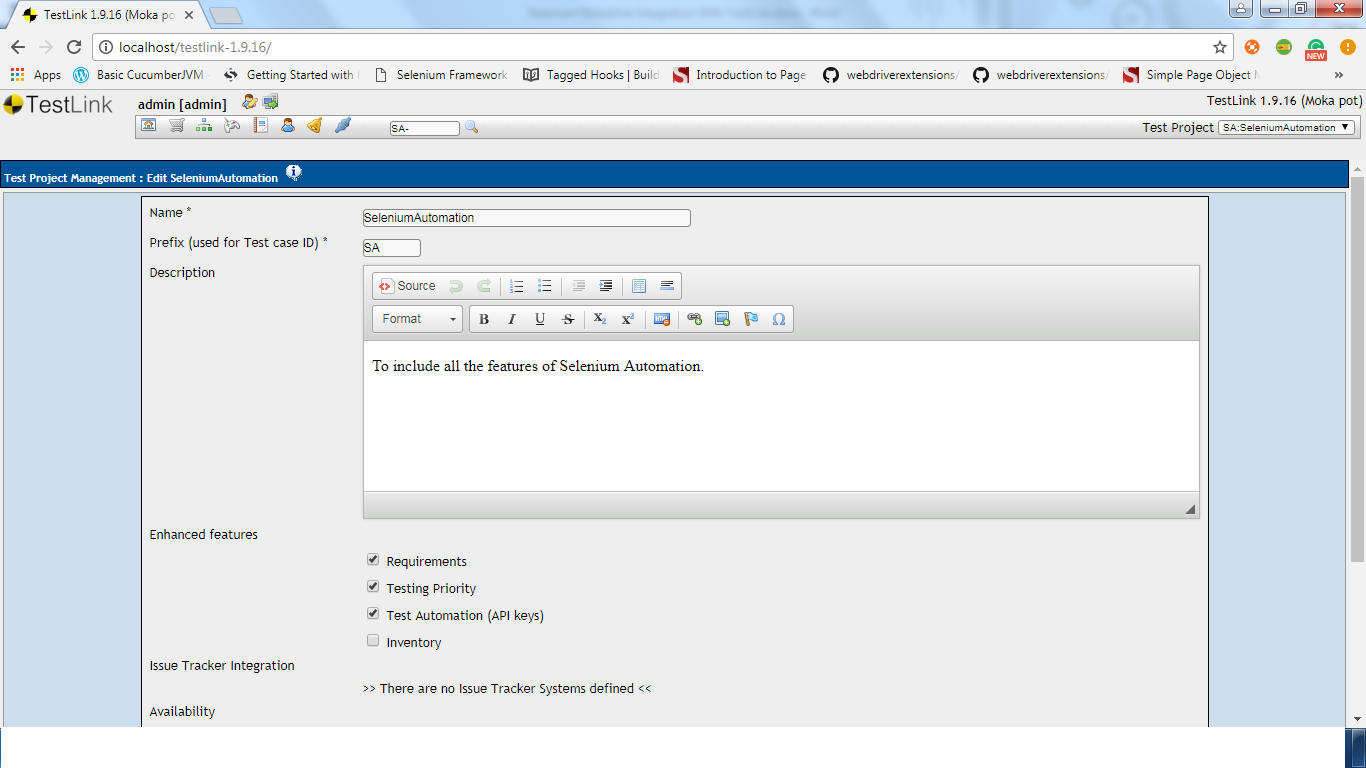
Test Project Creation:
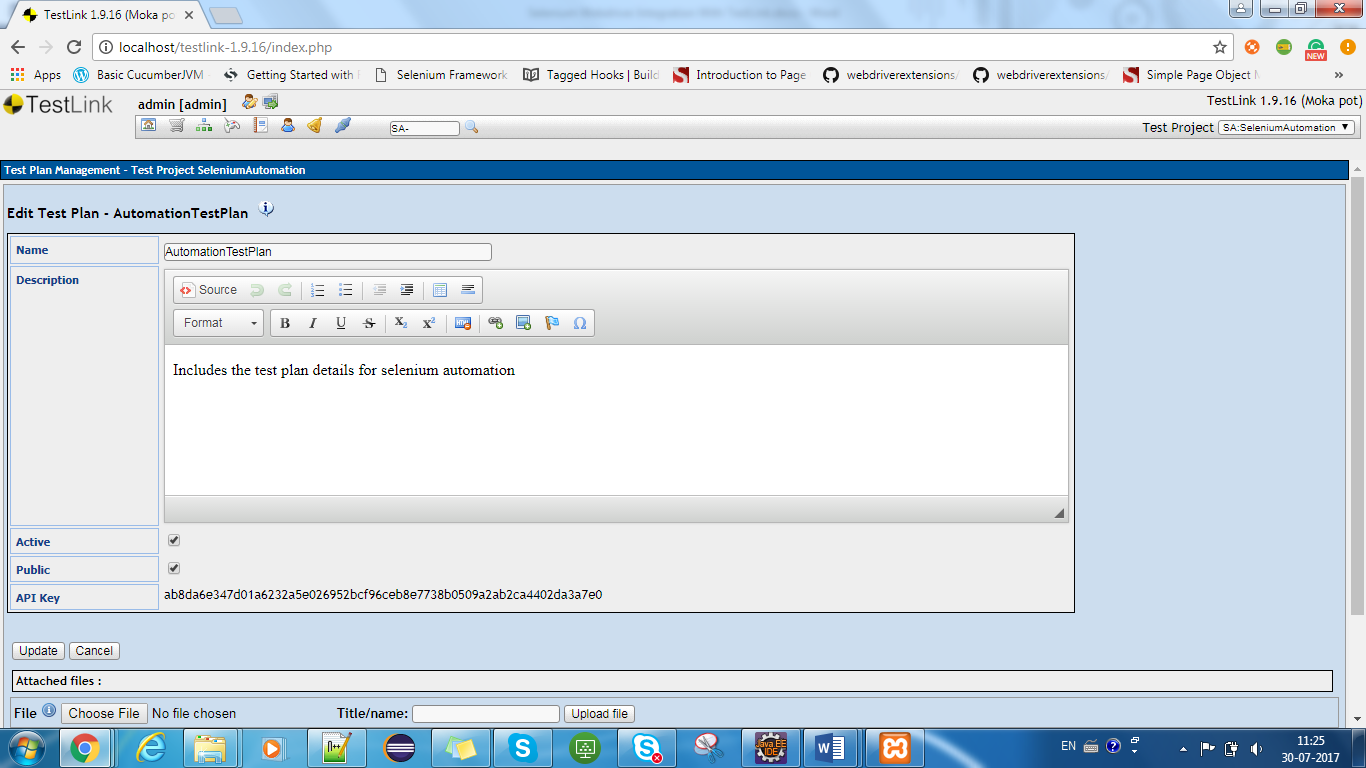
Test Plan Creation:
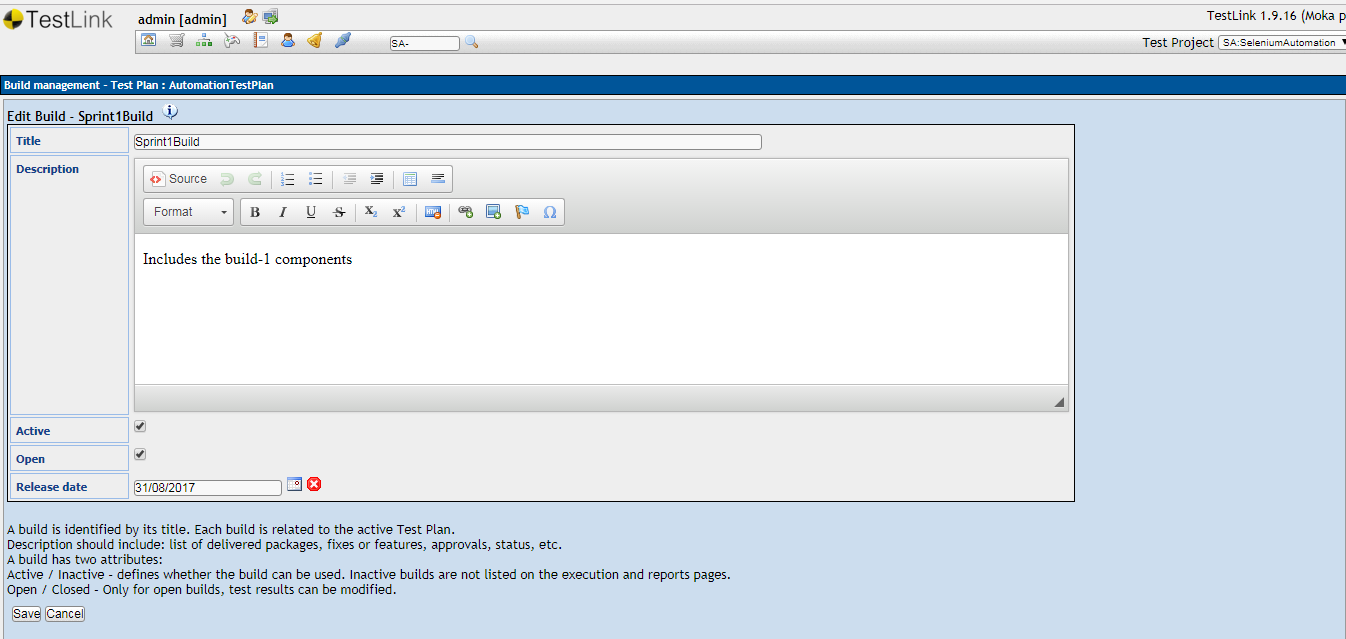
Build Creation:
Test Suite Creation:

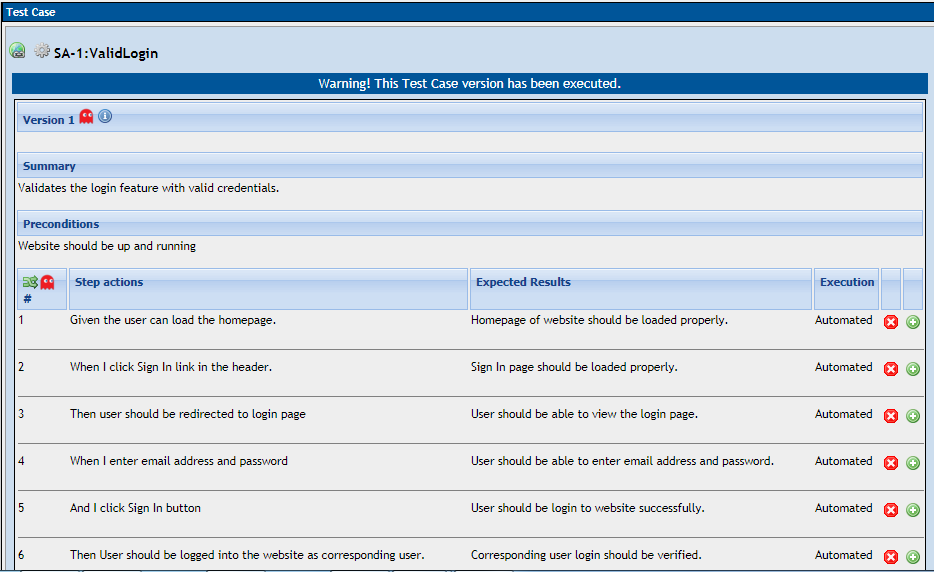
Test Case Creation:
API Key Generation and Execution Type Changes on TestLink:
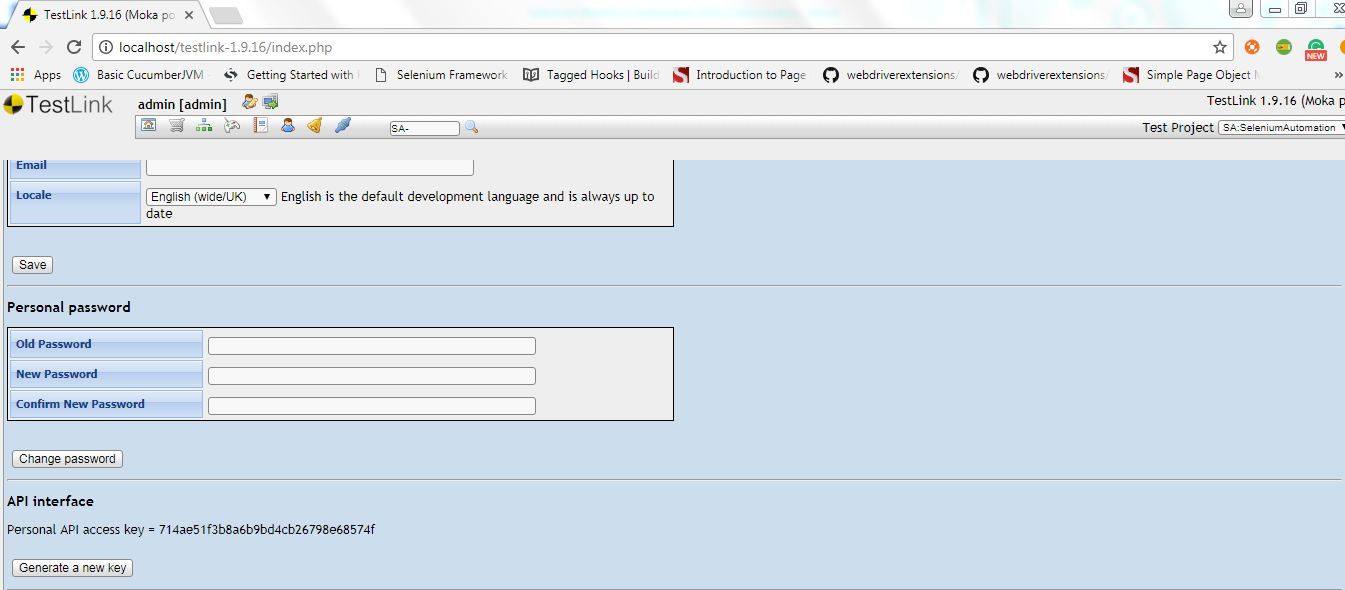
1.Generate the API Key on TestLink as below.
• Click the “My Settings” icon next to logout.
• Personal API access Key will be “none” under the “API Interface” section.
• Click “Generate a new key” button.
• Key will be generated from “Personal API access key”.
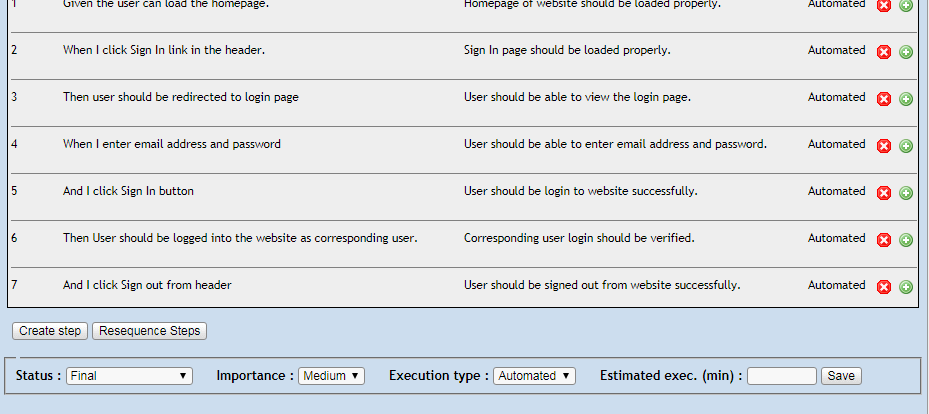
2. After generating a key, update the test execution status as “Automated” as below.
Selenium Webdriver Project Setup:
1.Create a Java project on eclipse and add the required libraries for Selenium.
2.Download the below JAR for TestLink Integration.
• testlink-api-client-2.0.jar
• ws-commons-util.jar
• xmlrpc-client-3.1.jar
• xmlrpc-common-3.1.jar
3.Add the above listed JARs as external JARs from Java Build path.
Integration of Selenium Webdriver test scripts with TestLink:
1.Make a note of the Testlink API Key, Testlink URL, Test project name, Test Plan name, Test case name and Build name created on Testlink. These details need to be used in our Java code.
2.Create a Java class to specify the TestLink integration details and method to update the test results on Testlink.
3.The below code snippet explains the testlink details.
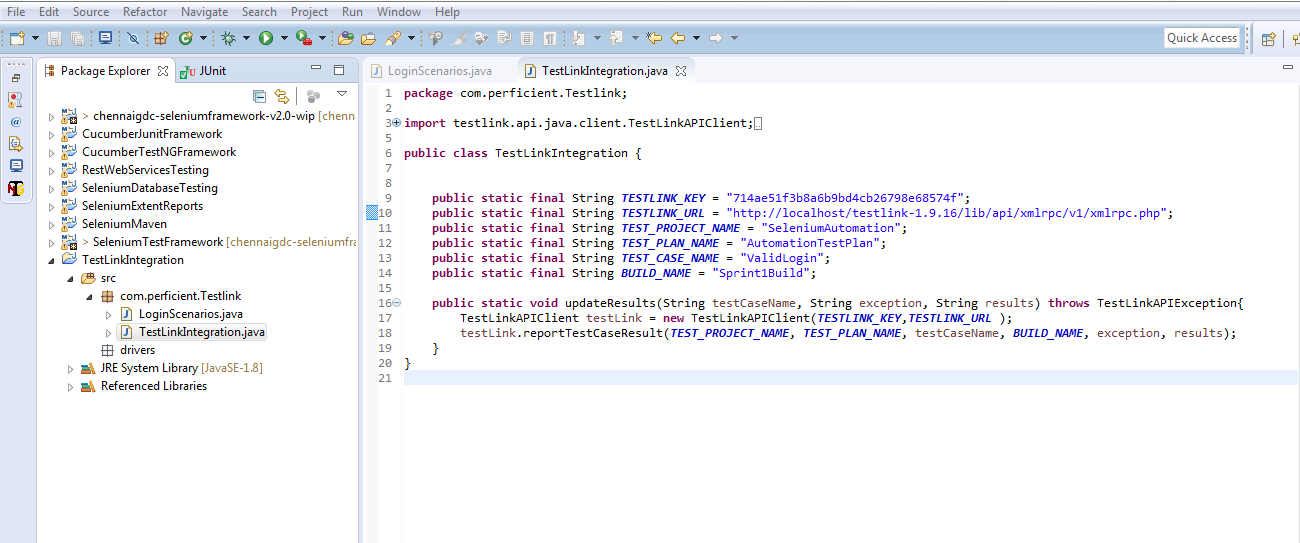
Using the UpdateResults method will update the automated test results based on the values passed for Test project name, Test plan name, Test Case name, build name, exception/notes and results.
Specify the Testlink URL as http://localhost/testlink-1.9.16/lib/api/xmlrpc/v1/xmlrpc.php if any error occurs while communicating with Testlink.
4.The below code snippet is the selenium webdriver test script to login to one of the e-commerce website. This is the automated test script for the above-specified test case on Testlink.


In the “Before” method, it includes the webdriver scripts to launch the chrome browser and open the Website.
In the Test method, it includes the webdriver scripts to login to the website and if any error occurs, the exception will be caught. In both cases, the test results will be passed to the “updateResults” method.
In the “After” method, it includes the webdriver scripts to close the browser.
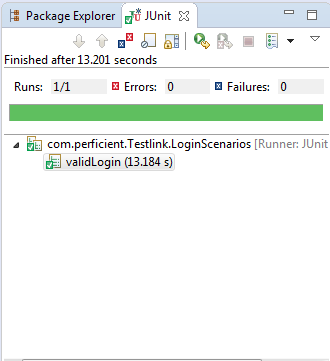
Execution of Webdriver Test scripts:
Run all the test scripts as Junit tests. Upon completion of the execution of tests, test results will be displayed on the Junit console and corresponding test results will be updated on Testlink as well.
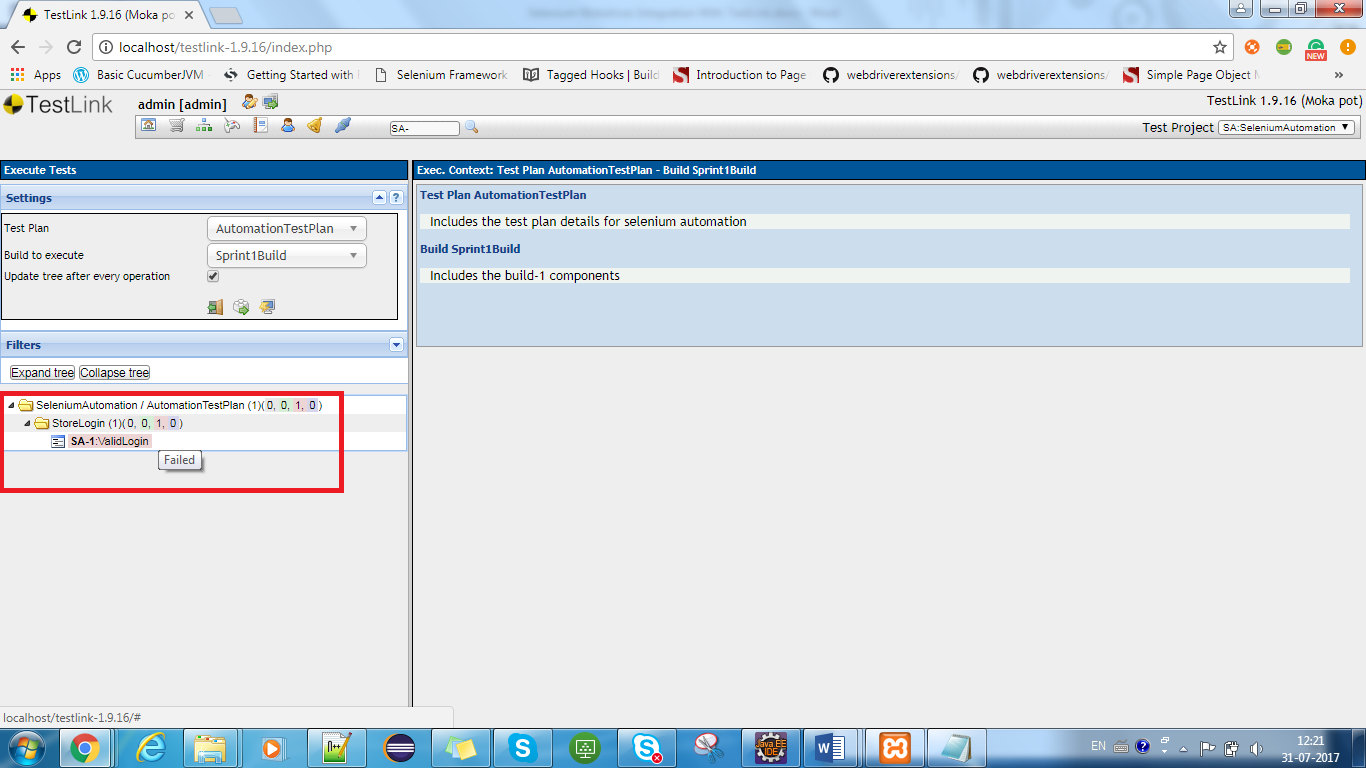
Test Execution Results update on TestLink:
Before execution, the test status will be “Not Run” on Testlink.
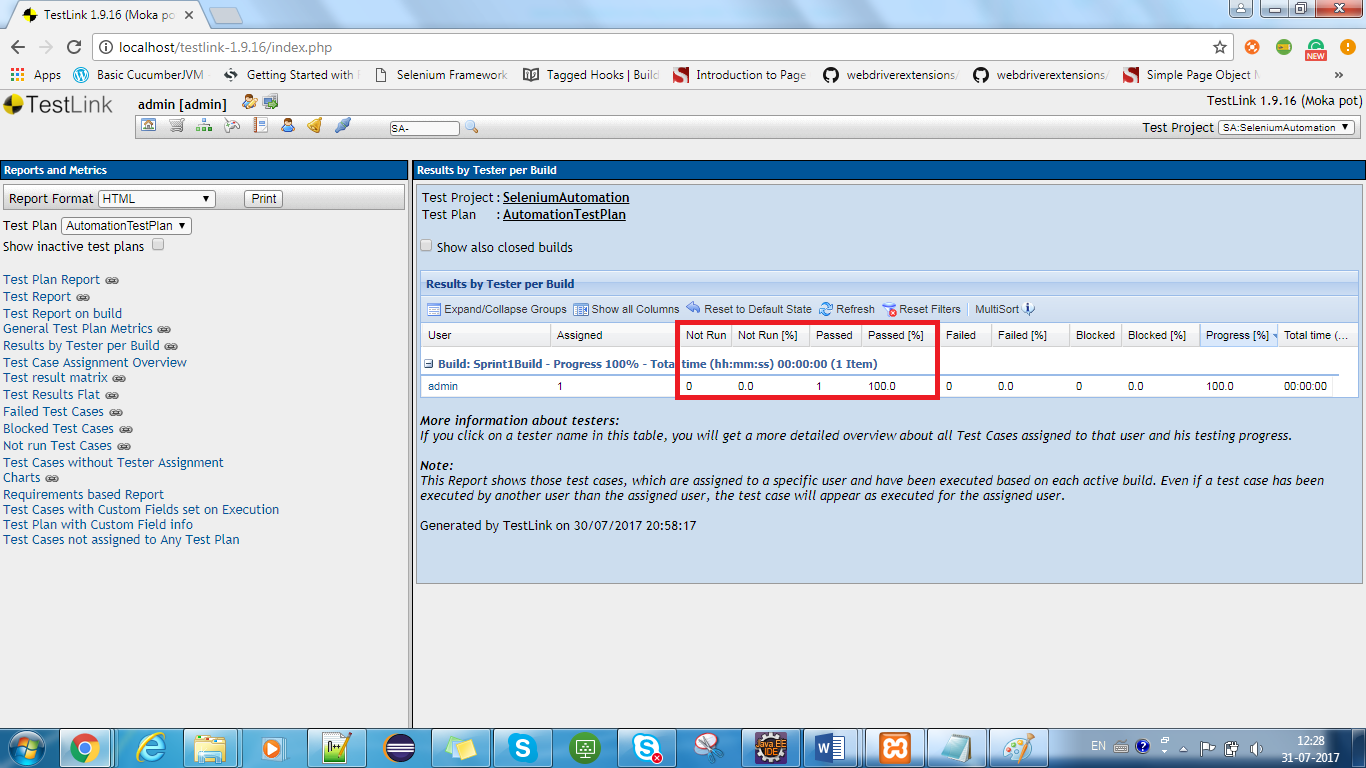
If the test case is passed, the status will be updated as “Passed”.

If the test case is failed, the status will be updated as “Failed”.
Test Report on Test link after execution:
Thanks for the post, it helped me to get the status updated in Testlink using selenium. Only issue I see is it takes a lot of time to update the status in Testlink. I have nearly 300 cases and it takes almost 3 to 4 hours to update the status.
Is there a quick soltuion to this, please let me know.