Get an API Key for Google Map
Before all our work, we first have to apply an API key for Google Maps.
- What is an API key?
An API KEY can be regarded as a kind of authorization mode for interface access.
- How do you get an API key for the Google Maps API?
Google provides developers with an official web page to get an API key with their Google account. You can find that link below:
https://developers.google.com/maps/documentation/android-api/
On the top right of the page, click the “Get a key” button and select “Maps” for the usage of the API key. You will then get your API key for Google maps.
Create Google Maps Project
1.Download and install Android Studio
As an Android project, developers need to download and install Android Studio as the Android development IDE on PC or Mac. For this Google Maps project, you can keep all the configurations as default.
2.Install Google Play Serve SDK
Google Play Service is required for the Google Map API. We can add the feature via SDK manager (as in the picture below).
3.Create Google Maps Project
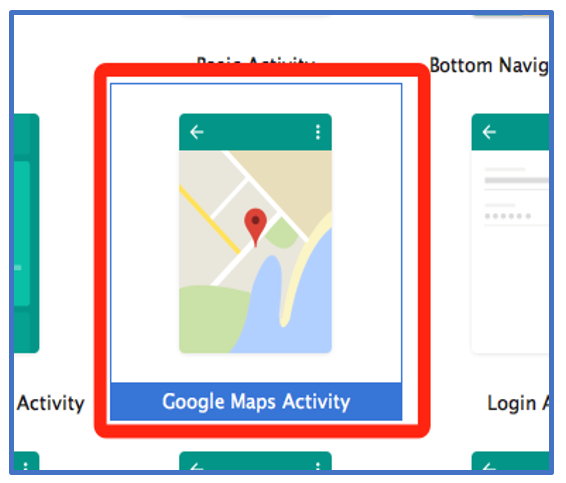
Now we have met all the requirements needed to build an Android application with Google Maps. Next we are going to create an Android project in Android Studio. We can choose the “Google Maps Activity” when we create the project. We can also add Google Maps activity whenever we want.
4.Apply the Google Maps Key in our Project
The API key should be added into an XML configuration file. We first go to the manifest, and find this code:
Follow the link “@string/google_maps_key” to “google_maps_api.xml“, and add your KEY in the string part
5.Add permissions
Up to now, if we build and run the project, we will still not be able to see Google Maps on the screen. Before our development, we also need to add at permissions, at least for internet and locations for this project. We can add them in the “Manifest.xml” file.
Now we can see a map loaded in the screen (as the picture below). Tip: we may need VPN access for Google services.
Enable my current location
In the high Android API level, to enable current location, we also need to let the system pop up a message to ask for permission.
Users need to confirm the use their location the first time they open the application. After that, a position button will be shown on the top right of the screen.
Mock location data in Android Studio simulator
In Android Studio, simulators are not able to support the current location. In this case, we need to mutually send the location data to simulators. Android Studio provides a UI interface to do the operation.
As we send the costumed location latitude and longitude to the simulator and click the location button, it is displayed as our current location(mocked).
Set markers in Google Map
Markers will be displayed only after the map has loaded, so we need to implement our codes into “OnMapLoaded” method:
- Create a new position(s) with longitude and latitude

- Add these positions as markers to Google Maps

- Move camera to marker(s)


Get path/route data from Google
Google services provides us with a very strong API for calling. Based on that, we will also be able to display route or even navigation information in our costumed Google Map application. To get route information, developers need to get another Google Map Destination API Key to access the JSON data from Google Direction Service.
- Get an API key.
This is the same process you used to get a Google Map API key, just link to the address:
https://developers.google.com/maps/documentation/directions/
click the “Get a Key”, button, and just repeat the previous steps.
- Access Google Direction and get the data from the service.
Now we are able to make a network request to get JSON data from the server. And the base API consists of these parts:
- Base URL
As most of the API, the base URL will almost never be changed or modified when we are calling data from the servers, for now, the base URL is:
https://maps.googleapis.com/maps/api/directions/
- Data format
This part of the the address(pattern) will determine what kind of data file format we will get from the server. Google Direction Services provided us JSON and XML. Here we choose the JSON format.
- Parameters
Parameters contain 2 parts: origin location and destination location. Both of these 2 are required for calling. The format is
?origin=xxx&destination=xxx
- API key
The last part of the address is the API key:
&key=xxxxxxxxxxxx
So, the entire address for calling should look like this:
- Request data from server and parse JSON data to local module class
This is the last step, developers can choose third-party libraries to load data. Here we choose Retrofit:


