
Intro:
Can you imagine how people with visual impairments use their Apple devices without the help from a sighted person?
Apple provides an amazing accessibility feature in iOS called Voiceover, which makes the iPhone easier to operate for the blind and sight impaired.
To make a long story short, Voiceover is capable of describing an app’s UI element and assisting the user in accessing the views and controls.
It is a technology about screen-reading, which is one of Apple’s patents for invention. It acts as an intermediary between the user’s touch and an application’s user interface, and it gives an audible description of the user interface elements and actions in the application.
All of this makes it possible for the visually impaired to have control over their devices without having to see the screen.
How does Voiceover work?
At the very beginning we need to turn the voiceover ability on in our system setting, via the path:
Settings > General > Accessibility > Voiceover.
And one more tip, on the Accessibility page, scroll down to the bottom, and tap Accessibility Shortcut, and then click Voiceover. Now you can toggle Voiceover on or off whenever you triple-click the Home button on your iOS device.
Voiceover changes the gestures in iOS in order to make it easier for the visually impaired individual to know what they are tapping on before they actually select it. Here are some of the most common gestures:
- Single-tap anywhere on the screen and iOS will read all the texts inside the field you tapped.
- Double-tap on an item is to activate the selection
- Three fingers to scroll through a page. You have to use three fingers under the Voiceover mode so that the iOS doesn’t misread a tap as a scroll.
For more gestures you can refer to this link.
A live Example:

Make your app accessible
Now that your Voiceover is enabled, we are going to use one of our GDC Mobile apps—ITWAREHOUSE as an example. Go to the main screen and tap the itWareHouse app icon, you will find a thin black line around it, and you will hear the icon name.

Then, double tap the screen to go inside the itWareHouse app.
Now we will use a developer tool called: Accessibility Inspector. It will help you run your app and find common accessibility issue, and it will also help you to check the accessibility attributes of UI elements.
In the Xcode menu, navigate to Xcode\Open Developer Tool\Accessibility Inspector.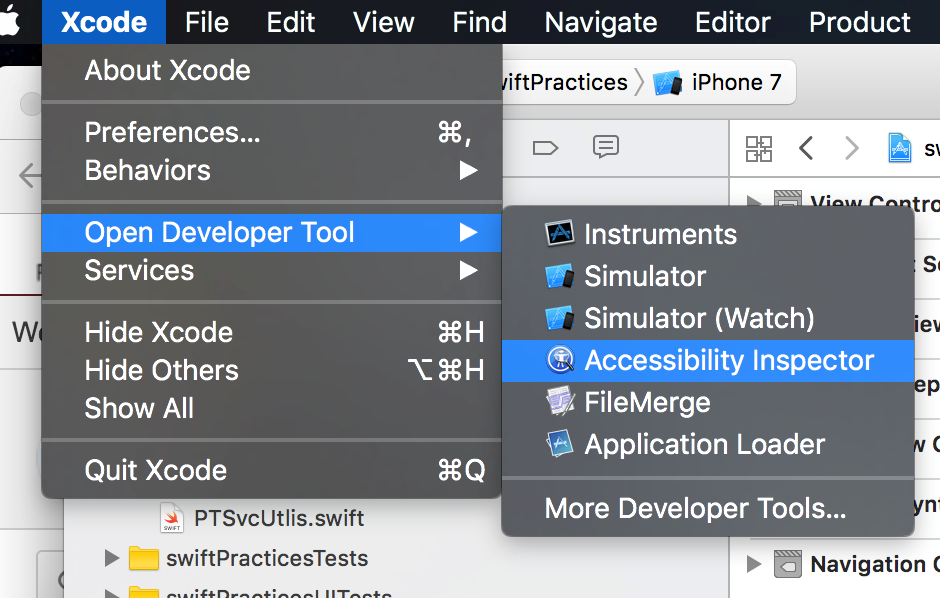
Once you open it, it may look like this:
In the upper left corner you can switch your target, like so:
and in the upper right part, we have Inspection Pointer, Inspection Detail, Audit, and a Settings button successively.
Use the Inspection Pointer to click on the target screen, which is similar to enabling Voiceover on your device. When you activate the pointer, you can hover over any UI element to check its attributes.
As an example, now we are going to use the Inspection pointer to check one app page inside our GDC app.
When we click the user avatar we found that the whole screen turned green like the below screen shot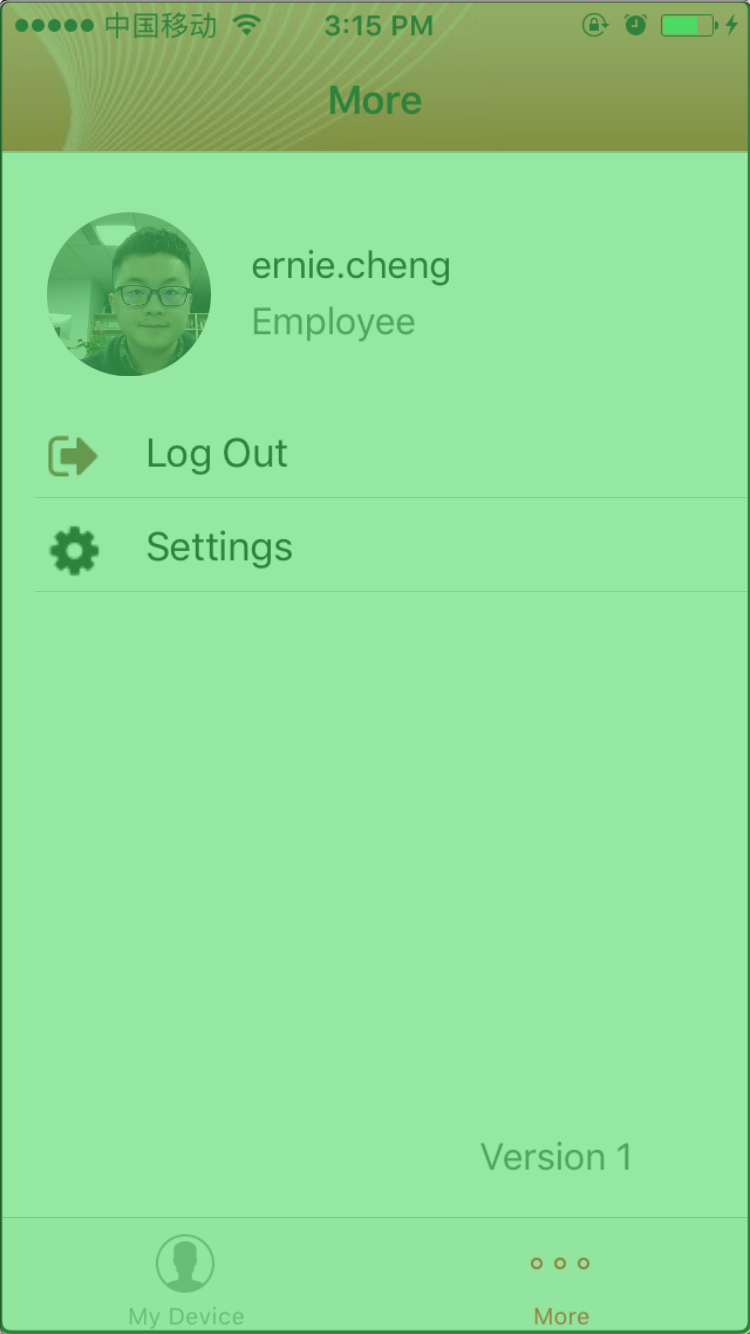
This means that the user avatar element is not detected by the voiceover, thus, in the very first step, we need to use the swift code to let the user avatar element to be detectable.
Then we hit the run and inspect the avatar image again, now we get the result like this:
Now the avatar image label is detected by the voiceover. Now when we look at what is showing in our Accessibility Inspector, we see this: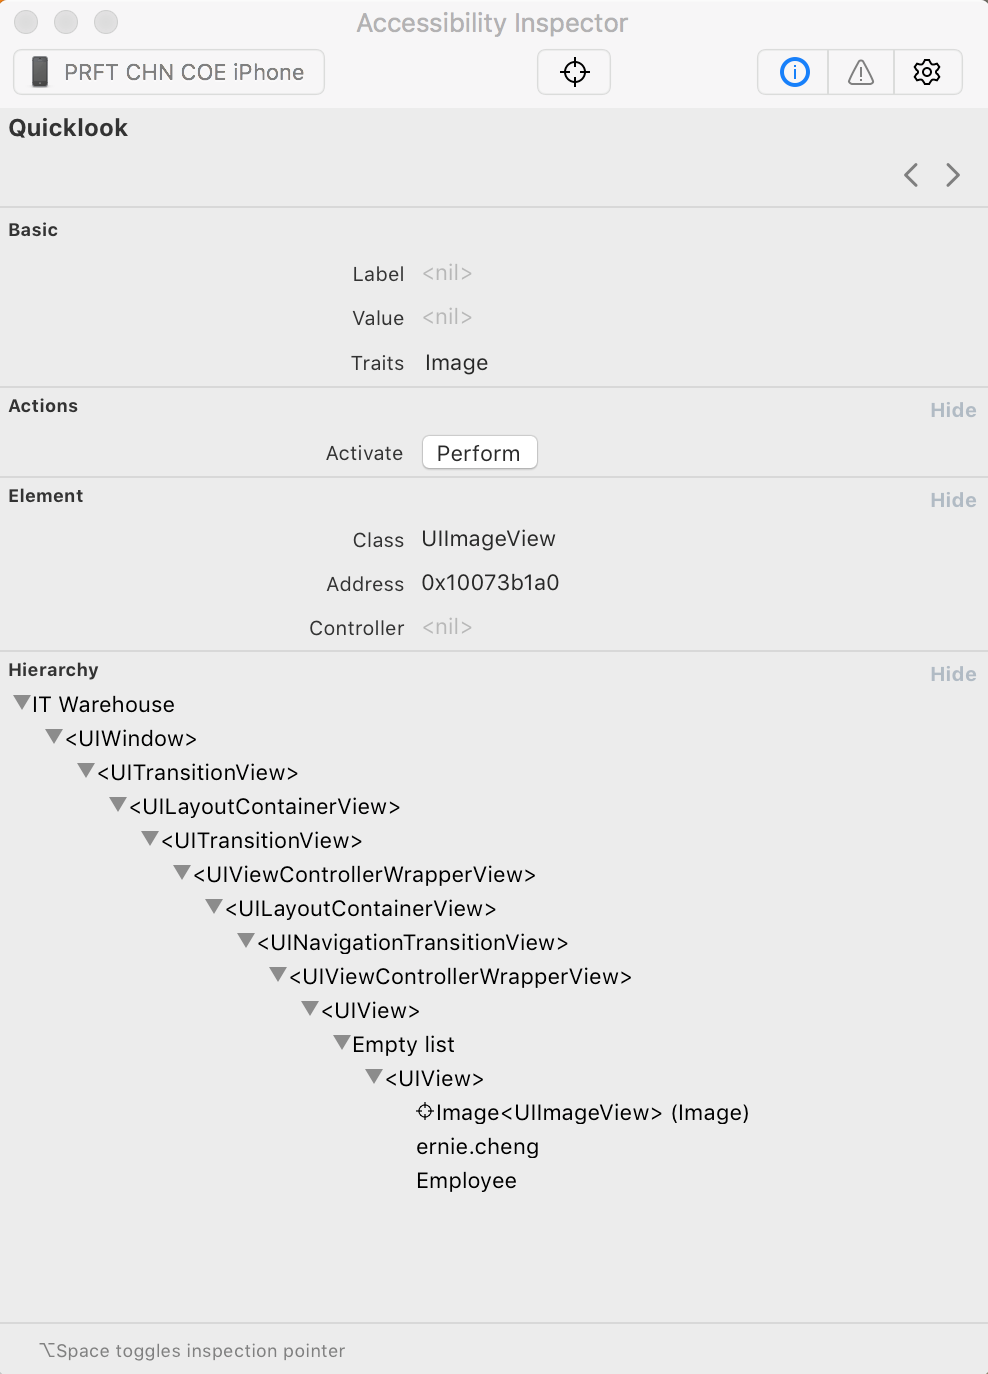
The Inspection Detail pane has everything you need to review and interact with the accessibility attributes in your app:
- Basic: Displays the attribute properties for the currently highlighted element.
- Actions: Lets you perform actions, such as tapping a button or scrolling the view. Pressing the Perform button in this pane will perform the action on your target.
- Element: Displays the Class, Address, and Controller of the current item. As of this writing, it doesn’t seem to work consistently.
- Hierarchy: Displays the view hierarchy for the element, making it easier to understand complex view hierarchies.
By the result in the Inspection Detail pane, we can see that the Label and Value accessibility is nil, this means that the voiceover can detect this label, however, it won’t read anything for the user, so the user experience is definitely unfriendly so we are going to adjust our code inside the view Did Load method a bit:
Now hit the run button inside our Xcode, and use voiceover to detect the image avatar label again, we find out that now the voiceover will supply enough useful info for the visually impaired individual.
In this iOS accessibility tutorial, we learned about voiceover, and how to use accessibility inspector to detect user interface element, and check the accessibility attribute, and use swift3 to supply accurate and helpful attribute info to the visually impaired individual. Hope it’s useful for you guys, thanks for reading!