
I recently wrote a blog post describing the process to create and download Oracle PBCS application SnapShots to local disks. Now I’m sharing a step-by-step look at the process of importing an application onto PBCS.
In this article, I will describe how to remotely execute predefined commands to upload files and migrated Artifacts SnapShot. To begin, an overview of each EPMAUTOMATE commands that were used to complete the process:
EPM Automate commands:
Uploads a file from local computer to the services instance. Use this command to upload files containing data, metadata, rules definitions, dimensions definitions mapped transactions, template and backup snapshots
epmautomate uploadfile “FILE_NAME” [DATA_MANAGEMENT_FOLDER | profitinbox]
Procedure
In this scenario, you run a sequence of commands
Step 1 – Upload SnapShot via command line
Log in to stablish a session

Step 2 – SnapShot File location
Copy the file to EPMAUTOMATE installed directory
X:\Oracle\EPM Automate\bin


Step 3 – Upload file to PBCS inbox
Epmautomate uploadfile LCMEXPORT.zip

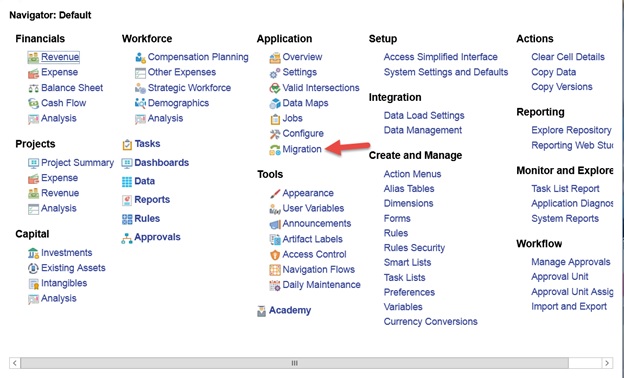
Step – 4 Log in to PBCS
Select Migration
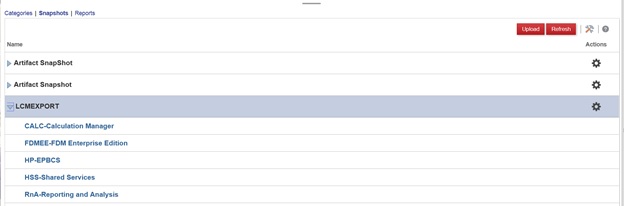
Select Snapshot

Expand LCMEXPORT
In this step you can select the different artifacts that you can import back to the application
Right click on the icon on the far right of the file name
Select import
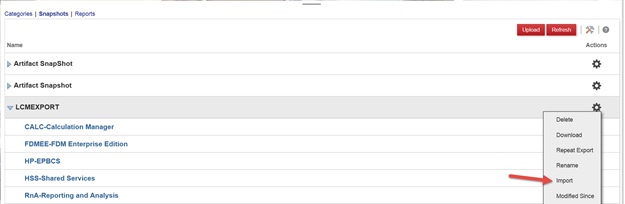
Select Ok to start import

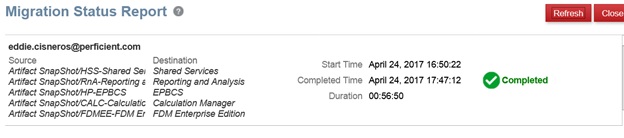
This report provides status on the migration process and information of each step

Successfully completed
In addition to restoring SnapShot, you can also restore PBCS instances, which I will cover in a future blog post.