It’s little tricky when it comes to creating Custom Task Outcomes using Visual Studio as there are quite a few steps to keep in mind in order to successfully build your workflow project.
I have hit quite the same road blocks as many developers across the forum are now facing. So in this walk through, I will share my experiences and necessary actions to implement when you run into such issues.
Assume that you have to create a custom Time Off Request form/list where when a user submits a request and initiates the list workflow, the manager is notified and will be assigned a task to either “Approve PTO” or “Deny PTO”. [“Approve PTO” and “Deny PTO” are the custom task outcomes associated to the task].
In this code walk through, much of the emphasis will be around creating workflow with custom task outcomes. I assume you know how to create SharePoint Hosted Add-Ins and add custom lists, etc. In this demo, I’m going to cover the following:
- Create Site Column with data type “OutcomeChoice”
- Create custom content type based on Workflow Tasks (SharePoint 2013)
- Add the Content Type Binding in the WorkflowTaskList.
- Remove default Taskoutcomes (Approved & Rejected)
Step 1: Create Custom Site Column of type “OutcomeChoice”
Assuming that you have created a SharePoint Add-In and created a custom list -“TimeOffRequestList” (as in this example), we have to add a new Site Column item to store custom task outcomes.

Edit the site column’s Elements.xml to change the data type to “OutcomeChoice“. OutcomeChoice is based on the Choice field type so here we are going to add few <CHOICE> attributes which will allow the manager select one of these choices on the task form. Also, remove “Required” attribute as it is not necessary since these CHOICE fields are nothing but buttons on the task form.

Step 2: Create Custom Content Type based on Workflow Task (SharePoint 2013)
Please note that in SharePoint 2013, Microsoft introduced a new content type for Workflow related task list called “Workflow Task (SharePoint 2013)“. It’s ID is 0x0108003365C4474CAE8C42BCE396314E88E51F which is inherited from its parent Tasks of content type 0X0108 and indicates that these special content types are used only for workflow.

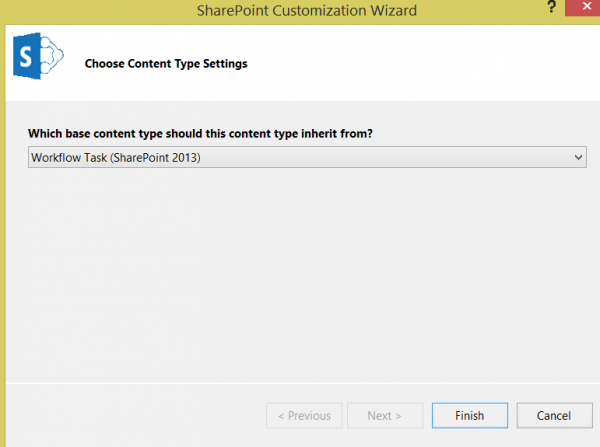
Choose the content type to be Workflow Task (SharePoint 2013).
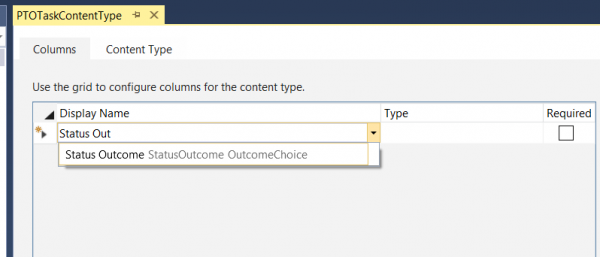
Add the OutcomeChoice field that we created in the previous step.
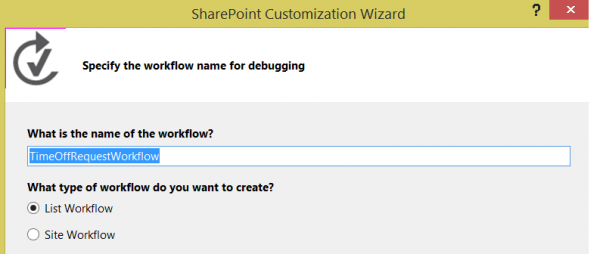
Now it’s time to add a new List based workflow to the Time Off Request list.

For this example, we are selecting List Workflow to our custom Time Off Request list.
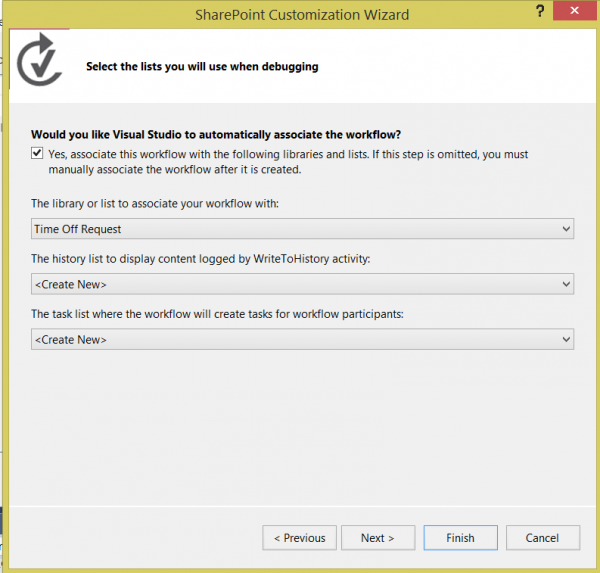
We are telling Visual Studio to dynamically create Workflow History List and Workflow Task List for us.
You can also specify the ways to instantiate your workflow. In this demo, we selected the user to manually kick off the workflow.
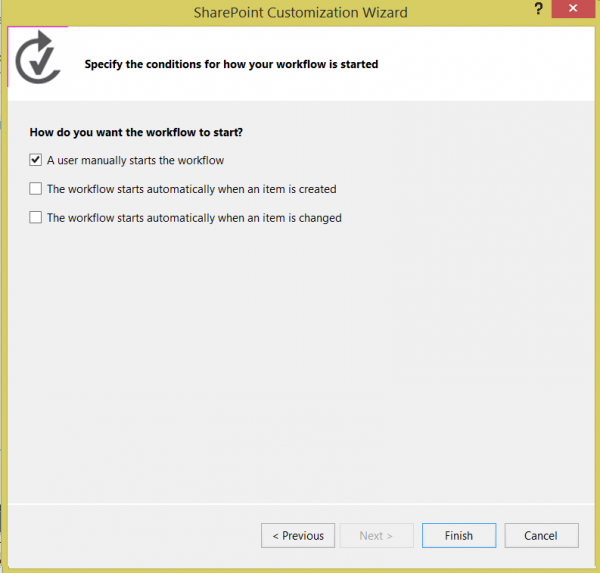
Once done, open the Workflow.xaml file and start designing your workflow.
To begin with, I would want to store the current item properties in some variables so it can be later used when assigning a task to my manager.
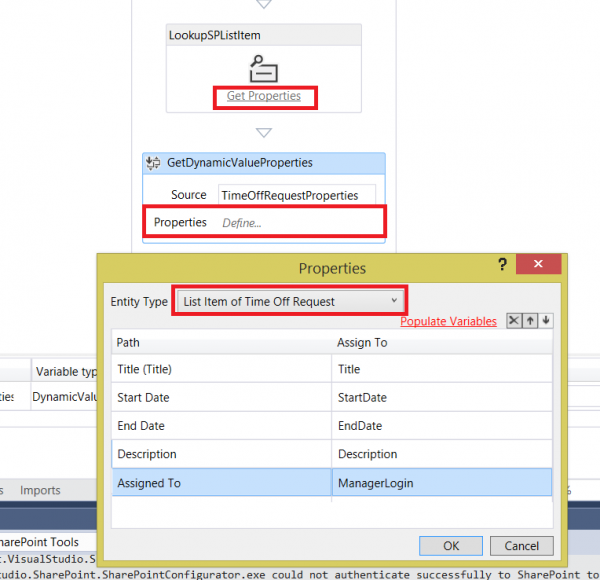
So, I dragged and dropped the LookupSPListItem to the “Sequence”, in order to store the current list item properties to a dynamic variable called TimeOffRequestProperties which will be later used in the Single Task of Body field.

As mentioned, I created a new dynamic variable called “TimeOffRequestProperties” to store the current list item details.


Click on “Get Properties” and define which item properties (fields) you want to select that will be used in the workflow later. Since you are retrieving it from the custom Time Off Request, make sure to select that entity type. Once you choose the required item properties in the “Path” column, you can also let Visual Studio create and assign variables by clicking on “Populate Variables“.
Next, we would drag & drop Single Task to the workflow sequence.

Click Configure to configure the Task form.
Fill out the necessary details to the below Task form and select the Task Content Type to the custom task content type that we created before. Once you select the custom task content type, you can choose the custom outcome field.

Now, you can build the project and run it.
Create an item, manually start the workflow.

Click on Properties –> Workflow. In order to start the workflow, click on the workflow which is associated to the list.

After you start the workflow, you will see that the workflow got Suspended. Many of you might have encountered this issue.

System.ArgumentException: ContentTypeId at Microsoft.Activities.Hosting.Runtime.Subroutine.SubroutineChild.Execute error
RequestorId: 842d9357-b3ed-1c23-0000-000000000000.
Details: An unhandled exception occurred during the execution of the workflow instance.
Exception details: System.ArgumentException: ContentTypeId at Microsoft.Activities.Hosting.Runtime.Subroutine.SubroutineChild.Execute(CodeActivityContext context)
 at System.Activities.CodeActivity.InternalExecute(ActivityInstance instance, ActivityExecutor executor, BookmarkManager bookmarkManager)
 at System.Activities.Runtime.ActivityExecutor.ExecuteActivityWorkItem.ExecuteBody(ActivityExecutor executor, BookmarkManager bookmarkManager, Location resultLocation)
 Exception from activity Throw If Sequence Microsoft.SharePoint.WorkflowServices.Activities.OperatingWebContextScope Microsoft.SharePoint.WorkflowServices.Activities.SingleTask ...
Step 3: Add <CustomContentTypeBinding> for the new custom “Workflow Task (SharePoint 2013)” content type
The reason behind the above error is that your existing WorkflowTaskList has no idea of the new custom content type. So in order to fix that, you would have to add a <ContentTypeBinding> that represents the custom Content Type based on “Workflow Task (SharePoint 2013)” that you created above, which is “PTOTaskContentType” in this example.
So in this case, I did a copy & paste of the default WorkflowTaskList <ContentTypeBinding> and then edit only the ContentTypeId pointing to the new custom Content Type (PTOTaskCustomType). You will get the custom content type ID by going “PTOTaskContentType” –> Elements.xml.

So after you build and run the list workflow, it works fine. However when the manager opens a task item, he/she would see the default “Approved”, “Rejected” out of the box outcomes. This doesn’t make sense in this scenario.
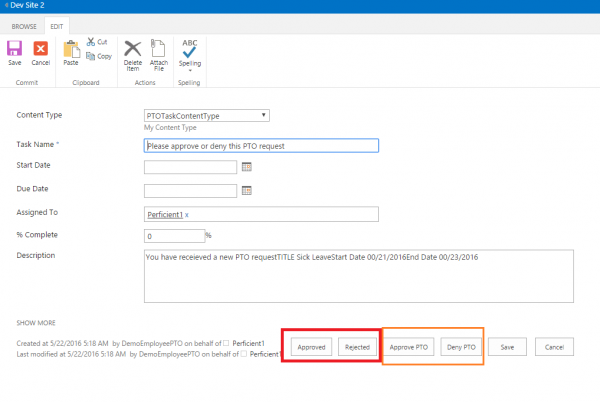
Step 4: Remove OOTB Taskoutcome fields – “Approved” and “Rejected”
Since our custom content type is being inherited from Workflow Task (SharePoint 2013) Content Type, it also inherits a default “Taskoutcome” field which are nothing but Approved and Rejected choices. There are couple of ways to fix this issue:
Fix 1: Remove the default Taskoutcome field (Approved & Rejeted) explicitly
In order to fix this, first we have to make changes to the custom content type’s (PTOTaskContentType) Elements.xml file of your custom content type and remove the “TaskOutcome” field reference explicitly.
<RemoveFieldRef ID="{55B29417-1042-47F0-9DFF-CE8156667F96}" Name="TaskOutcome" />
After this, you need to have only one ContentTypeBinding in your Workflow Task List pointing to your custom content type. Open the Elements.xml file for the Workflow Task List and change the <ContentTypeBinding> element’s ContentTypeId attribute to match the custom task content type ID.
Fix 2: Convert Workflow Task (SharePoint 2013) to a Task Content Type
One caveat to the above approach (Fix 1) is that you end up creating different workflow task list for each type of task that you create. This becomes messy if you are building a complex workflow with different types of tasks. So in this approach, we would essentially convert the Workflow Task to a Task Content
In order to convert a “Workflow Task (SharePoint 2013)” to a regular “Task” content type, one easy way is to just delete the part of the ID succeeding 0X108, i.e. 0x0108003365C4474CAE8C42BCE396314E88E51F and this becomes your Task content type. Ensure that the resulting content type ID is same in both <ContentTypeBinding> xml and the custom content type’s Elements.xml file as shown in the below screens.

Note that there is another field called WorkflowInstanceId that the SharePoint 2013 Workflow List content type has. We have to add this field to your custom content type.
<FieldRef ID="{1F30D200-0D4E-4C8A-A7EB-2E49815BF2BE}" Name="WorkflowInstanceId" />

There is one more place that we need to make changes, i.e. to your list workflow. Your list workflow is still pointing to the old custom content type ID and in order to change this, we can open the workflow,xaml file as XML.

Go to the Single Task node (as in our example), change the ContentTypeId to the correct ContentType Id.

After successfully building the workflow, you can see that you will have only the custom taskoutcomes on your task form.

