Datacap Taskmaster Capture is a tool that is used for capturing data from scanned documents. This tool provides classification, recognition, validation and verification of data. It captures data using common recognition engines (OCR, ICR, OMR, barcodes) and exports the captured data to an XML file or to a database. It can capture any kind of documents like hand print, machine print, bar codes and check box data. Taskmaster software components are Datacap Studio, Taskmaster server, Rulerunner service, Application Manager and the Taskmaster Web client. You can also run the application tasks like scanning and verification using the DotEdit, DotScan and FastDoc clients.
Installation and configuration of Datacap Taskmaster
The following steps provides the information on installing Taskmaster on a single machine.
I. Basic Installation
- Run the IBM Datacap tool (Version – 8.1) installation program and ensure that all the Taskmaster software components are installed on your machine.
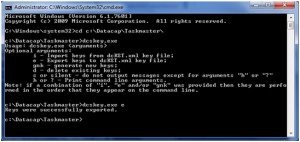
- To export the encryption keys, open the command prompt and change the directory to C:\Datacap\Taskmaster folder.
- Run the dcskey.exe and also add one of the following parameters in the command prompt.
- e – Exports the encryption keys from the local keystore to a transport file.
- gnk – Generates but does not export encryption keys in the local keystore.
- Go to Start -> All Programs -> Datacap -> Administrator -> Taskmaster -> Taskmaster Server Manager.
- Verify that the status is Running, if the status is stopped, click Start.

- Close the server manager.
- Go to Start -> All Programs -> Datacap -> Developer -> Datacap Studio.
- In the Application dialog box, select the application and click Next.

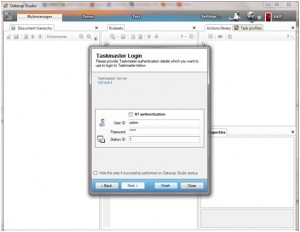
- In the Taskmaster Login dialog box, ensure that the NT authentication check box is not selected and enter the following values.
- User ID : admin
- Password : admin
- Station ID : 1 and click Finish.
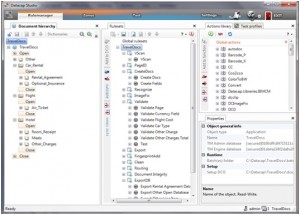
- Now you can see the selected application in Datacap studio.
II. Installation and Configuration of Taskmaster Web
Taskmaster web client allows you to scan and validate the application. In a single machine configuration it is used for testing and demonstration purposes. Taskmaster web client allows you to create your own tasks and also you can monitor the jobs which are running in the server. Taskmaster Web runs using the LocalSystem account. Before doing the web configuration ensure that the server is stopped.
- Go to Start -> All Programs -> Datacap -> Administrator -> Taskmaster -> Taskmaster Server Manager.
- Verify that the status is stopped if the status is running, click Stop.

- Close the Server Manager window.
A. Taskmaster Server Configuration
- Ensure that Internet Information Services is installed on your machine
- Go to Start -> All Programs -> Datacap -> Administrator -> Taskmaster Web -> Taskmaster Web Server Configuration.
- Ensure that all items that are listed in the information box are Found, then click OK to continue.

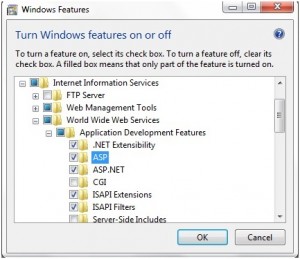
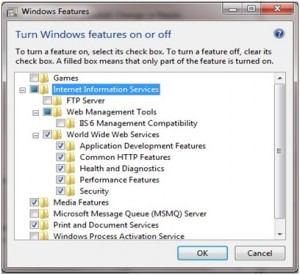
- If one or more of the components that are listed in the above information box are Not Found, then click OK and go to Start -> Control panel -> Programs and Features -> Turn Windows features on or off -> Internet Information Services

- Expand the IIS and add the required components under Application Development Features
- IIS -> Web Management Tools -> Management Console component.
- IIS -> World Wide Web Services -> Application development Features -> select ASP and ASP.NET components.
- IIS -> World Wide Web Services -> Common HTTP Features -> Static Content component.
- Click OK and close the Control Panel, it will take some time to install the components.
- After installing the IIS components, run the Taskmaster Server Configuration tool again and click OK to continue.
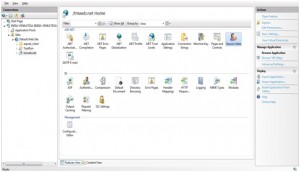
- Click Configure to configure the default web site for Taskmaster.
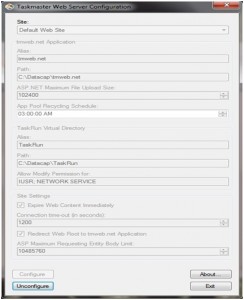
- Ensure the default values with the above image and Click OK
- Exit. Now the Taskmaster Web site is configured and created.
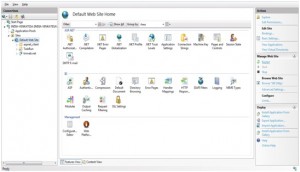
- Go to Control Panel -> Administrative Tools -> Internet Information Services (IIS) Manager.
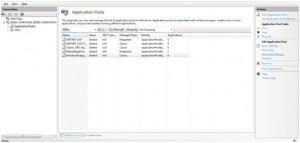
- Expand the sites node under computer node and expand the Default Web Site. Now you will be able to see tmweb.net site. If it is not displayed then Refresh the sites node and check again.

- In the Application Pools pane, select the tmweb.net application pool and go to Actions pane -> Edit Application Pool -> Advanced Settings.
- In the Process Model section, click Identity and in the Application Pool Identity dialog box, change the Built-in account to LocalSystem and then click OK.
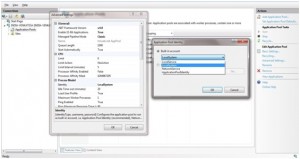
- In the Process Model section, change Load User Profile to True and click OK.


- Go to Connections -> Sites -> Default Web Site -> tmweb.net and select Session State.
- Under Cookie Settings, change the Name to taskmasterweb or another unique name and click Apply.

- Go to Connections pane -> Default Web Site -> Actions -> Manage Web Site -> click Restart.
B. Taskmaster Client Configuration
- Go to Internet Explorer -> Tools -> Internet Options.
- Click the Security tab to display the options, select the Trusted sites option and click Sites button to open the Trusted Sites dialog.

- Enter the default URL http://localhost in the Add this website field and click Add.

- Close the Trusted Sites dialog and click OK to close the Internet Options window.
- Go to Start -> All Programs -> Datacap -> Administrator -> Taskmaster Web -> Taskmaster Web Client Configuration.
- Ensure that http://localhost/tmweb.net is the default URL that is displayed.

- Click Configure, OK and Exit.
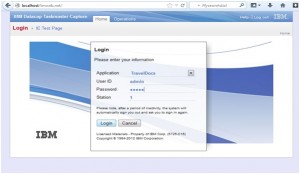
- Open Internet Explorer and enter the Taskmaster Web URL, you can see the login page.
- Select your application and enter the following details.
- User ID – admin
- Password – admin
- Station – 1 and click Login.
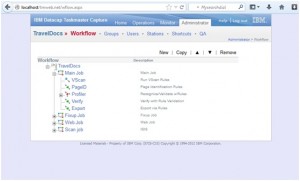
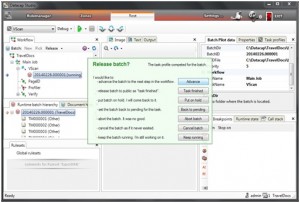
- Now you can see the workflow (Main job , Fixup Job, Web Job and tasks) for the selected application and also you can see the menu bar for job monitoring and operations.
III. Taskmaster Databases
Datacap Taskmaster Capture applications can use Microsoft SQL Server or Oracle databases to store workflow definitions, fingerprints, security parameters and processing information. By default the sample applications and templates that are installed with Datacap use Microsoft Access for their application databases. Taskmaster contains three main databases to store all the information about the application they are:
- Administration Database – Contains definitions of the workflows jobs and tasks in the application. Also contains the parameters for the stations, user groups, users and job-task icons in the application
- Engine Database – Stores current and historical processing information for each batch and its contents
- Fingerprint Database – Manages the fingerprints of the application if you are using fingerprint matching to identify and align forms for the application
- Lookup Database or other application specific databases can also be configured to use Microsoft SQL Server.
Taskmaster Database Configuration for SQL Server
- Ensure that Microsoft SQL Server is installed on your machine.
- Open Control Panel->Administrative Tools-> Services and start the SQL Server (SQL EXPRESS).

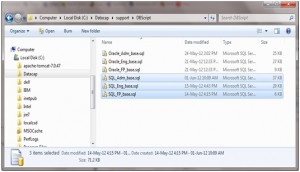
- Go to C:\Datacap\support\DBScript, here you can find the scripts for the database you want to create:
- Open SQL Server Management Studio or SQL Server Enterprise Manager and log on to the server as the administrator.

- Create the database and open the appropriate scripts in the tool and run them to define the structure of the Taskmaster databases.

- Go to Start -> All Programs -> Datacap -> Administrator -> Tools -> Database Copy Utility and choose the type of the database that you want to copy.

- Enter the following information in the Source Database fields.
- Database Type – Microsoft Access
- Database – Browse to the source database location

- Enter the below information in the Destination Database fields.
- Database Type – Microsoft SQL Server
- Server – Enter the SQL server name
- Database – Enter the destination database name
- Database Login – Select Network Authentication.

- Press Copy to copy the application database from source to destination.

- Click OK and repeat these steps for Engine and Fingerprint databases.
- Click Exit to close the utility window.
- Go to Start -> All Programs -> Datacap -> Administrator -> Taskmaster -> Taskmaster Application Manager.
- Select your Taskmaster application and click the Taskmaster tab.

- In the Administration field, click the browse button to select your database.
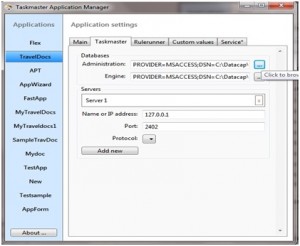
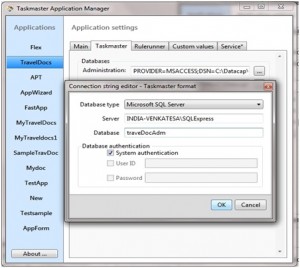
- In the Database Type field, select Microsoft SQL Server and enter the following parameters.
- Server Name – enter the name of the SQL Server database
- Database Name – enter the name of the application database
- Select System Authentication or enter your User ID and Password
- Click OK.
- Repeat these steps for Engine and Fingerprint databases.
- Close the Taskmaster Application Manager to save the settings.
- Go to Start -> All Programs -> Datacap -> Developer -> Datacap Studio.
- Log in with your credentials and run the application using the Test tab, to verify the Admin and Engine databases are working properly.
- Click the Zones tab to verify that the Fingerprint database is working.

By using the rules engine, data capture can be fit into the business requirements and can be changed quickly when business needs change and also it is possible to create custom actions using .Net framework based on the business requirements. It is also possible to deliver data and images to FileNet Content Engine.