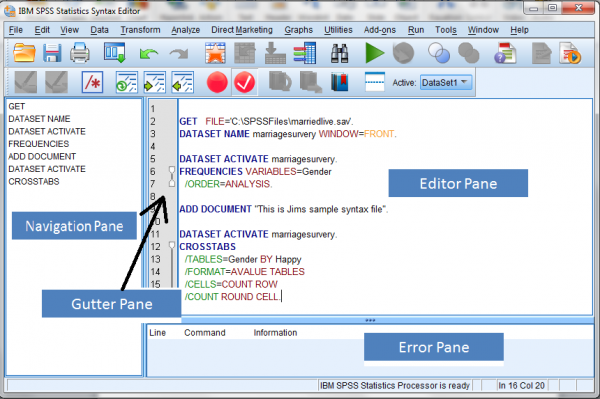
The SPSS Syntax Editor (by default, the name of the new syntax window is SPSS Statistics Syntax Editor). Is divided into 4 areas (or “panes”):
Editor Pane
The editor pane is the main part of the syntax editor and it is here where you perform your scripting.
Gutter Pane
The gutter pane is adjacent to the editor pane and displays:
- line numbers,
- breakpoint positions,
- bookmarks,
- an indicator showing the span of lines in a command and
- a marker showing which commands were last run
Navigation Pane
The navigation pane is to the left of the gutter pane and displays a list of all commands in the syntax editor and provides “single click navigation” to any command.
Error Pane
The error pane is below the editor pane and displays your scripting errors.
MACRO MAGIC
Once you have bought into the idea that using SPSS Syntax script is preferred (over using the Statistics GUI to repeatedly performing the same tasks), then you will want to take your scripting to the next level and create a MACRO library for your reuse.
Macros most often are small routines of commands that automate one or more tasks to make your work more efficient and easier (using a macro means not having to construct commands each time you need to do a particular analysis or data transformation).
SPSS macros are a bit different from those you may have seen in other tools. Although the SPSS macro facility has its own language, you don’t invoke a “macro editor” to create a macro. An SPSS macro is created like any other syntax script file, using the Syntax Editor (you just need to use the DEFINE function!).
So, as an exercise, I originally created a syntax file that opened a data file and ran FREQUENCIES and CROSSTABS against the file. Since (in my made-up world) I have to rerun this script against multiple data files (and since I’m a lazy programmer), I don’t really want to rerun the script for each different file. So the answer is to create a MACRO that will run the commands on a “dynamic” (or “to be defined at runtime) data file name.
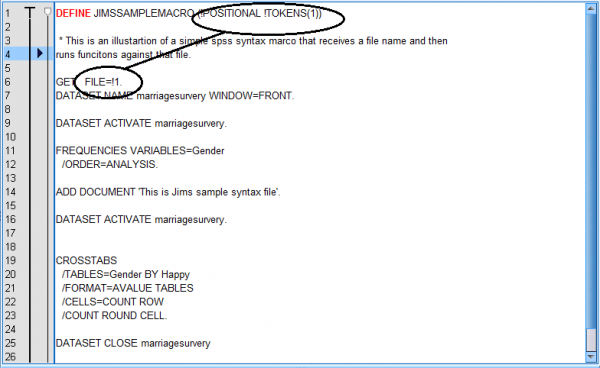
Here is my code. Notice that I used the DEFINE and !END DEFINE commands to “define” my new MACRO (named JIMSSPAMPLEMACRO) and also note that I defined a single parameter (or TOKEN) to be “passed in” to the MACRO at run-time. This will be the name of the dataset:
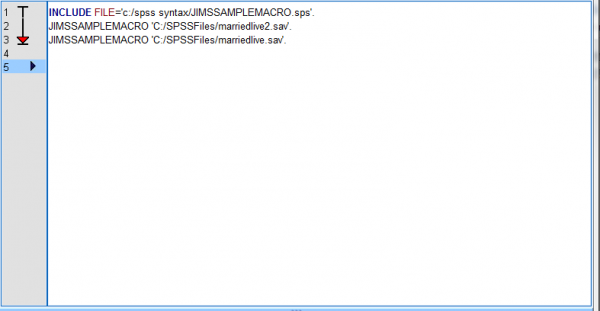
Once run this SYNTAX script (and save the file to my script library) the new MACRO is defined! Now I can go ahead and write a simple script to run the MACRO as many times as I want, with different file names. Here I want to run the MACRO 2 times (1 for each file).
This works just fine – you just need to add the INCLUDE FILE at the top of the script to reference the defined MACRO.
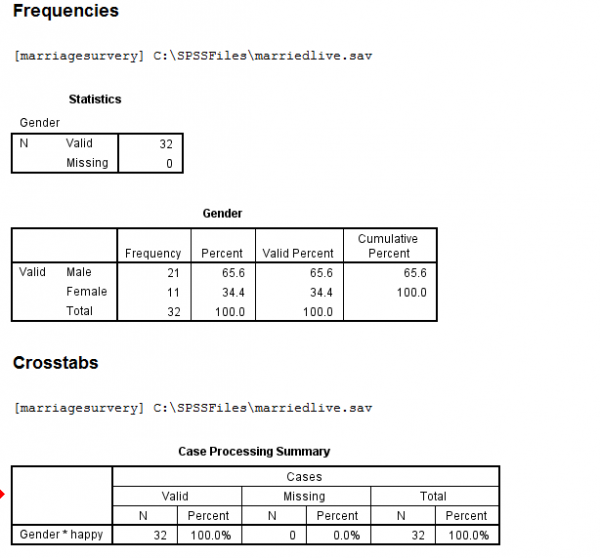
After I run this script, the Viewer shows the output as:
(and then repeated for the 2nd file):
Very cool! The next exercise will be to create a more interesting MACRO to add to my ever-growing Syntax script library!
Have a great weekend.


