This time I wanted to “run through” how creating a simple dimensional hierarchy using Performance Modeler compares to using Architect and “native” TM1. Keep in mind that although you properly would not use this technique to build a production ready TM1 model, it is most likely more than adequate for prototyping and building personal models.
Creating the New Dimension
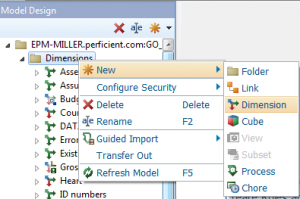
As you probably guessed, after launching Modeler, you right-click to select Dimensions, select New and then Dimension:
This time when you name your new dimension object, select “Hierarchy” as the type.
Observation
Until you actually save your new dimension, Modeler shows it with an asterisk in the navigational pane:
Adding Your Elements
Of course you can type in each element (or import them from a file); the most user friendly method is to paste them in. To do this you can select and copy the cells from a MS Excel worksheet and then, in Performance Modeler, right-click on the “” cell and select Paste:
Creating The Hierarchy
After the elements are added you can use the “hierarchy edit” icons (move up or down and promote and demote) in Modeler to build your hierarchy. This icons work with a single selected element or a group:
Without much effort we have our dimension hierarchy built and saved:
TM1
Once you clicked Save, the dimension exists in TM1 – which I just had to log in and confirm:
Conclusion
Using modeler to create a simple dimension hierarchy prototype was actually a little bit easier than doing it with the dimension editor in TM1 (of course we all know that TM1 offers other methods to accomplish this). Also I want to stress again that this was a simple prototyping example, manually manipulating and updating elements directly in a hierarchy is certainty prototyping work, not production support.


