So I was talking to a colleague of mine, and we were trying to decide if we wanted to run Server 2012 or Windows 8 Enterprise on our laptops.
We had a few issues on doing this.
- Not sure what OS we wanted to run.
- Not sure all of our current software, will run on this operating system.
- Not sure we want to reformat our machines and start over making them just right.
- Not sure we might miss that all important file, we have buried deep in the OS.
Not sure what would be best, stay with what we have or take the plunge.
After much thought we decided let’s do a dual-boot system. The thought of that was a bit scary only because of how it was done in the old days.
But the good thing is Microsoft has made this easy to do and not the headache it was in the past.
Now this can all be done by connecting a VHD.
I will go through the steps I used to make this happen on my laptop.
I am running Server 2008R2, and now I can dual-boot into Windows 8 Enterprise.
This way I can kick the tires on this OS to make sure, I really want to take the plunge of rebuilding my machine.
The beauty of this is I can run another OS and not damage my previous one while at the same time be able to access all my files.
If I don’t like the OS and want to keep using what I had before, then No Problem I can just remove the new VHD disk or leave it and switch between both Operating systems with just a reboot.
So let’s kick this off and dual-boot a Machine.
First thing you will need to do is open Disk Management, and create a 20 Gig VHD Minimum.
Open Disk management go to Start Run and type in diskmgmt.msc.

Once you have Disk Management open click Action and select Create VHD.


Browse to the location that you want to create your VHD drive. I chose to create mine on C: but you don’t have to. If you want to run it from another location like a USB, external hard drive that will work as well.
I would choose at least 20 Gig so this way you can install the OS and have room for some software Office etc.
Select Fixed size and click next, this can take a few minutes while it is creating the VHD.
You can browse out to the location where you are creating the new VHD file.

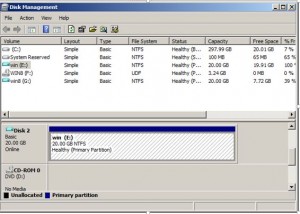
Once the VHD drive is created it will show up in Disk Management, you will now need to initialize the disk right-click on the new disk and select Initialize disk. And click ok.


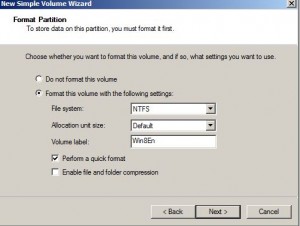
Now that the VHD has been initialized it is time to create new simple Volume and format the drive.
Right click on the volume and select New Simple Volume.


Click next.

Choose the drive letter you want this Volume to be.

Give the Volume a unique label. And click next.
Now you have your VHD drive let’s get to dual-booting.

Now open PowerShell and make sure to run as an Administrator.
Right-click PowerShell and select run as Administrator.
One little tip if you have never ran PowerShell to execute scripts before, you might have changed it to allow the running of scripts.
So to do this type Set-ExecutionPolicy RemoteSigned in the PowerShell window and then type Y, now you will be set to run scripts.

Microsoft has been so kind, to have created a Inatall-WIndowsIMage Powershell that helps automate this process. This Script will need to be downloaded from MSDN. http://archive.msdn.microsoft.com/InstallWindowsImage/Release/ProjectReleases.aspx?ReleaseId=2662
Once you have downloaded Install-WIndowsImage.PS1 file, place it on the root of your C: drive. The file might be blocked, so you might need to right-click on the file and select properties and click the unblock button on the bottom of the file.
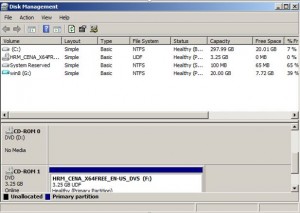
Now you will need to make sure you have a mounted ISO file of the OS you want to install. You can use Microsoft’s Virtual CD-ROM or a third-party tools such as Daemon Tools, MagicDisk etc that you will need to install so you can mount your ISO file. I use Daemon Tools.
When the ISO file is mounted it will look like another drive on your computer.

Now that we have a mounted ISO file, open PowerShell again as an administrator
And run this command.
./Install-WindowsImage.ps1 –WIM f:\Sources\Install.wim –Apply –Index 1 –Destination g:\
Change f:\ to whatever drive letter you put your sources files or mounted ISO. The second Drive letter G: is you destination drive or the VHD we created earlier, change that accordingly as well.
Once the script is running you will see the screen below.
I have noticed this process takes longer than 15 minutes.
So go get coffee.
The other thing I have found is if you get errors right off, the problem is normally a bad syntax or if this has been running for 10 minutes and bombs it is normally a corrupt ISO file.

Once this completes you are also most done.
Open an Administrative Command prompt and type bcdboot.exe g:\windows this will create your boot OS loader when you restart your machine. The drive letter should be changed accordingly to the location of where your new VHD file is.
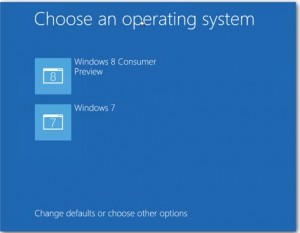
Now reboot your machine. On startup you should now have the option to choose your new OS.

Once you login you can now share files between your drives.
You will need to reinstall any software but you can access all your old files. I found this to very nice.
Once finished with the VHD and no longer need it, no problem that is easy fix.
Open Disk Manager again. Select Detach VHD

Check the box to remove the VHD file from the location where you created the file.

Click Ok and POOF, Now it is gone.

The next step I would do is clean up your startup boot record.
Open an Administrative Command Prompt
Type bcdedit > c:\ This will create a text file located in your c:\ drive showing your boot entries.


Now in your command prompt type bcdedit /delete {Identifier}
Your identifier is located in the file you created, just be sure to delete the correct identifier so you don’t blow up you machines boot sequence.

Now when you reboot your machine there will be only the one boot record.
You are back to where you started……

Hey! the good thing is Microsoft (hp error code biohd-8) has made this easy to do and not the headache it was in the past.
Now this can all be done by connecting a VHD.