
Welcome to Part 2 of this blog series! In Part 1, we discussed the high-level architecture and use case for enabling live agent transfer from a chatbot.
In this post, I’ll walk you through the actual steps to build this feature using:
- Copilot Studio
- D365 Omnichannel for Customer Service
- Customer Service Workspace
- Customer Voice
Prerequisites
- Dynamics 365 Customer Service license + Omnichannel Add-on
- Admin access to D365 and Power Platform Admin Center
- Agents added to your environment with proper roles
Step-by-Step Implementation
1: Set Up Omnichannel Workstream
- Go to Customer Service Admin Center
- Create a Workstream for live chat
- Link it to a queue and assign agents


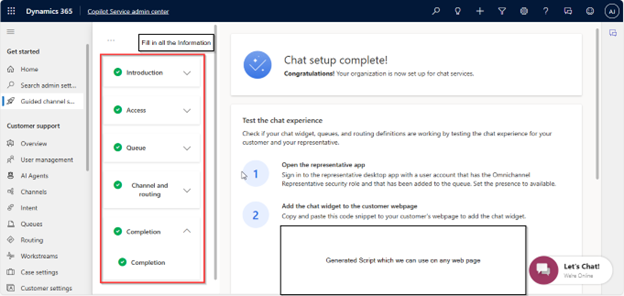
2: Create Chat Channel
- In the same admin center, create a Chat Channel
- Configure greeting, authentication (optional), timeouts
- Copy the embed code to add to your portal or test site
3: Create a Bot in Copilot Studio
- Create a bot and add core topics
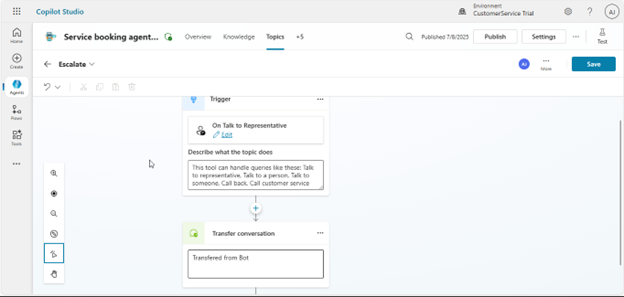
- Create a new topic: “Escalate to Agent”
- Add trigger phrases like:
- “Talk to someone.”
- “Escalate to huma.n”
- “Need real help”
- Use the Transfer to Agent node
- Select the Chat Channel
- Add a fallback message in case agents are unavailable

4: Test the Flow
- Open your bot via the portal or the embedded site
- Trigger the escalation topic
- Bot should say: “Transferring you to a live agent…”
- An available agent receives the chat in the Customer Service Workspace
- The agent sees the whole chat history and continues the conversation

5: [Optional] Post-Conversation Feedback Using Customer Voice
To collect feedback after the chat ends, enable the native post-conversation survey feature in Omnichannel.
Steps:
- Create a feedback survey in Microsoft Customer Voice
- Go to Customer Service Admin Center > Workstream > Behavior tab
- Enable post-conversation survey
- Select “Customer Voice.”
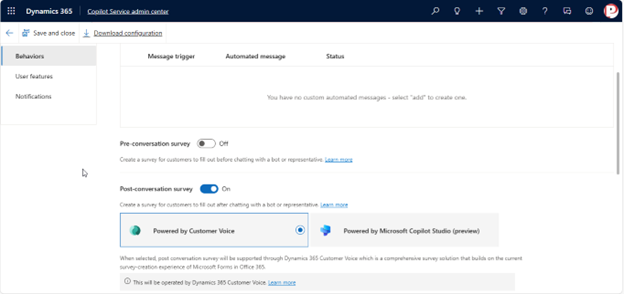
That’s it – once the chat ends, users will be prompted with your feedback form automatically.
Real Scenarios Tested
- User types “Speak to a human.”
- Bot transfers to live agent
- Agent sees the customer transcript and profile
- No agent? Bot shows “All agents are currently busy.”
Final Outcome
This setup enables a production-ready escalation workflow with:
- Low-code development
- Reusable components
- Smooth agent handoff
- Agent empowerment with full context
Conclusion
This approach balances bot automation with human empathy by allowing live agent transfers when needed. Copilot Studio and D365 Omnichannel work well together for modern, scalable customer service solutions.
This step-by-step guide is incredibly clear and practical. It simplifies the live agent transfer setup in Copilot Studio using D365 Omnichannel, making even complex configurations easy to follow. A highly useful resource for anyone looking to streamline their support workflows.
Thank you so much for your kind words! I’m glad the guide was helpful and made the process easier to follow. My goal was to simplify the setup for everyone, so it’s great to hear that it worked for you. If you have any questions or ideas for improving workflows further, feel free to share, I’d love to hear your thoughts!