
Automating deployments is crucial for efficiency and reliability in today’s fast-paced development environment. GitHub Actions provides a seamless way to implement CI/CD pipelines, allowing developers to automate the deployment of static websites without manual intervention.
In this blog, we will explore how to deploy a static website to an AWS S3 bucket using GitHub Actions. We’ll cover setting up an S3 bucket, configuring IAM roles for secure authentication, and leveraging GitHub Actions workflows to streamline deployment. By the end, you’ll have a fully automated pipeline that ensures quick and secure deployments with minimal effort.
Prerequisites
- Amazon S3 Bucket: Create an S3 bucket and enable static website hosting.
- IAM User & Permissions: Create an IAM user with access to S3 and store credentials securely.
- GitHub Repository: Your static website code should be in a GitHub repository.
- GitHub Secrets: Store AWS credentials in GitHub Actions Secrets.
- Amazon EC2 – to create a self-hosted runner.
Deploy a Static Website to an S3 Bucket
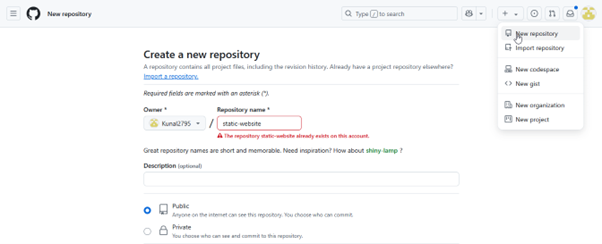
Step 1
First, create a GitHub repository. I already made one with the same name, which is why it exists.
Step 2
You can clone the repository from the URL below and put it into your local system. I have added the website-related code to my GitHub repository, so you just need to clone it: https://github.com/Kunal2795/Static-Website.git.
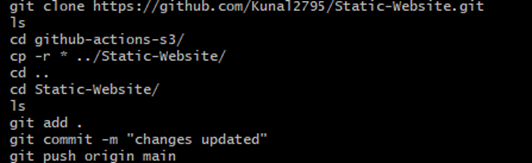
Step 3
Push the code to host this static website with your changes, such as updating the bucket name and AWS region. I already have it locally, so you just need to push it using the Git commands below:
Step 4
Once the changes are pushed to your GitHub repository, ensure the main. The yaml file is in the .github/workflows directory.
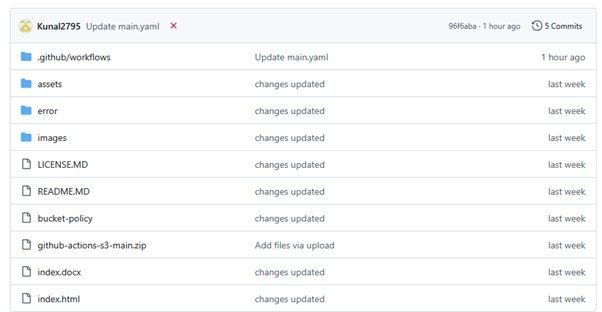
If the main.yaml file is not present in the .github/workflows/ directory. Create it and add a job to run the static website pipeline in GitHub Actions. The main.yaml file is the primary configuration file in GitHub Actions that runs the entire pipeline.
Add the following job code to the main.yaml file in the .github/workflows/ directory:
name: Portfolio Deployment2
on:
push:
branches:
– main
jobs:
build-and-deploy:
runs-on: [self-hosted, silver]
steps:
– name: Checkout
uses: actions/checkout@v1
– name: Configure AWS Credentials
uses: aws-actions/configure-aws-credentials@v1
with:
aws-access-key-id: ${{ secrets.AWS_ACCESS_KEY_ID }}

aws-secret-access-key: ${{ secrets.AWS_SECRET_ACCESS_KEY }}
aws-region: us-east-2
– name: Deploy static site to S3 bucket
run: aws s3 sync . s3://kc-devops –delete
You need to make some modifications in the above jobs, such as:
- runs-on – Add either a self-hosted runner or a default runner (I have added a self-hosted runner).
- AWS-access-key-id – You need to add the Access Key ID variable name (store the variable value in Variables, which I will show you below).
- AWS-secret-access-key – You need to add the Secret Access Key ID variable name (store its value in Variables, which I will show you below)
- AWS-region – Add Region of s3 bucket
- run – In that section, you need to add the path of your bucket where you want to store your static website code.
How to Create a Self-hosted Runner
Launch an EC2 instance with Ubuntu OS using a simple configuration.
![]()
After that, create a self-hosted runner using specific commands. To get these commands, go to Settings in GitHub, navigate to Actions, click on Runners, and then select Create New Self-Hosted Runner.
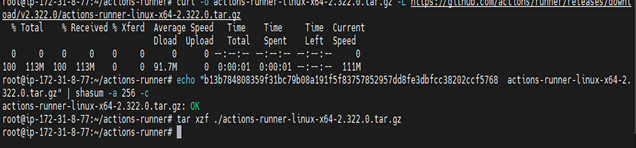
Select Linux as the runner image.
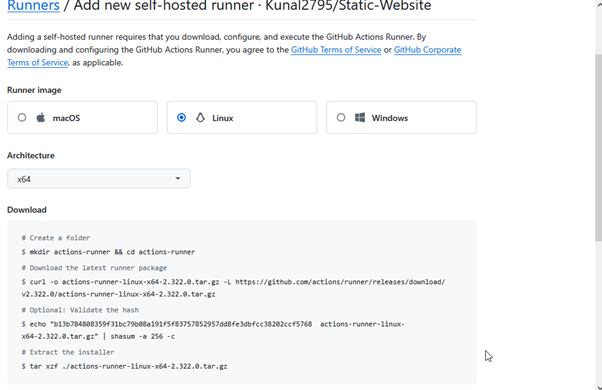
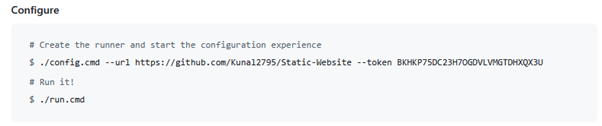
Run the above commands step by step on your EC2 server to download and configure the self-hosted runner.

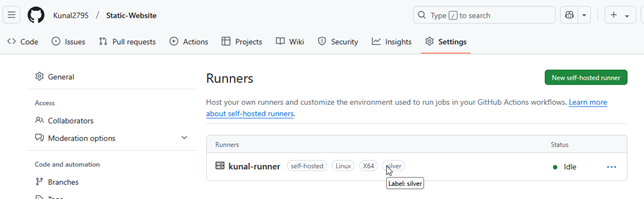
Once the runner is downloaded and configured, check its status to ensure it is idle or offline. If it is offline, start the GitHub Runner service on your EC2 server.
Also, ensure that AWS CLI is installed on your server.
IAM User
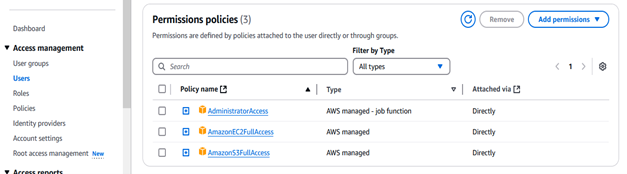
Create an IAM user and grant it full access to EC2 and S3 services.
Then, go to Security Credentials, create an Access Key and Secret Access Key, and securely copy and store both the Access Key and Secret Access Key in a safe place.
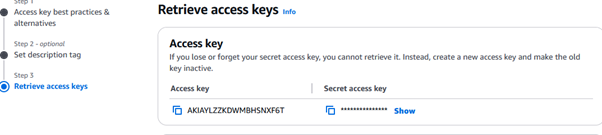
Next, navigate to GitHub Actions → Secrets & Variables → Actions, then add your AWS Access Key ID and Secret Access Key securely.

After adding the Access Key ID and Secret Access Key, proceed to the next section: S3.
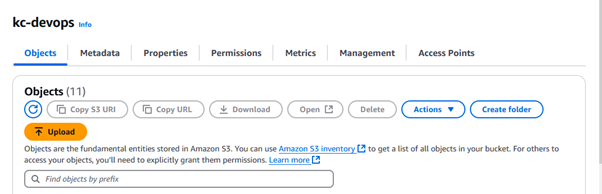
Create an S3 bucket—I have created one with the name kc-devops.
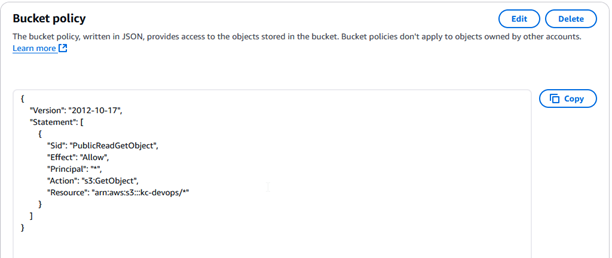
Add the policy below to your S3 bucket and update the bucket name with your own bucket name.
After setting up everything, go to GitHub Actions, open the main. In the yaml file, update the bucket name and commit the changes.
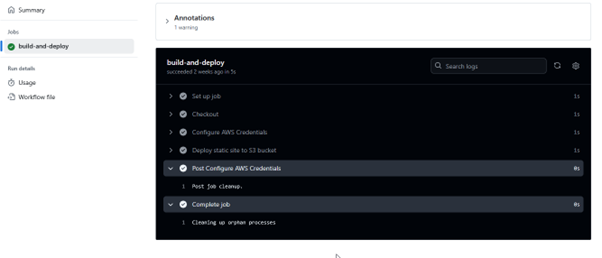
Then, click the Actions tab to see all your triggered workflows and their status.
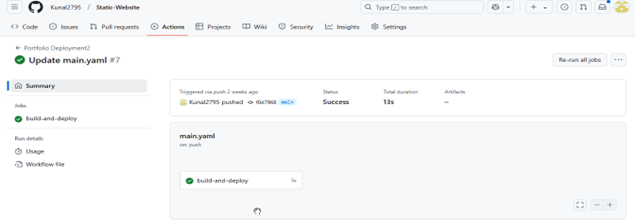
We can see that all the steps for the build and deploy jobs have been successfully completed.
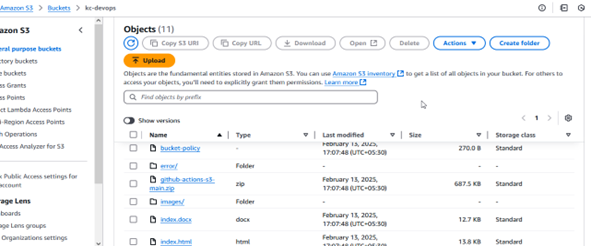
Lastly, sign in to the AWS Management Console and open the Amazon S3 console. Check all the codes are stored in your bucket.
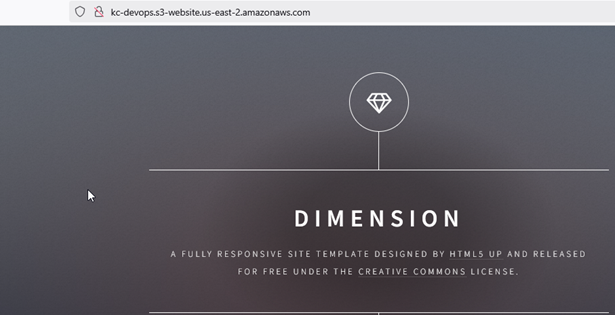
Then, go to the Properties tab. Under Static website hosting, find and click on the Endpoint URL. (Bucket Website endpoint)
This Endpoint URL is the Amazon S3 website endpoint for your bucket.

Output
Finally, we have successfully deployed and hosted a static website using automation to the Amazon S3 bucket.
Conclusion
With this setup, whenever you push changes to your GitHub repository, GitHub Actions automatically trigger the deployment process. This ensures that your static website is seamlessly updated and deployed to your AWS S3 bucket without any manual intervention. This automation streamlines the deployment workflow, making it more efficient and error-free.
Thanks for sharing !