
In my previous blog, Rich Text Editor in Vue Application: Using Quill.js, we covered the fundamentals of setting up Quill.js in a Vue.js application to create a rich text editor. This blog will build on that foundation by diving deeper into Quill.js customization in Vue.js to meet specific needs.
By the end of this tutorial, you’ll gain a comprehensive understanding of how to customize Quill.js to meet your specific needs, including creating multiple toolbar configurations, managing different editor modes, and handling advanced text change events.
Recap: Rich Text Editor in Vue Application: Using Quill.js
If you haven’t read Rich Text Editor in Vue Application: Using Quill.js blog, here’s a brief overview of the setup process:
- Install Quill.js: Use npm to install Quill.js in your Vue project.
- Create a Custom Component: Encapsulate the editor logic in a
Quill.vuecomponent. - Build the Editor Template: Define a basic structure for the editor in the template.
- Configure Toolbar Options: Set up default options for text formatting.
- Initialize the Editor: Use the
mountedlifecycle hook to instantiate Quill.js.
You can find the full setup details in my previous blog post. [Rich Text Editor in Vue Application: Using Quill.js]
We will cover few Key Features of the Component
Dynamic Toolbar Options:
The Quill editor supports various toolbar configurations, allowing you to customize the editing experience based on user needs or application requirements. Quill.js customization in Vue.js enables you to tailor the editor’s toolbar to fit the specific needs of your users.
Step 1: Define Toolbar Options
Start by defining your toolbar options as objects. This will allow you to easily manage and customize the toolbar based on user preferences or component props.
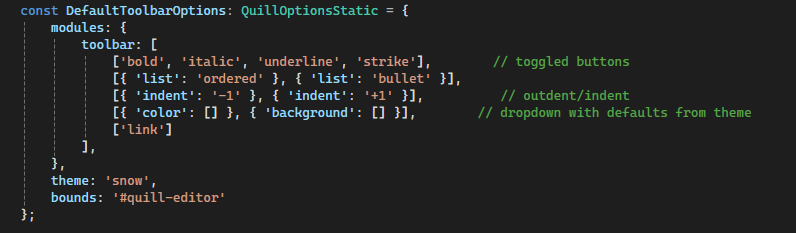
The component defines three different sets of toolbar options:
- Default Toolbar Options: Includes essential formatting tools like bold, italic, underline, lists, and links.
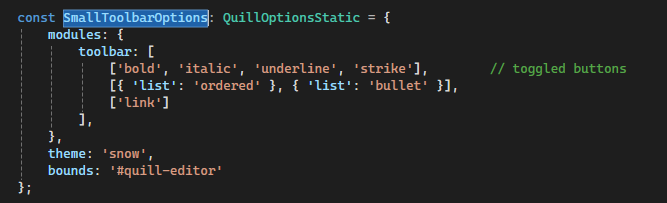
- Small Toolbar Options: A simplified version with just the most commonly used formatting options.
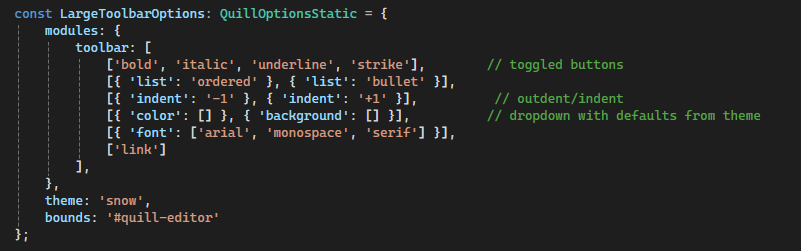
- Large Toolbar Options: An expanded set that adds more features like font selection and color options.
Step 2: Add a Prop for Toolbar Option
In your Quill.vue component, add a prop to accept the toolbar option. This allows you to customize the toolbar from the parent component.
![]()
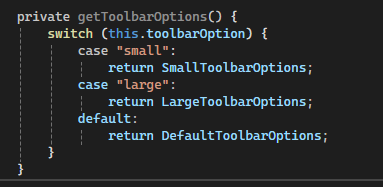
Step 3: Create a Method to Get Toolbar Options
Implement a method that returns the appropriate toolbar options based on the value of the toolbarOption prop. This method will be called during the initialization of the Quill editor.
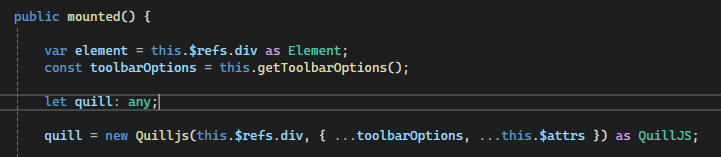
Step 4: Initialize Quill with Dynamic Toolbar Options
In the mounted lifecycle hook, call the getToolbarOptions method when initializing the Quill editor. This ensures that the editor uses the correct toolbar configuration.

Step 5: Use the Custom Quill Component
In the parent component, you can now specify which toolbar option to use when including the CustomQuillEditor.

Step 6: Customizing the Toolbar
You can further customize the toolbar by adding additional buttons or dropdowns. For example, if you want to add a font dropdown
![]()
Error Handling in Quill.js
Proper error handling ensures a smooth user experience, even when things go wrong. Quill.js customization in Vue.js also involves implementing robust error handling mechanisms to manage various scenarios.
Step 1: Identify Possible Error Scenarios
Consider common error scenarios that might occur while using the Quill editor:
- Initialization errors when creating the Quill instance.
- Issues when setting or getting content.
- Errors during user input (e.g., invalid HTML).
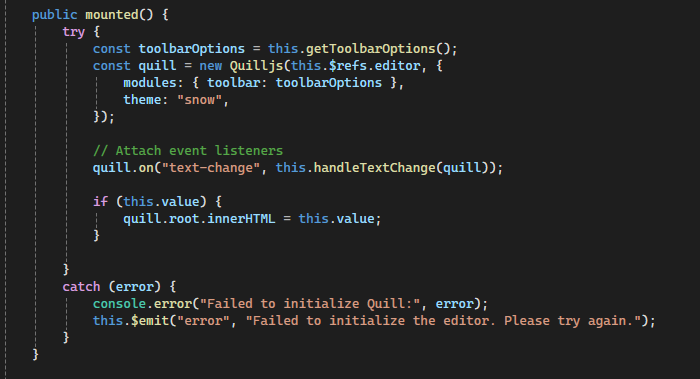
Step 2: Wrap Initialization in a Try-Catch Block
When you initialize the Quill editor, use a try-catch block to catch any errors that occur during setup. This allows you to handle initialization failures gracefully.
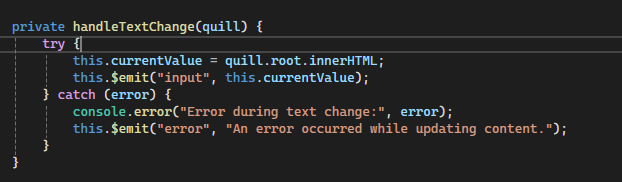
Step 3: Handle Text Change Errors
Implement error handling to catch potential issues when getting or setting content.
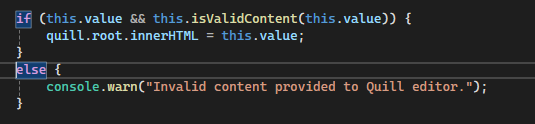
Step 4: Validate Content Before Setting
Validate the content before setting it to prevent errors from invalid HTML:

Then, use this method before setting the content in the mounted hook:
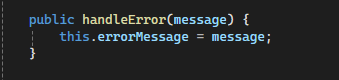
Step 5: Emit Errors to Parent Component
In case of an error, emit an event to the parent component to notify it of the error. This can be helpful for displaying user-friendly error messages.
![]()
Step 6: Implement User Feedback
In your parent component, listen for the error event emitted by the Quill editor. Use this information to display feedback to the user.

Additional Enhancements
- Dynamic Toolbar Changes: If you want to change the toolbar options dynamically (e.g., based on user actions), consider using a watcher on the
toolbarOptionprop to reinitialize Quill with the new options. - Customization: Feel free to add more complex configurations, such as custom buttons or dropdowns. Refer to the Quill.js documentation for detailed options.
Conclusion
By focusing on Quill.js customization in Vue.js, you can create a highly flexible and user-friendly rich text editor in your Vue.js application. Whether you’re catering to different user needs or ensuring a smooth experience, these techniques will help you build a powerful text editor.
For more advanced customization, explore the Quill.js documentation and see how you can further enhance your editor’s functionality.