
What is CI/CD?
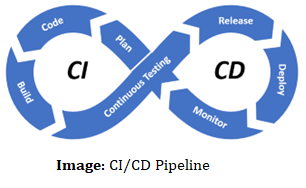
A CI/CD (Continuous Integration/Continuous Deployment) pipeline is an automated workflow or series of steps that developers use to build, test, and deploy their code changes. It’s a crucial part of modern software development, promoting efficiency, reliability, and consistency in the software development process.
Why Do We Need CI/CD?
In many organizations, the integration processes and other artifacts developed in the integration platform must be integrated with external CI/CD workflows and tools such as GitHub and Jenkins to automate and coordinate deployment.
With the help of CI/CD, it is possible to develop software and products faster than ever before, move code into production continuously, and guarantee a steady stream of new features.
Understanding CI/CD
Continuous Integration (CI) involves frequently merging code changes into a shared repository. Each integration developer’s changes are validated through automated builds and tests to detect integration issues early in the development cycle. This ensures that the main codebase is always in a working state.
Continuous Deployment (CD) automates the process of deploying the validated code changes to different environments, such as development, testing, staging, and production. It ensures that the latest tested code is delivered to users quickly and efficiently.
Getting Started with CI/CD implementation
Boomi is a powerful integration platform. While it offers a wide range of features, certain functionalities might not be readily available in certain scenarios. The extensive collection of Boomi Atomspher APIs allows users to automate tasks like creating package components, component deployment, monitoring, and more.
Utilizing these APIs, we have developed CI/CD implementations that enhance code quality and facilitate test-driven development. This blog goes into more detail about the reference implementation and provides example code to assist with it.
There are two primary components:
- Atomsphere API
- GitHub
Let’s examine the mentioned components in depth by considering a use case in which we’ll automate the creation of a package component and its deployment to the desired environment in Boomi Atom Cloud.
Atomsphere API
Please refer to the images below for the mentioned use case. In this use case, the AtomSphere platform API is at the core. To use AtomSphere APIs, the Boomi AtomSphere API connector is necessary. By using this connector, we can create a process responsible for creating a package and deploying it in the desired environment.
When automating this process, the Env ID and packaged ID must be passed to process deployment and the Component ID for packaged component creation. The flow diagram helps you understand the implementation in more depth.
You can set the process name by copying the process name from the Process Component, and the Env ID can be fetched from Boomi’s Atom Management.
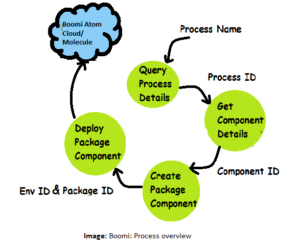
The rest of the dependent parameters are shown in the diagram (Boomi: Process overview).
Using the AtomSphere API connector requires following a sequence. We might need multiple AtomSphere connectors to extract different values. The sequence of the Boomi Atomsphere API connector for our use case is shown to the right.

In the Flow Diagram, we are using the query action in the AtomSphere API connector. This process requires various parameters, which are mentioned below according to their dependency.
You can set process name by copying the Name of the process from the Process Component and Env Id can be fetched from the Boomi’s Atom Management.
The rest of the dependent parameters are shown in the diagram (Boomi: Process overview).
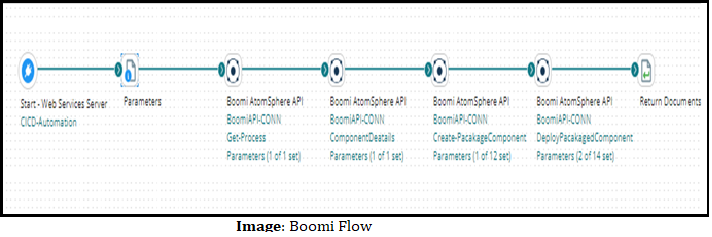
The functionality of each Atomsphere API Connector shown in the image is explained below:
- Get Process Details: Enter the process name as a parameter value, and action of connector is Query.
- For Component Detail: Enter the process ID from the process detail as a parameter value, and action of connector is GET.
- For Creating a Packaged Component: Enter the component ID from the component detail as a parameter value. The connector’s action is CREATE.
- For Deployment: Enter the packaged ID from the response of packaged component and Env ID as a parameter value and action of connector is CREATE.
The Process should be web service server-based and use the Set property shape to set the value of process name and Env ID dynamically using the dynamic process property.
If you want to enhance the CICD process, you can utilize any source-controlling tool and deployment pipeline. Here I have used GitHub as a Source control tool and GitHub Actions as a deployment pipeline.
GitHub
In this implementation, we are going to use GitHub Action to manage the CI/CD workflow. Organizations generally follow branching strategies by involving environment-specific branches (Feature, Dev, QA, UAT & PROD).
Here, we will be using four branches, which will give us a better understanding. Below are the steps to implement continuous deployment for a Boomi process.
- Proceed to GitHub and establish a new repository with the name of the Boomi Process that we are going to deploy.
- Inside this repository, we’ll create four branches: “Feature,” “Dev,” “Test,” and “Prod.”
- In the Feature branch, the previously mentioned changes will be pushed from our local system.
- Then, a pull request (PR) will be raised from the feature to Dev to merge the code.
- Similarly, the code will be promoted to higher environments. GitHub Workflow will be triggered each time a PR is merged, and Boomi processes will deploy to the desired environment.
- Workflow must be configured in the Dev, Test, and Main branch (Prod) for this. To set up workflow in GitHub, go to the Desired branch to set up workflow >> Action >> new workflow >> Set up Workflow yourself. Proceed to compose code using a (.yml) extension.
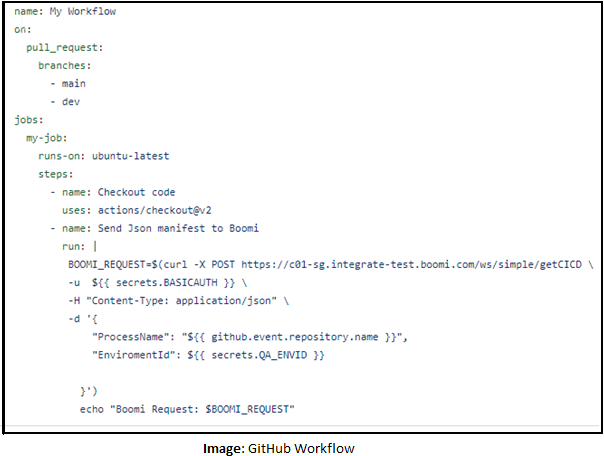
This is a sample workflow code for reference. This can be changed according to the requirements.
In this reference code, we used the Base URL for API Requests of the Boomi process, which we created and deployed earlier over Boomi Cloud. As part of authentication, we need a few passwords and secrets. You can directly add passwords and secrets in line (which is not recommendable); otherwise, you can utilize GitHub’s secret store, which is a secure way to add and store credentials. To create secrets, go to Settings >> Secrets and Variables >> Secrets or Variables.
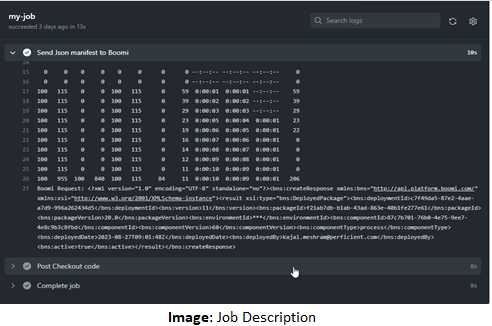
Understand How GitHub Works

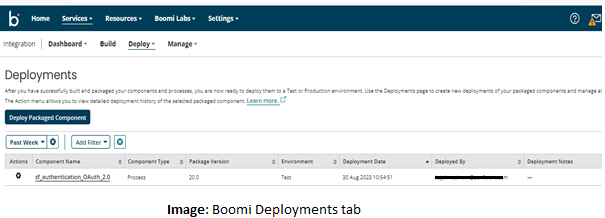
The job description shows that processes have been successfully deployed to the desired environments. You can also verify this on the Boomi Platform.
We’re all done with the implementation of the automated deployment process of Boomi. Here we used GitHub to manage the CI/CD workflow; you can use another tool as well, such as Jenkins.
Conclusion
While Boomi does not have an inherent functionality to automate the creation of package components and their deployment to the Atom Cloud, developers can overcome this limitation using Boomi’s APIs and scripting capabilities. Organizations can achieve a more efficient and automated integration process by leveraging these APIs, third-party tools, and CI/CD integration.
This, in turn, results in reduced developer time and errors and an overall improvement in the integration workflow, making Boomi an even more valuable tool for businesses seeking seamless connectivity between applications and data.
Perficient + Boomi
At Perficient, we excel in tactical Boomi implementations by helping you address the full spectrum of challenges with lasting solutions rather than relying on band-aid fixes. The result is intelligent, multifunctional assets that reduce costs over time and equip your organization to proactively prepare for future integration demands.
Contact us today to learn how we can help you to implement integration solutions with Boomi.
Thank you for this blog. What code is being checked into GitHub? Is it the JSON manifest?