
Are you interested in learning more about C# automation but need help determining where to begin? Do not be alarmed! In this step-by-step tutorial, we’ll walk you through starting from scratch with C# automation. After completing this course, you’ll have a strong basis for effectively automating activities with C#.
Step 1: Setting Up Your Development Environment
Before we begin coding, let’s ensure that you have the necessary tools set up on your system. Here’s what you’ll need:
- Visual Studio: Download and install Visual Studio (Community), Microsoft’s integrated development environment (IDE), which provides a comprehensive set of tools for building C# applications. You can download Visual Studio from the official Microsoft website. Visual Studio
- .NET Framework or .NET Core: Depending on your project requirements, you’ll need either the .NET Framework or .NET Core installed. These frameworks provide the runtime and libraries necessary to run C# applications. You can download them from the official .NET website. .Net Framework
Once you have installed Visual Studio and the appropriate .NET framework, you’re ready to move on to the next step.
Step 2: Creating a New C# Project
Now that your development environment is set up, let’s create a new C# project in Visual Studio:
Open Visual Studio.
- Click on “File” > “New” > “Project.”
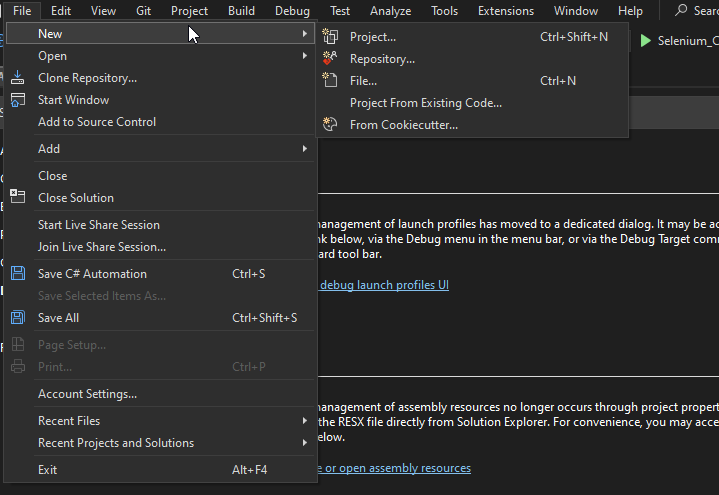
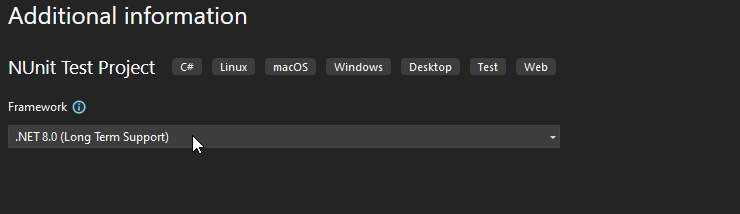
- Choose “NUnit Test Project” under the C# category

- Enter a name for your project and choose a .Net Framework location to save it.
- Click “Create” to generate your project.
Congratulations! You’ve just created your first C# project.
Step 3: Writing Your First Automation Script
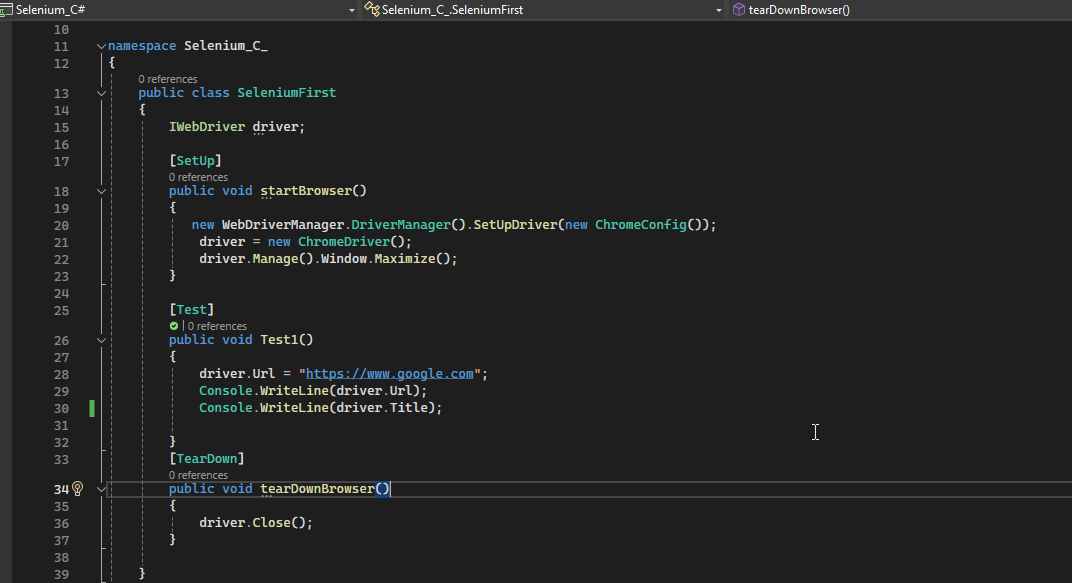
Now that we have our project set up, let’s write a simple automation script. For demonstration purposes, let’s create a script that opens a web browser and navigates to a specific URL:
Install NuGet Packages for Selenium as below:
- Right-click on project> Manage NuGet Packages..
- Install Selenium.WebDriver.
- Install Selenium.Support.
- Install WebDriverManager.

In this script, we’re using Selenium, a popular automation tool, to control the web browser programmatically.
Step 4: Running Your Automation Script
Once you’ve written your automation script, it’s time to run it:
- Click on the “Build” button or press Ctrl+B to build and run your project.
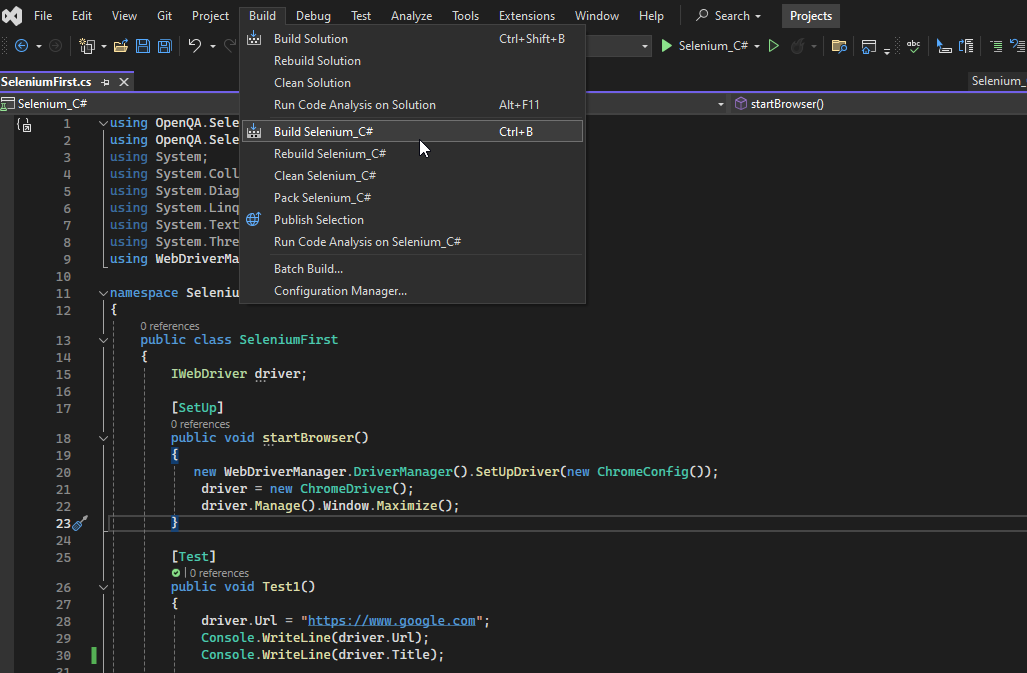
- Click on Test>Test Explorer/Ctrl+E, T.
- The New Test Explorer window opens.
- Right-click on Test>Run
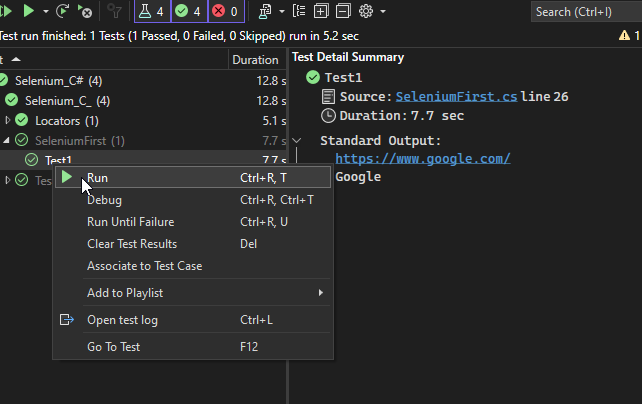
Visual Studio will compile your code and execute it.
You should see a Chrome browser window open navigate to the specified URL & Perform actions.
Voila! You’ve successfully automated a task using C#.
Step 5: Exploring Further
Now that you’ve completed your first automation script, you can explore more advanced automation techniques and libraries. Here are a few ideas to get you started:
Data-driven Testing: Use external data sources (such as Excel files or databases) to drive your test cases dynamically.
Page Object Model (POM): Implement the POM design pattern to organize your automation code for better maintainability and scalability.
Parallel Testing: Run multiple automation tests simultaneously to reduce execution time using tools like NUnit or MSTest.
Conclusion
Automation is a powerful technique for streamlining repetitive tasks and improving efficiency in software development. In conclusion, this beginner’s guide has provided you with a solid foundation for venturing into C# automation with Selenium. By following the step-by-step instructions, you’ve not only set up your development environment and created your first automation script but also gained insights into advanced techniques like data-driven testing, the Page Object Model, and parallel testing. With C# and tools like Selenium, you have everything you need to automate a wide range of tasks, from web testing to data manipulation.
By following this step-by-step guide and experimenting with different automation scenarios, you’ll become proficient in using C# for automation in no time.
Happy coding!
This is very informative, Thank You! Sandesh for sharing.
Thanks Ankita