Welcome to the first installment of our three-part series designed to deepen your understanding of Cypress, a cutting-edge tool for testing web applications. This series aims to guide web developers through the intricacies of Cypress, from getting started to integrating advanced testing techniques into your development workflow. Whether you’re new to automated testing or looking for an alternative to your current tools, this series will equip you with the knowledge to enhance your testing strategy effectively.
Introduction to Cypress
In the realm of web development, delivering flawless applications is crucial. Cypress stands out as a premier testing framework, specifically engineered for the modern web. It simplifies the testing process, offering a more intuitive and efficient approach to ensuring your web applications work exactly as intended. Unlike traditional testing frameworks, Cypress is built with the web in mind, making it a go-to choice for developers working with React and other JavaScript frameworks.
Why Choose Cypress? A Comparative Look
While there are several testing frameworks available, such as Vitest and Jest, Cypress distinguishes itself in several key areas:
- Real-Time Feedback: Cypress runs tests in a real browser, providing instant feedback on your app’s behavior in a real-world scenario. This contrasts with Jest, which primarily focuses on unit and snapshot testing without a browser environment.
- Easier Debugging: Cypress’s Test Runner offers a unique debugging experience, allowing you to see exactly what happened at each step of your test. Vitest, while fast and efficient for unit testing, doesn’t offer the same level of interactive debugging.
- Rich Ecosystem: Cypress not only supports end-to-end testing but also integrates various types of testing such as API testing and component testing, providing a comprehensive testing solution.
- No Configuration Hassle: Cypress requires minimal configuration to get started, making it accessible for beginners. Jest and Vitest, though configurable, can require additional setup for end-to-end testing capabilities.
Installation and Configuration
To integrate Cypress into your React project (or any JavaScript framework), follow these simple steps:
- Install Cypress via npm:
npm install cypress –save-dev
- Open Cypress for the first time:
npx cypress open

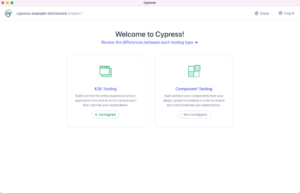
Choose E2E.
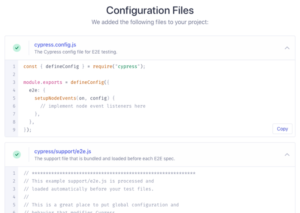
- Quick configuration: Quick configuration: On the next step, the Launchpad will scaffold out a set of configuration files appropriate to your chosen testing type, and the changes will be listed for you to review.

- Launching a browser: Select the bowser you want to work with.
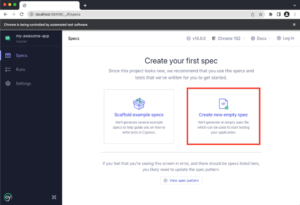
- Add a test file: We’re going to do this with the Create new empty spec button.

On clicking it, you should see a dialog where you can enter the name of your new spec. Just accept the default name for now.
The newly-generated spec is displayed in a confirmation dialog. Just go ahead and close it with the ✕ button.
Structure of a Test in Cypress
A Cypress test file follows a simple structure, making it easy to organize and read tests. Here’s a basic outline:
- Describe Block: Groups similar tests.
- It Block: Defines an individual test.
- Expect Statement: Asserts the outcome.
- It Block: Defines an individual test.
Your First Test with Cypress
Example of a basic test to verify a button’s functionality on a webpage:
describe(‘Button Click Test’, () => {
it(‘successfully clicks a button’, () => {
cy.visit(‘/’);
cy.get(‘.my-button’).click();
cy.get(‘.result’).should(‘contain’, ‘Button clicked!’);
});
});
Advantages of Using Cypress
Cypress offers several benefits over traditional testing frameworks, such as real-time reloading, direct browser access, simplified asynchronous testing, and rich debugging capabilities.
Cypress is transforming web application testing with its developer-friendly approach, making it an excellent choice for React projects and beyond.
Stay tuned for Part 2 of our series, where we delve into advanced testing techniques with Cypress.

