Identity management is HARD! But third parties are making it easy for us. We wanted to configure Content Hub for Single Sign-on authentication with Okta through SAML to match with Sitecore so the DAM popup would be seamless. This way the responsibility of manual user management will move away from content hub admins to the system admins who are responsible for the whole organization.
Okta setup
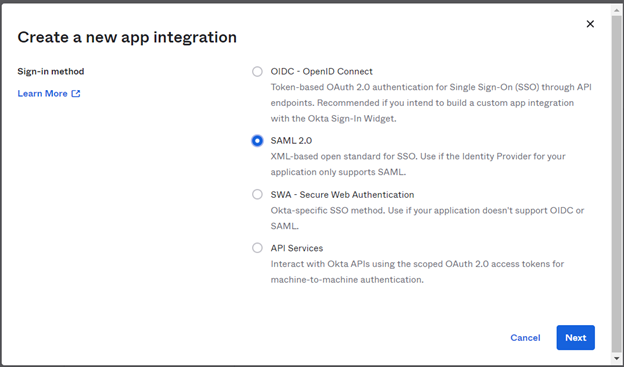
- From Okta admin portal create an application.
- On the next screen, Single Sign-on URL will be <Your-content-hub-instance-url>/AuthServices-okta/Acs
- Use the same url for Recipient URL and Destination URL
- Audience Restriction is the url of your content hub instance
- For Name ID Format use email address or name whichever seem fit, but this will depend on your setup.
- Mapped these two ATTRIBUTE STATEMENTS (these will also change depending on your setup)
- http://schemas.xmlsoap.org/ws/2005/05/identity/claims/emailaddress is mapped with user.email
- http://schemas.xmlsoap.org/ws/2005/05/identity/claims/name is mapped with user.email
- Use SAML 2.0 as the sign on method
- Set Application username format to email or name depending on Name ID.
I am working with a personal account to build a POC, so not a lot of users and roles but just me, myself and I.
Content Hub Setup
- Go to Manage then Settings
- Under PortalConfiguration find Authentication
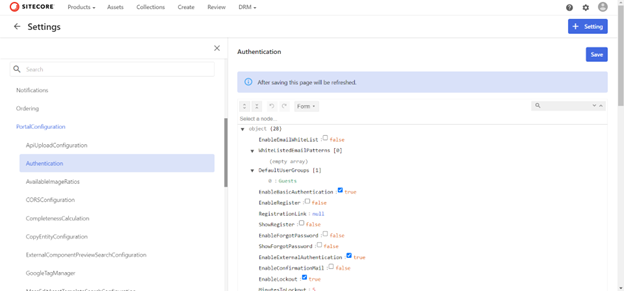
- There are three different views.
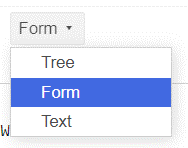
- Tree view is easy to view. Form view is easy to change, but Text view is easier to copy & paste. Choose the one your heart desires.
- Turn EnableBasicAuthentication to true
- Turn EnableExternalAuthentication to true
- Expand or look inside ExternalAuthenticationProviders node.
- The saml block of code should look something like below:
"saml": [
  {
    "metadata_location": "",
    "sp_entity_id": "",
    "idp_entity_id": "",
    "provider_name": "okta",
    "authentication_mode": "Passive",
    "module_path": "/AuthServices-okta",
    "is_enabled": true
  }
],
- Where and how do I get the values, you ask?
- Metadata_location: Go to Okta application setting
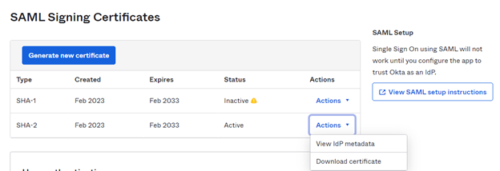
- Click on View IdP metadata and copy the url from the browser. This will end with “/sso/saml/metadata”
- sp_entity_id is the Content hub instance url.
- idp_entity_id can be found in two places. From the UI and from the metadata listed above.
- in the UI, find this block on Sign on tab of the application
- Open the instruction
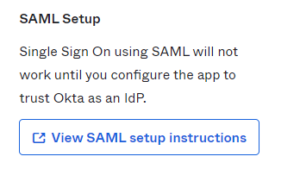
- IdP will be listed there on #2

- Metadata_location: Go to Okta application setting
- That’s it. This is the minimum configuration needed to hook up Okta to your content hub.
- Save all the settings changes in Content Hub. The changes should propagate instantly. I say should because sometimes the goblins are chewing the cables that flies the bits around in the Content Hub cloud.
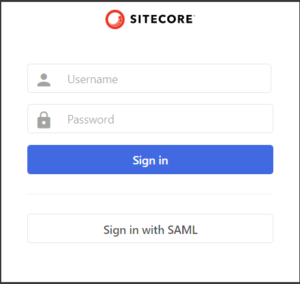
- Open another browser or use incognito browser and try to login with SAML it should look like below.
What’s next:
- Add title, description and Sign in messages to the settings json
- Complete setup and real users and roles in Okta
- Write User Log In script in Content hub to map user roles from Okta to Content Hub (another topic for another day)
Write a blog post- Buy flowers (note the publish date)
Special thanks:
- Chandra Sekaran, for the only other useful link on the whole wide world (www) https://chandraschub.blogspot.com/2021/09/sitecore-content-hub-solve-common-okta-sso-configuration-issues-with-practical-tips-and-advice.html
- Sitecore documentation team for putting these together: https://doc.sitecore.com/ch/en/users/42/content-hub/manage–authentication-configuration-example.html

