
Webpack Plugins
Last time we started creating rules for file types, and sometimes we used a loader and sometimes we referenced a plugin to do any special functions. We already used the MiniCssExtractPlugin for working with Sass-like files and plain css to produce a single CSS file. Next we will look at some common use cases where plugins will either help us during development testing or in our final output for production.
Keeping things clean
Each time we run a build webpack will create new file(s) in our “dist” directory, but we only want to use the latest built files. Webpack 5 has a built-in method for this called “clean” which is put in the “output” area in our configuration file:
output: {
  filename: 'bundle.js',
  path: path.resolve(__dirname, './dist/'),
  clean: true
},
This will remove everything in “./dist/” and replace it with new files when running a build. That’s great if you’re using Webpack 5, but if not, we need a plugin called clean-webpack-plugin.
As usual, we start by installing it using npm and since we will need it during development using the –save-dev flag.
npm install clean-webpack-plugin --save-dev
Now we add it as a requirement at the top of our configuration file:
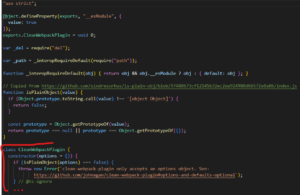
const {CleanWebpackPlugin} = require('clean-webpack-plugin'); Notice we are using the braces when giving this a reference name as we are asking for the class called “CleanWebpackPlugin” found within the js module. You can always open up the folder created in node_modules and take a peek at what you installed so it’s not such a black-box situation!
screenshot of clean-webpack-plugin.js showing the class we are using
Finally, we need to add this to our plugins array in our config file:
plugins:[
    new CleanWebpackPlugin()
]
For now we don’t have any options defined within the parentheses, ie: new CleanWebpackPlugin({ options go here}). But there are ways to include other folders besides “dist” or to keep certain files.
More can be read in the documentation https://www.npmjs.com/package/clean-webpack-plugin
Be Unique
Very often when we are deploying new code our JS and CSS files are not immediately picked up by browsers with our changes due to caching. Almost every time when doing a deployment the client doesn’t see the work done unless given specific instructions on how to hard reload, clear cache or use some other method to pull that latest version. Fine if you can tell someone, but for the public, you can’t. In order to be confident what needs to be loaded, we can create unique filenames for our assets.
Using ContentHash

Webpack has a built-in value called [contenthash]. This can be added to any named output file in order to make that filename unique for the browser to know it needs downloading.
If we wanted our bundle.js file in our output to instead use a unique name we would place the [contenthash] value anywhere in the name:
output: {
    filename: 'bundle-[contenthash].js',
    path: path.resolve(__dirname, './dist/')
}
In the above case, the output JS file would be something like “bundle-53daj335232d.js”
The same can be done for our CSS within the MiniCSSExtractPlugin we used previously.
 plugins: [
     new MiniCssExtractPlugin({
         filename: 'styles-[contenthash].css'
     })
]
This is great for cache-busting, but now we have a problem. How will the browser know what filename to use within our <script> and <link> tags for our external JS and CSS files?
There are several ways to deal with this, and it depends on the structure of the site you are working on. If you have either a single-page app, or use a server template, these tags can be automatically inserted in them using another webpack plugin. For enterprise-level sites, a server-side solution to determine the filenames within a location could also be used.
Let’s assume we want to insert those tags into a template page for now.
HtmlWebpackPlugin
By default, this plugin will create a standard HTML5 – coded page structure in the output filename you specify. It isn’t often you’ll have your whole site created just with CSS and JS, so usually you’ll have an existing page you’ll want to inject those condensed CSS and JS file tag references. This might be just a Head Include file, or a whole file template, or a single page app. We will be demonstrating how to get just the JS and CSS links we need put in the HEAD of whatever kind of file you are using.
Installing
Back in our terminal we’ll install as a dev dependency which will appear in our package.json file.
npm install html-webpack-plugin --save-dev
In our config file, we add it to our plugins
plugins: [
       ... (other plugins already installed),
       new HtmlWebpackPlugin({
           inject: false,
           template: 'src/index-template.html',
           title: "Hello World",
           filename: "index.html",
           description: "Some Description",
           minify: true
       })
   ]
Above we have some options added for the plugin. More information can be found here: https://webpack.js.org/plugins/html-webpack-plugin. And in the plugin’s own documentation here https://github.com/jantimon/html-webpack-plugin#options (much more as you scroll down)
The first things we need to specify are the template and filename. template is the location of the file we want to read-in, and filename is the desired name of the output file, and any specific location other than the default “./dist/” folder. Here I am saying to get my template file from “src” and I’m calling it “index-template.html” It doesn’t need to be an html file, so any server-side text file will work just the same. The output file will just be called index.html. In case you are wondering, yes, multiple files can be created/updated using this plugin by defining it multiple times in the plugin array with whatever options desired.
The template file
To output whatever you want in your template file, you’ll need to use the lodash variable syntax : <%= htmlWebpackPlugin.options %> or <%= htmlWebpackPlugin.tags %>. Lodash is available by default, but you can use other templating libraries like handlebars {{ }}, but that needs to be defined in a rule for that type of file. For now we’ll just use what is out of the box.
Here we have our index-template.html file with the variable to output the <script> and <link> tags placed in the head.
<!DOCTYPE html>
<html lang="en">
<head>
    <meta charset="UTF-8">
    <meta http-equiv="X-UA-Compatible" content="IE=edge">
    <meta name="viewport" content="width=device-width, initial-scale=1.0">
    <%= htmlWebpackPlugin.tags.headTags %>
    <title>My App</title>
</head>
<body>
    <h1>Page using template to generate CSS and JS hashed bundle names dynamically.</h1>
</body>
</html>
and the output will be a replacement of the variable with our tags for CSS and JS according to whatever file name and location our rule and/or our plugin for that file type defined earlier. If none, the default output “./dist/” is assumed. Notice since the JS is in the head, “defer” has been automatically added to prevent synchronous loading issues.
<!DOCTYPE html>
<html lang="en">
<head>
    <meta charset="UTF-8">
    <meta http-equiv="X-UA-Compatible" content="IE=edge">
    <meta name="viewport" content="width=device-width, initial-scale=1.0">
    <script defer src="bundle.js"></script><link href="css/styles.css" rel="stylesheet">
    <title>My App</title>
</head>
<body>
    <h1>Page using template to generate CSS and JS hashed bundle names dynamically.</h1>
</body>
</html>
We didn’t use any of the options such as title or description but these are available to be generated as well using the <%= htmlWebpackPlugin.options.title %> for example within the <title> tags of your template file. Also, as by default this plugin will generate all the standard html, we set the “inject” option to false so we populate only the parts we want within our variable output tags.
Finally, the “minify” option can be hard set or removed completely. html-webpack-plugin will look at your “mode” (development or production) value and if no “minify” value is set, will auto-minify for mode: production, and not minify for development.
Next: Get Your Module Running