The Adobe Experience Manager ‘Launches’ feature presents a simple way to make new content changes and manage existing content until you are ready to replace it.
Adobe describes Launches this way: “A launch is created to allow you to make changes ready for future publication (while maintaining your current pages). After editing and updating your launch pages you promote them back to the source, then activate the source pages.”
Learning some content launch basics will get you ready to use this AEM feature.
When Should You Create a Launch?
You should create a launch whenever you need to make content updates that require time and patience before publishing while also maintaining the existing content you have. With the Launches feature you can avoid accidentally publishing a page before it’s ready and you can continue to update and publish existing pages while at the same time making changes to content in the launch.
Something to Be Aware of
An important note is that you are not allowed to move a page within a launch. If you attempt to do this a warning message will appear. If you have content changes that involve page moves, creating a launch isn’t advised. If you’d like to move pages, you could move them first and then create a launch from the moved pages. If you’d like to include brand new pages in a launch, you can create the page first and then add the new page to a Launch.
How to Create a Launch
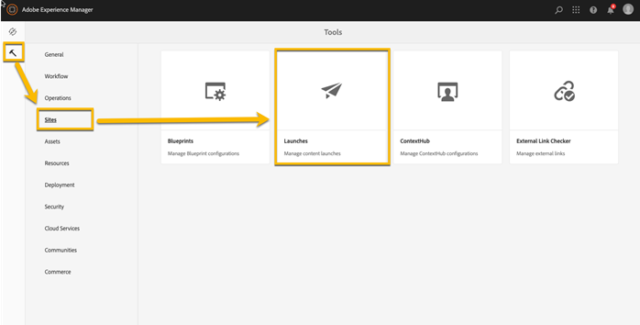
To create a Launch in AEM 6.5, go to Tools, Sites, Launches. Then click create.

Next, add existing pages to your launch. In the Create Launch page, click + Add Pages to add pages and subpages to your launch.

Then, Define the Launch properties:
• Give the launch a title.
• Decide if you want your launch to remain in sync with the source page changes or if you want the launch to be independent and not be updated with changes made to the source page. Check or uncheck the “Inherit source page live data” box accordingly.
• Set a launch date or leave the launch date blank if you plan to manually promote the launch whenever you are ready.
• Click create.
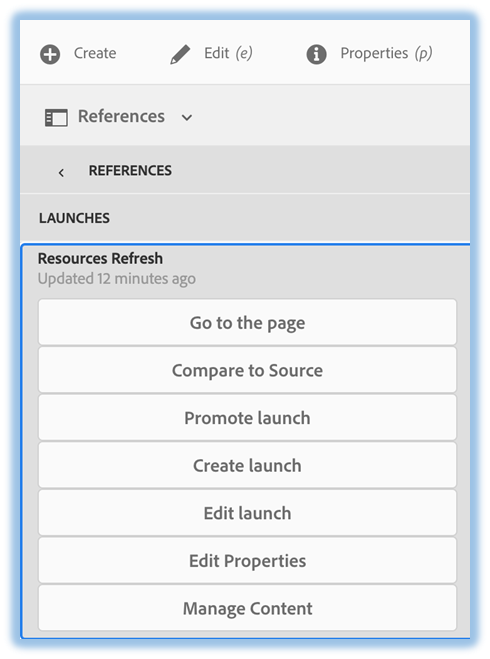
When you click create, copies of the pages you included will be created and can be accessed under Launches or by navigating to the original page and viewing the references under the Launches heading. From there, you can go to the launch page and update the content or select Manage Content to navigate all the pages included in the Launch.

Headers & Footers or other inherited content may not appear in Launch pages, but they will match the source pages when promoted.
When you’re ready to move the launch back to the source, select the entire launch or individual pages in the launch and click “Promote Launch”. Promoting the launch overwrites the source content. It’s a good idea to make sure other AEM authors are aware of Launch activities, especially if there is a launch that doesn’t have synch turned on. If authors update source content that isn’t synced to the launch, it will be overwritten when the launch is promoted. If that does happen, you can use the timeline feature to revert to the previous version if necessary.
After the launch is promoted, you can publish the new content or send it through your publication workflow. The launch can still be accessed unless you delete it, so you can continue using the same launch if you’d like.
Hopefully this blog helped you to further understand Launches and some of their components! Contact us with any questions you may have about your AEM project.

