What’ll You Learn
- What is Virtuoso
- How to Create Project in Virtuoso
- How to Create a Goal
- How to Create a Journey
- What is Checkpoint
What is Virtuoso:
It is a framework for autonomous testing of web applications called Virtuoso. With the help of this platform, you can increase testing quality. Virtuoso investigates your application to streamline and improve testing. Any of the UI’s or integrations of the following categories of browser-based applications can be functionally tested using Virtuoso:
- Front-end websites (ecommerce store, public-facing website)
- Browser-based business applications such as:
- SAP S/4Hana, C/4Hana, Fiori
- Salesforce
- Adobe AEM
- Oracle Cloud
- And others – so long as it is browser-based!
How to create a project in Virtuoso:
To create a project in Virtuoso, the user needs to log in with a user id & password. After successfully logging in user navigates to the organization dashboard, where the user can start creating a project.
Users can examine or manage many parts of your organization (e.g., usage, apps, team and member management, and settings). More importantly, the User can create new projects and access projects already in the dashboard.
Follow the Given Steps to Create a New Project:
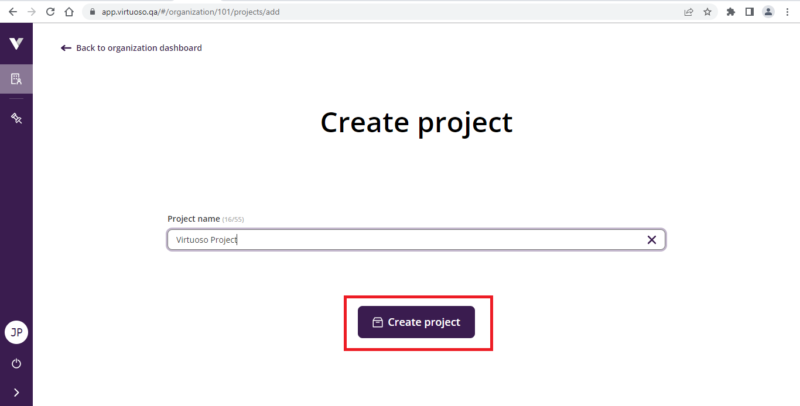
- Click on ‘New project’ from the right side of the page.

- Give the name of the project and click on the ‘Create project’ button.
- Once we create a project, we have a series of menu options within the project.
- Project Dashboard
- Project Activity:
- Journeys:
- Extension:
- Test Data:
- Execution Planner:
- Environment:
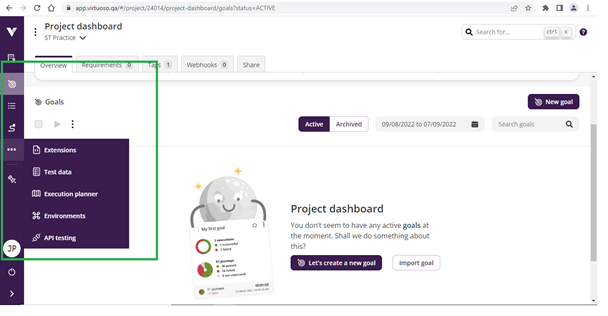
- When we come to an empty project, we can create a ‘Goal’ for the specific part of the application which we want to test.
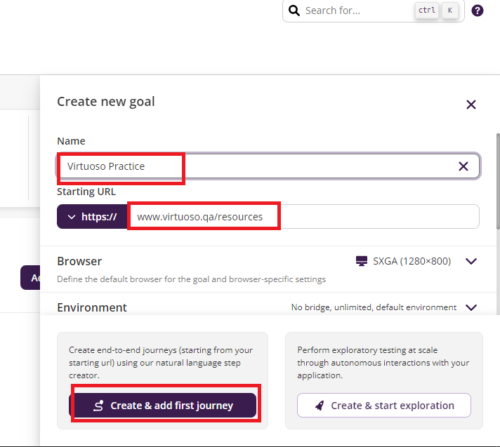
Few Steps to create a goal:
-
- Click on ‘Let’s create a new goal’
- Give the specific name for the goal (e.g., Virtuoso Practice)
- Add URL In the Starting URL Field.
- Click on Create and add First Journey
Once the user has finished creating the Goal and is in the Goal view, the user can begin planning their route. Virtuoso will always include a first test step with every goal user has written, which is simply a navigation step to your testing web application.
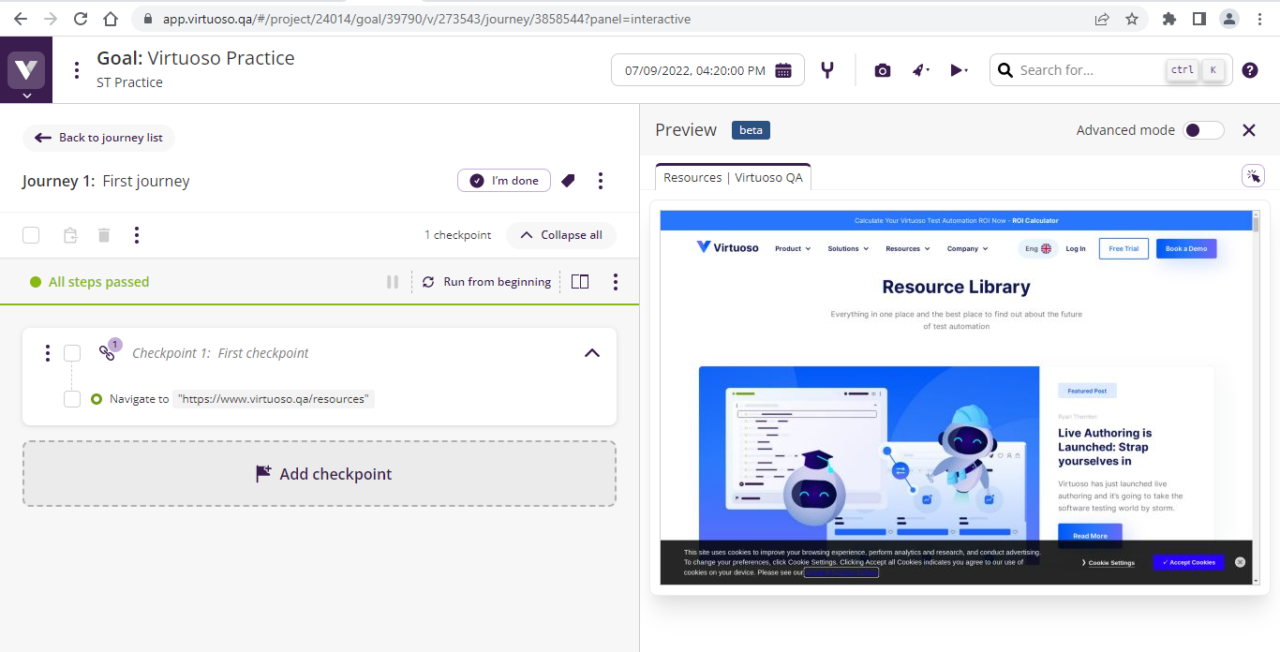
By selecting the execute journey ‘icon’ located above the journey, the user may run this journey exactly as it is. Once the user starts running the journey, first, it will turn yellow as it begins to execute and then turn green after it is finished. And it turns red when Virtuoso does not get the expected result.
Creating and Managing a Journey:
Journeys represent complete user flows through your application.
Each journey typically comprises a few interactions that move you from the starting point A to the destination point B and a few validations along the route. Each of these activities is referred to as a step, and checkpoints can be used to distinguish between them.
How to Create a new Journey:
- To create a new Journey, click on ‘Add a journey’ below the journey list.
- It will ask for the name of the Journey and give a proper name for the journey
- Click on the save button, then you will navigate to the newly created journey.

The first Checkpoint (step) of journeys created for a single goal will be the same; the first step will be inherited by default in all journeys. If the user makes some changes at the first checkpoint, it will reflect all journeys in the goal.
What is a Checkpoint in Virtuoso:
- Checkpoints are nothing but the steps included inside the journey.
- The first checkpoint will be common for all journeys of the goal.
How to Create Checkpoints:
- Navigate to any journey
- Click on Add checkpoint
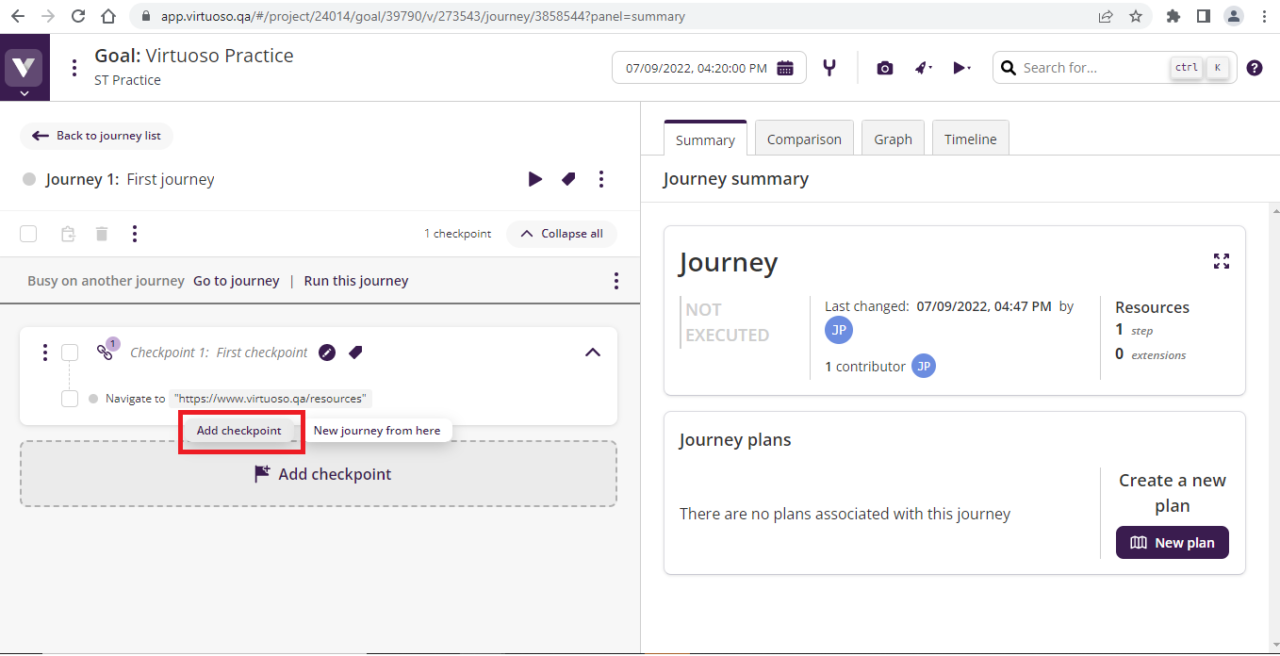
- Give a name for the checkpoint
- Start writing steps inside the checkpoint
- When we add a new step, click on run this journey, which will execute from the start.
- Execution will reflect on the left. Live Authoring will start.
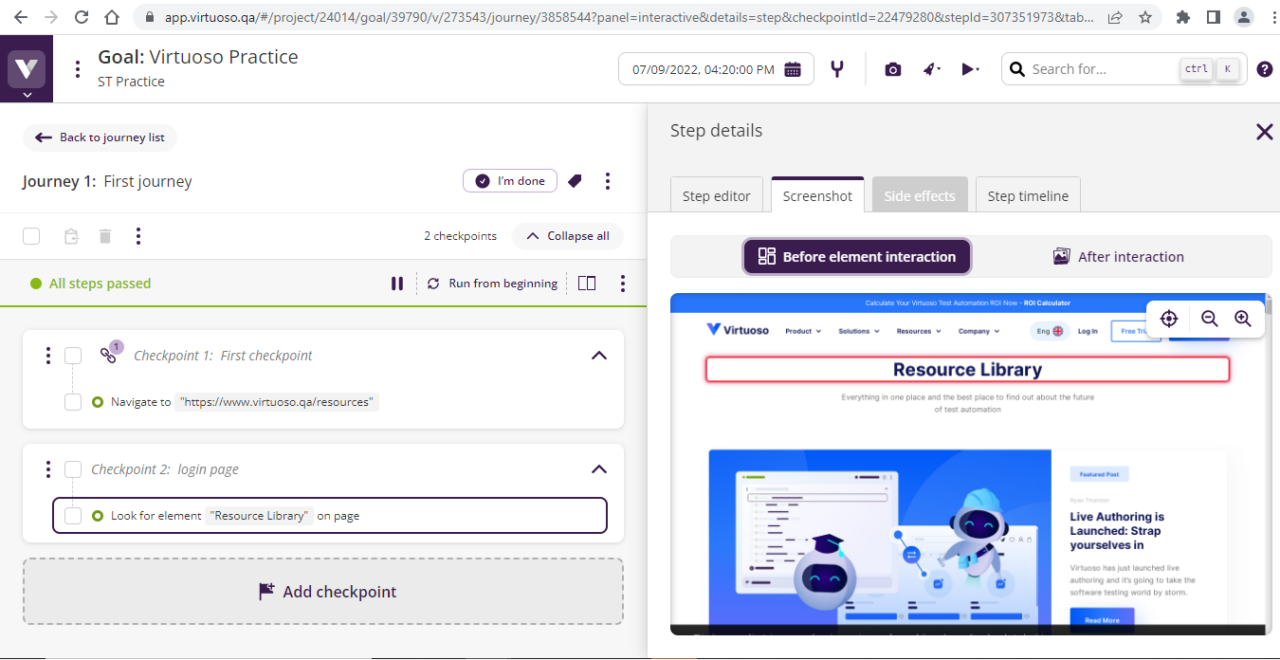
How Can we Edit the Steps we Have Written?
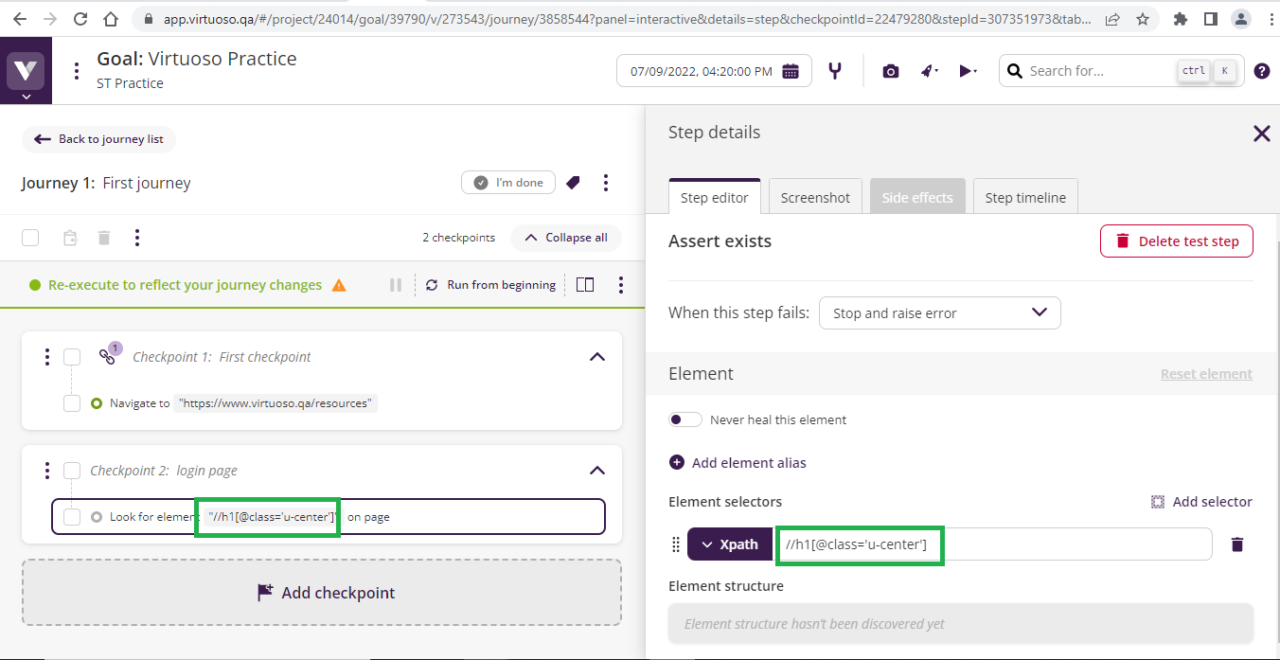
- Click on the step, then go to the step editor, then we can change the value.
- There is various element selector.
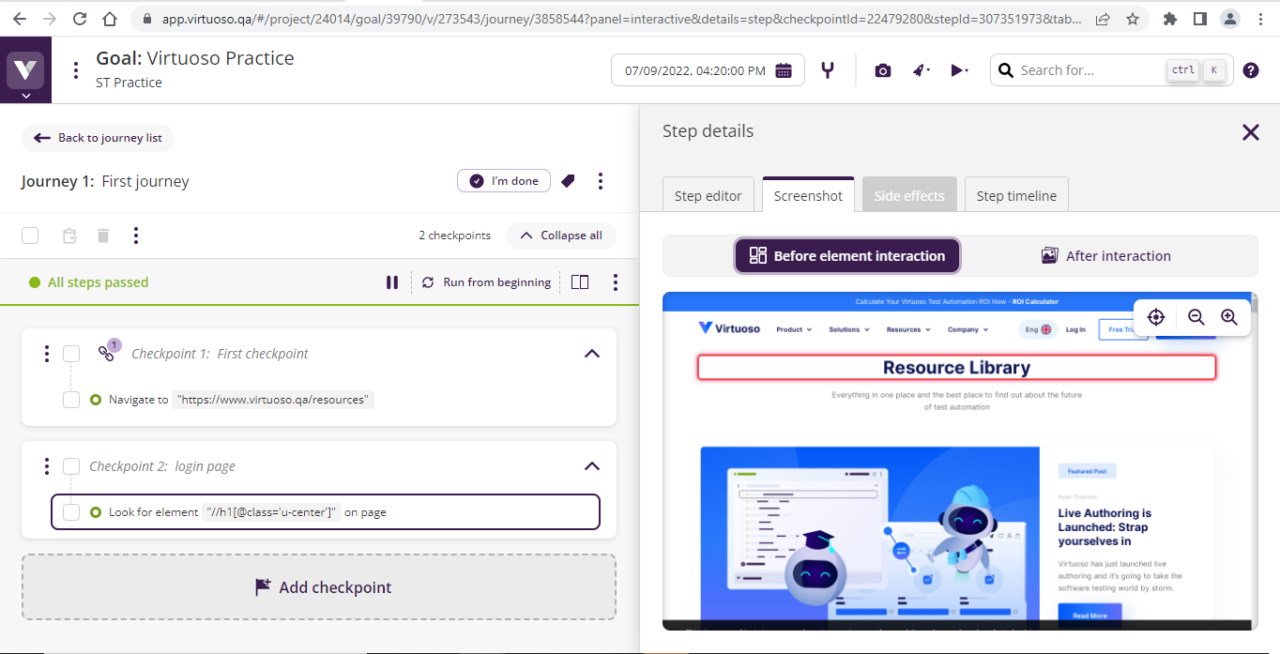
- We can select any selector and enter a value for that. E.g., If we select XPath, enter XPath for the expected element.
- The changed value will reflect in the step of the checkpoint.


Informative Blog Dipali !!
Thank You Mangesh!
Nice info, Useful Post !!
Thank You Rushabh!
Thanks Mangesh!
Useful and informative Blog
Thank You Saurabh!