In Part 1 of 2 Table Views, I demonstrated the data querying functionality of Table Views and stated that in Part 2 of 2 I would demonstrate how to update the data that was queried which is the subject of this blog. If you have not read Part 1 please do so before proceeding as this blog extends the previous blog.
To begin the process, I will log into the OneStream reference application, GolfStream. Once you have logged into the application, select “OnePlace“-> “Application“.

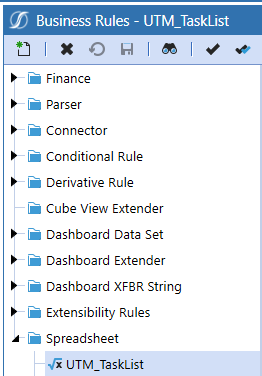
Expand “Tools” and then select “Business Rules“.

Expand “Spreadsheet” and then select the “UTM_TaskList“.

With the UTM_TaskList Business Rule “BR” selected, navigate to “Line 92” and update TV_TaskListExport.CanModifyData from “False” to “True” which enables the modifying of data. Also, update the comment on line 91 to document the change.


Navigate to “Line 34” and uncomment the line as a private function will be added to the SaveTableView SpreadsheetFunctionType.


Having enabled the modification of data and uncommented “Case Is = SpreadsheetFunctionType.SaveTableView“, the next step will be to add line 35 “SaveMyTableView(si,args.TableView)“. SaveMyTableView is a Private Function which will have the code to update table, XFW_UTM_TaskList, for changed records.
![]()
Navigate to the End Function line of Private Function, GetUTMTaskListExport, and then create the Private Function “SaveMyTableView“.

With the function added, the code to update the appropriate data record(s) is developed. As the code in the next image is documented, I will summarize the code development which is to create the SQL statement “Line 144 then Line 173” that will be populated and executed, the TaskID variable which is utilized in the SQL statement “Line 147“, connection to the application database “Line 153“, a loop of the rows “Line 155” and columns “Line 159” in the result set and finally execution of the SQL statement “Line 183“. If you have not already done so, save and then compile the BR to check the syntax. At this point, the BR is ready to test and can be closed or remain open.

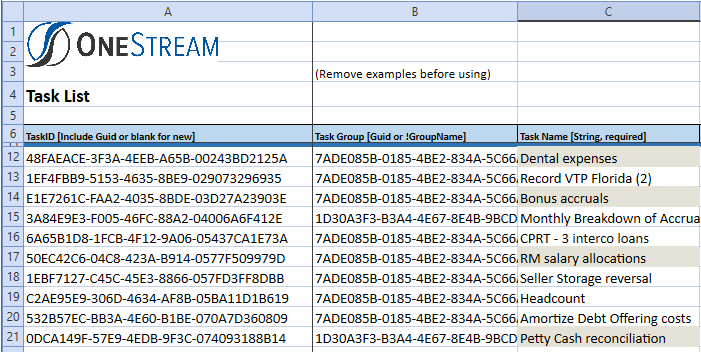
To begin the process of testing the SaveTableView functionality, expand “Tools” and then select “Spreadsheet” accessible from Application and open “TaskImportTemplate_UTMT.xlsx” saved in the previous blog post. Once the file is opened, select “Refresh Sheet“.


Update one or more row(s) in the TaskName column as the TaskName column is the column specified in the UPDATE SQL statement. The rows which are updated have been shaded to identify the rows which were changed. Note, additional columns can be updated which would require changes to the UPDATE SQL statement in the Business Rule, and one column was chosen to have a concise example for this blog.

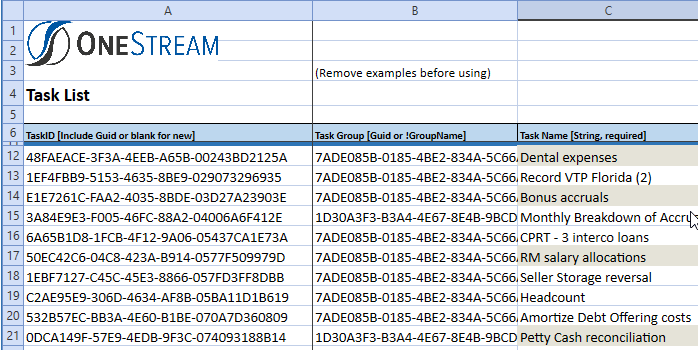
With the data updated, select “Submit Sheet” from the OneStream XF Ribbon.

After a second or two, the change records have been saved to the table and the TableView previously returned has been updated. Note, the changed records have been shaded for identification.

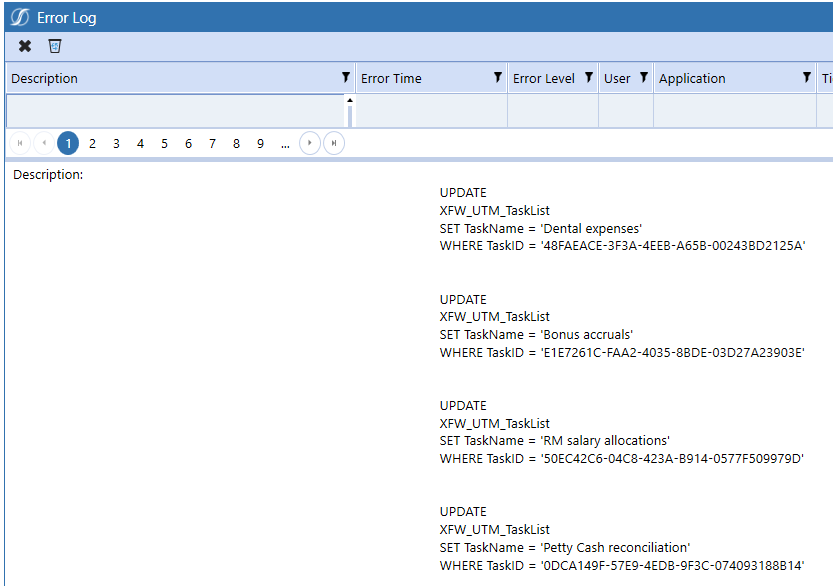
One of the lines I did not point out in the code summary was “BRApi.ErrorLog.LogMessage(si,SQL_TaskList_U.ToString)” which logged the query execution to the Application Error Log an image of which is included for reference. Note this is an optional line in the code that can be commented out if preferred.

At this point you may be wondering, the Excel file had more than four rows; however, the updates captured in the error log are only for four rows. How did the Submit Worksheet only know to update four rows which had changed data? The other line I did not include in the summary of the code is “If TV_ColumnU.IsDirty()” which per the Table Views User Guide, “IsDirty – Condition Check if the item has been modified” e.g. by including IsDirty() the SQL Statement will only execute for changed records.

As always, thank you for reading the blog post. In the event you have any questions, feel free to either post a comment or email me at terry.ledet@perficient.com.

