When loading data into an Oracle Accounts Reconciliations Cloud Services (ARCS) application, data is mapped to be loaded from the Source system into the Profile Segments. Profile Segments are the components of the ‘Account ID’ used to uniquely identify profiles and reconciliations. For example, if you typically reconcile accounts at the Company-Account level, then you would define two segments: one for Company, and one for Account. These Profile Segment values in ARCS are labels only. They do not control the mapping of balances to reconciliations which occur through mapping rules added in the data load definitions in Oracle Data Management.
For this reason, the ‘Change Sign’ option that is usually available for an ‘Account’ type dimension in an EPM application’s Data Management, is not available in an ARCS application’s Data Management.
PBCS Data Management:

To be able to use functionalities like “Change Sign”, “substring”, “Split”, “LTrim” etc. easily for an EPM Cloud application like ARCS whose segments behave differently than the dimensions of other EPM Cloud applications, you can use ‘Data Integrations’ module within Data Exchange in the Cloud application.
Between Data Integrations and Data Management, integration-related activities are bidirectional and synchronized. For example, when you map dimensions in Data Integration, any saved mappings are populated automatically in Data Management.
So using Data Integrations module in Data Exchange, several transformational tasks like flipping the sign on amounts, creating Source and Target expressions to modify the values, transforming amount values etc. can be easily performed. All these common integrations-related transformations can be done using an easy-to-navigate interface that supports and conforms to how you work. Some of these transformations are not directly available in Data Management interface, but once they are created in Data Integrations, they can be edited from Data Management as well.
For example, the following options are available in Data Management’s Import format for the Expression Type.

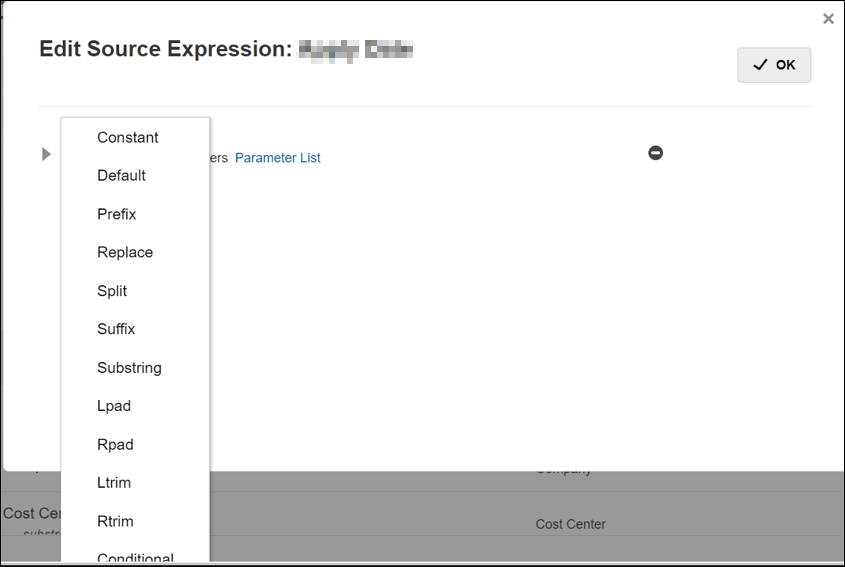
For the same integration, the following options are available in Data Integrations for the Source Expression Type.

In this article, the process to flip the sign on the amounts to be imported into an Account Reconciliation Cloud Services application is discussed to demonstrate updating integrations in Data Exchange.
This article assumes that you are an ARCS Service Administrator, the ARCS application is already configured and set up, Profile Segments have been created (including Account), and Data Management setup including source & target applications, Import format, Location, Data Load Mappings, Data load rule and Period mappings have been created to facilitate data load from the source into the ARCS application.
Below is a step-by-step process for changing the sign on the amounts to be imported into an ARCS application.
- Navigate to Data Exchange in the Application section in the ARCS application.

- In the Data Integration page, scroll to the integration for which sign needs to be flipped and select it.

- From the actions menu for the selected integration, click Map Members.

- From the Dimension drop down, click on the dimension based on which the Amount sign should be flipped (e.g. Account).

- Click on the Add button to add a new member mapping for the Account dimension. You should already have the rest of the mappings required for this integration created for this dimension. You can also just edit existing mappings as needed without adding a new mapping.

- In the Mapping window, select an appropriate Source map type by clicking on the Mapping Type drop-down. To flip the sign on all Accounts starting with 4, select the ‘Is Like’ map type.

- Specify the Source value by entering the Accounts for which the Sign on the amount needs to be flipped.

- In Target, enter the target value for this mapping. Since Accounts are not going to change, enter 4* for Target as well.

- The Processing Order determines the level of precedence within a mapping type. Mappings are processed in alphabetical order by the name within a mapping type. Numbers may also be used to help with ordering. For example, if numbering by tens or hundreds, you can insert a new value between existing ones. When mappings are numbered 10, 20, and 30, you can add a mapping that starts with 25 and need not rename other mappings.

- Enter an optional Description for the mapping.

- Check the Change Sign box to reverse the sign of the target accounts specified. The option is often used with General Ledger source data when the trial balance has negative signs for Revenue and Liability/Equity source accounts.

- If there are multiple Data load rules for this ‘Location’ and the mapping should apply to only a particular rule, choose the rule in the Apply To field.

- Click Ok to create the mapping. Click Save to save the new mapping.


- Once the mapping is created in Data Exchange, it will show up in the Data load Mappings in Data Management. Navigate to Data Management in the Integration section.

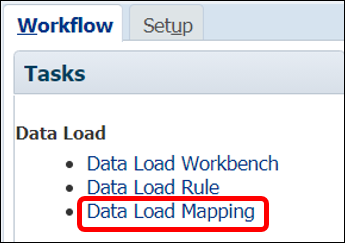
- Open Data Load Mapping under the Workflow

- Choose the Location for which the new mapping was added in the POV.
![]()
- Choose the Account dimension from the drop-down and review the new mapping. The Change Sign option is not seen from this page.

- Open Data Load Rule and click on Execute to import the data from the source.

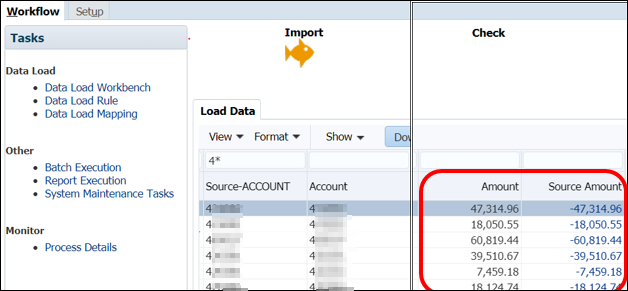
- Review the data in Data Load Workbench to verify that the signs on the Amount for the accounts starting with ‘4’ have been flipped.

- Data is now ready to be imported into ARCS application.

