
The Salesforce Developer Experience (DX) is a set of tools that streamlines the entire development lifecycle. It improves team development and collaboration, facilitates automated testing and continuous integration, and makes the release cycle more efficient and agile.
In this blog, we are going to see why and how to set up a Salesforce Environment on a local machine and learn to use it.
Why Do We Need the Salesforce DX Environment?
Before the invention of the Lightning Web Component, we were able to use the Developer Console to create Apex programming components like Trigger, VisualForce, and Lightning Pages. But Developer Console does not have functionality for creating Lightning Web Components. Along with this limitation, below are additional limitations of Developer Console:
- Autocomplete is not available
- Every time after saving, it hits the API request
- Moving from one tab to another in the developer console is a bit difficult when you open more Apex classes, lightning components, etc.
- LWC development is not possible on the Developer Console
Advantages of Salesforce DX
- It helps improve team collaboration and development
- It makes the release cycle process more agile and efficient
- It allows developers to use any tool to modify the code such as CLI, VIM, Sublime, Atom, etc.
- Facilitates automated testing for your code and enables continuous integration
- Requires a local development setup for developers to get hands-on expertise
Components of Salesforce DX:
- VS Code: Visual Studio Code is the go-to code editor for Salesforce developers. It’s free, open-source, and available for Windows, Linux, and macOS. This editor has easy-to-install extensions for syntax highlighting, code completion, and more.
- Salesforce CLI (command-line interfaces): The Salesforce CLI is a powerful command-line interface that simplifies development and builds automation when working with your Salesforce org. Use it to aggregate all the tools you need to develop with and perform commands against your Salesforce org. Synchronize source to and from scratch orgs.
- Extensions in VS Code: The features that Visual Studio Code includes out-of-the-box are just the start. VS Code extensions let you add languages, debuggers, and tools to your installation to support your development workflow. VS Code’s rich extensibility model lets extension authors plug directly into the VS Code UI and contribute functionality through the same APIs used by VS Code. The Salesforce Extension pack includes tools for developing on the Salesforce platform in the lightweight, extensible VS Code editor. These tools provide features for working with development orgs (scratch orgs, sandboxes, and DE orgs), Apex, Aura components, and Visualforce.
What We Are Going To Do
- Setup SFDX environment
- Setup VS Code environment
- Setup Salesforce DX with VS Code
- Authorization of org retrieve from org and deployment in org using VS Code
Setup SFDX Environment
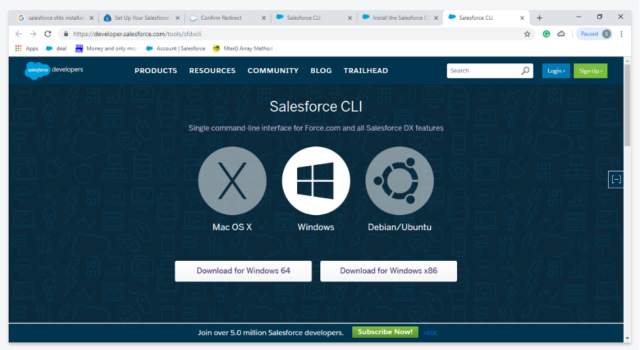
Step 1: Install the CLI using the links below
macOS: https://sfdc.co/sfdx_cli_osx
Windows 32-bit: https://sfdc.co/sfdx_cli_win
Windows 64-bit: https://sfdc.co/sfdx_cli_win64
Debian/Ubuntu 64: https://sfdc.co/sfdx_cli_linux
- Download the archive from one of the URLs in the manifest, extract the archive, then run the ./install script
Debian/Ubuntu x86: https://sfdc.co/sfdx_cli_linux_x86
- Download the archive from one of the URLs in the manifest, extract the archive, then run the ./install script
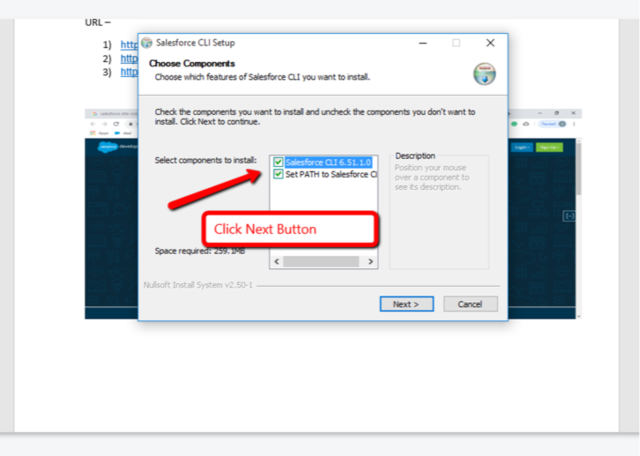
Step 2: Start installing for Windows
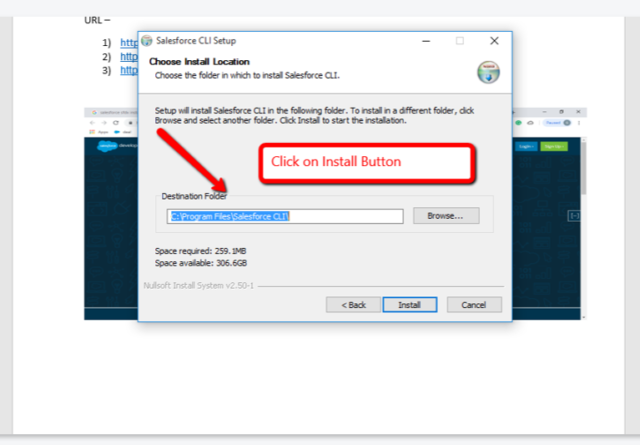
Step 3: Select path for install
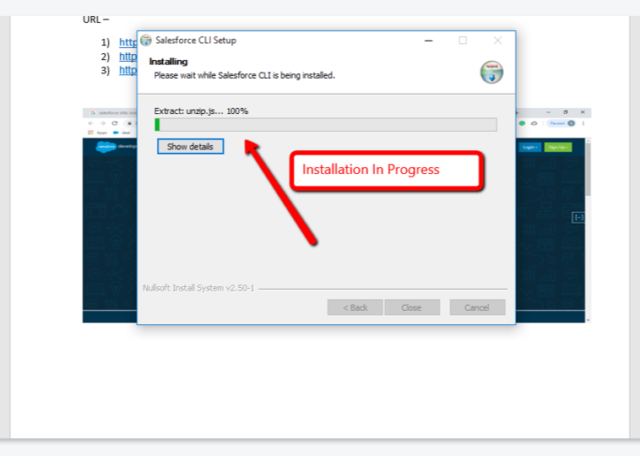
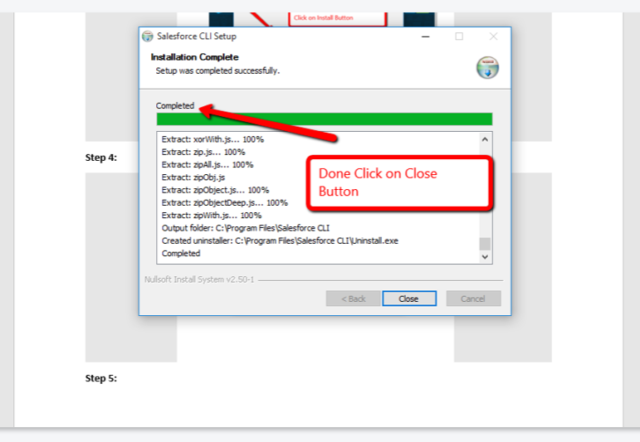
Step 4: Wait for install to complete
a)
b)
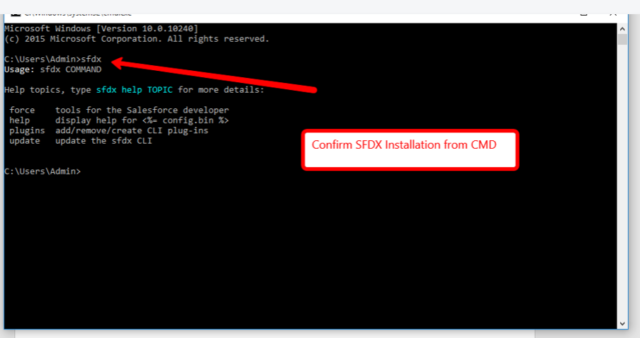
Step 5: Check the version and conform SFDX installation from CMD.
Use “sfdx –version” for version and “sfdx” for installation conformation. (Note: To open Command Prompt is to use search. Inside the search field from your taskbar, enter command or cmd. Then, click or tap on the Command Prompt result.)
a)
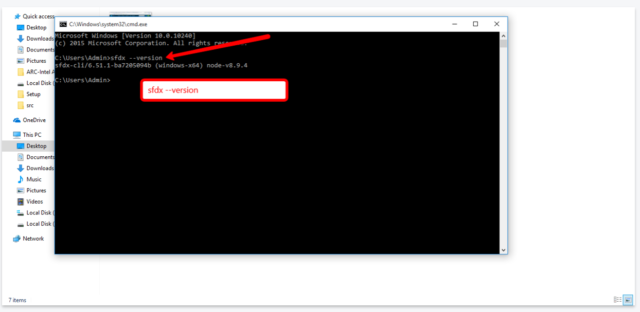
b)
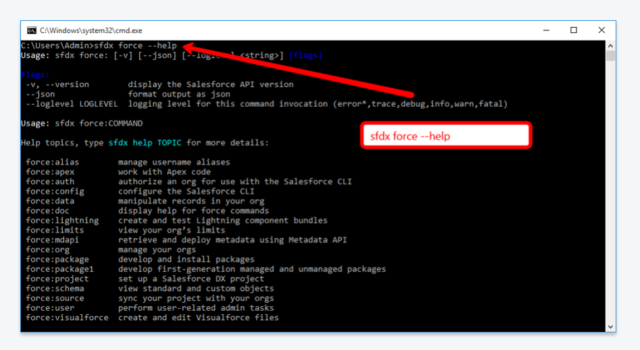
Step 6: Input command “sfdx force –help” to become aware of different commands available in it with its use.
Step 7: Confirm that you’ve installed sfdx plugins, using “sfdx plugins” command.

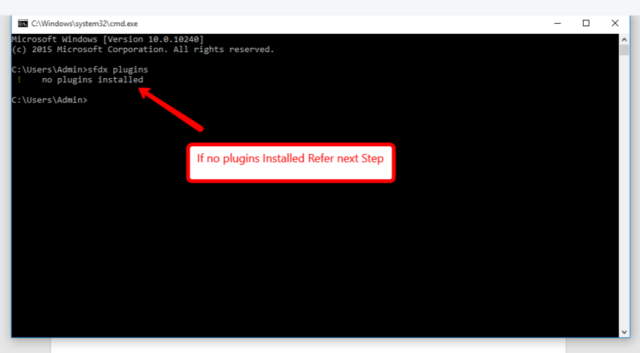
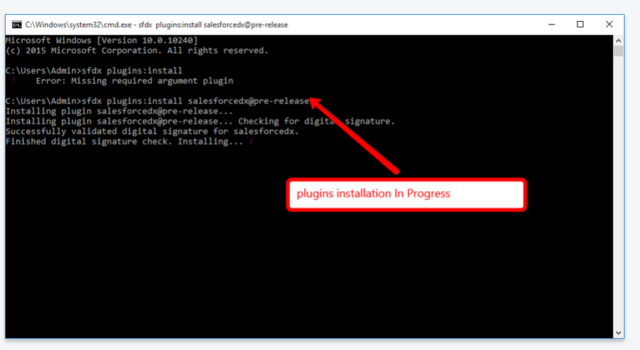
Step 8: If sfdx plugins are not installed, run the following command: ”sfdx plugins:install salesforcedx@pre-release”.
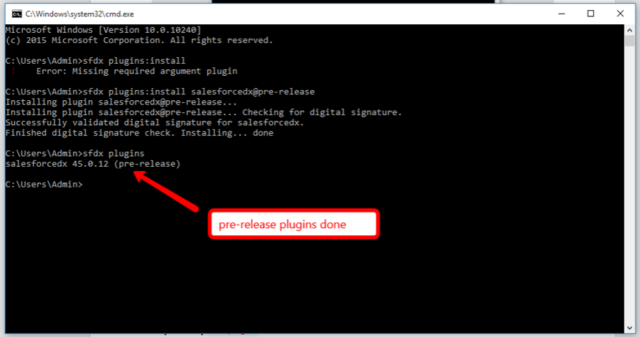
Step 9: Again, verify using the following command: ”sfdx plugins”.
In this way, we can complete the installation of SFDX in a Windows environment. Now, let’s setup the VS code.
Setup VS Code Environment
If VS Code is already installed on your machine, then you can ignore these steps or follow the following steps.
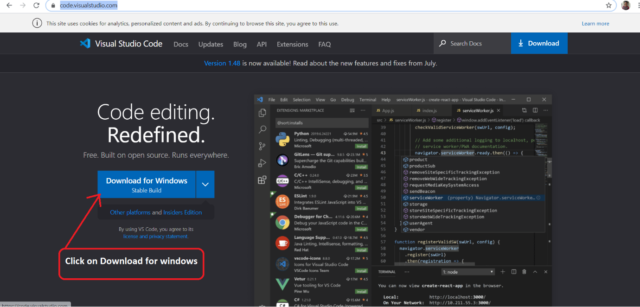
Step 1: Download & install VS Code setup from the following URL: https://code.visualstudio.com
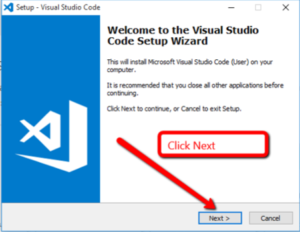
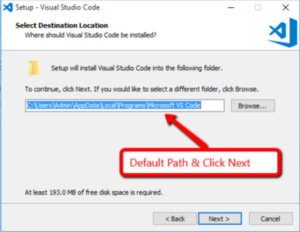
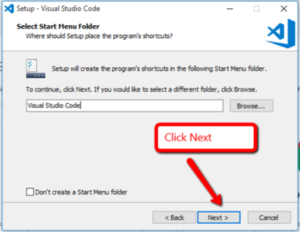
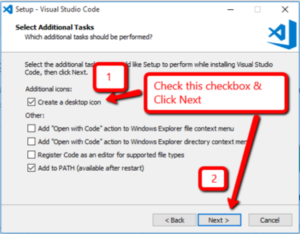
Step 2: Installation of VS Code
a)
b)

c)
d)
e)
f)
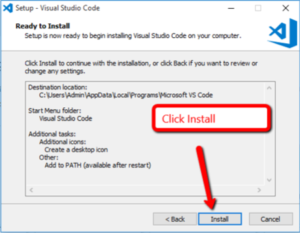
g)
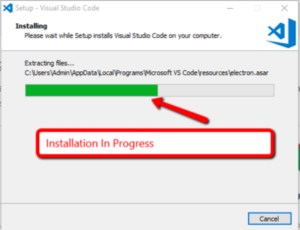
h)

i)
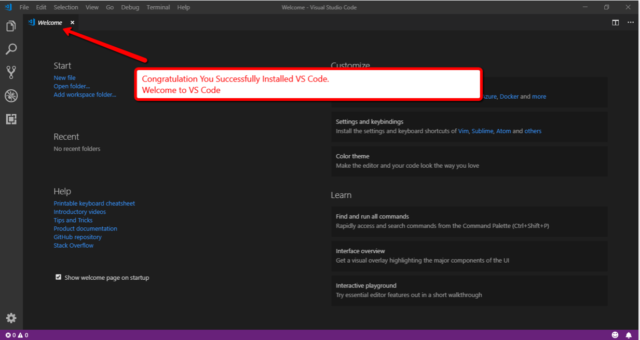
In this way, we can install VS Code on your system.
Setup Salesforce DX with VS Code
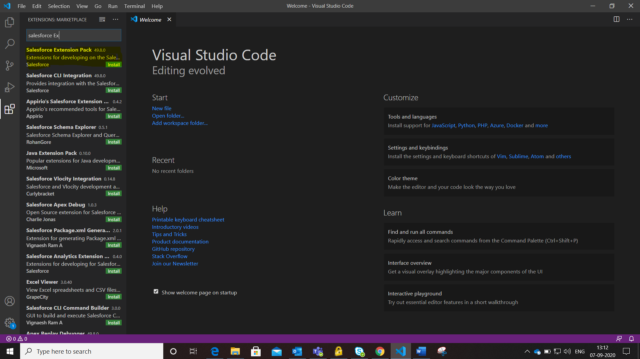
Step 1: To setup Saleforce in VS Code, first install “Salesforce Extension Pack”.
Step 2: To go for a Lightning Web Component in VS Code, first you need to install “Lightning Web Components”.

These are the steps required to set up and configure Salesforce DX on your system.
Create a Salesforce DX Project via Command Palette
- In Visual Studio Code, open the Command Palette by pressing Ctrl+Shift+P on Windows or Cmd+Shift+P on macOS
- Type SFDX
- Select SFDX: Create Project
- Enter HelloWorldLightningWebComponent as the project name
- Press Enter
- Select a folder to store the project
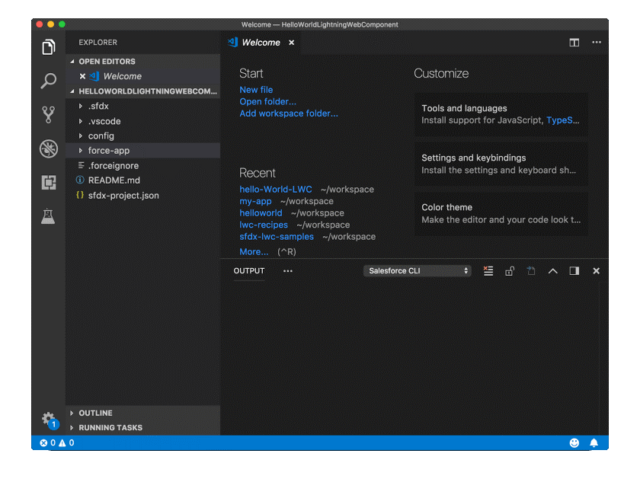
- Click Create Project. You should see something like this as your base setup:
 Authorize Your Non-DevHub Org via Command Palette
- In Visual Studio Code, open the Command Palette by pressing Ctrl+Shift+P on Windows or Cmd+Shift+P on macOS
- Type SFDX
- Select SFDX: Authorize an Org
- Select the login option accordingly. Select login.salesforce.com to log into your developer org or select test.salesforce.com to log in to the sandbox. You can also use a custom domain URL to log in.
- Log in using your org.
- If prompted to allow access, click Allow
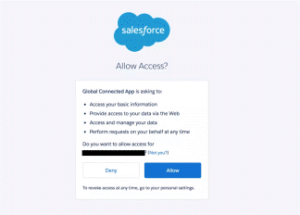
- After you authenticate in the browser, the CLI remembers your credentials. The success message should look like this:

Create a Lightning Web Component via Command Palette
- In Visual Studio Code, open the Command Palette by pressing Ctrl+Shift+P on Windows or Cmd+Shift+P on macOS
- Type SFDX
- Select SFDX: Create Lightning Web Component
- Press Enter to accept the default force-app/main/default/lwc
- Enter your desired name as the name of the new component
- Press Enter
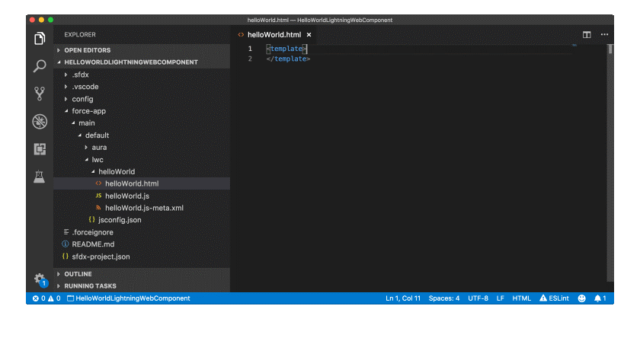
- View the newly created files in Visual Studio Code
 Deploying the Component to Org
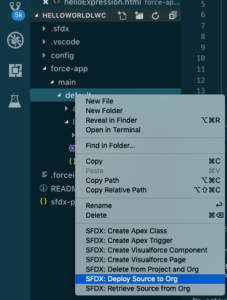
- In Visual Studio code, select the default folder in the project or selected component
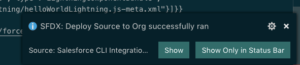
- Right-click; you will see an option for SFDX:Deploy Source to org. Select it.
After a successful deployment, you will see the following message in the terminal:
Notes:
- Make sure that you have installed Java 8 or Java 11 and configure the path on your system.
- If you are not able to retrieve or deploy components and you’re getting “UNSUPPORTED_API_VERSION: Invalid Api version specified on URL” message, then execute the following command: “sfdx force:config:set apiVersion=48.0” and select the previous version in it.
The main objective of this blog is to provide you an overview and easy way to configure Salesforce DX on a system using VS Code. With the help of this new DX, we can create Salesforce application components like LWC components, Lighting Components, or any development in Salesforce org.
To learn more about the Salesforce developer tools available to you, click here.
Visit our Salesforce page to learn more about Perficient’s Salesforce partnership and our capabilities with the platform.