You’d have to run the Azure SQL DacpacTask in your Release Pipeline to continuously deploy your database to Azure SQL. However, if your .dacpac file is not recognized in your build artifact during the DacpacTask, you have to manually add some lines in your Build Pipeline.
NOTE: I’d already deployed our local database to Azure SQL manually before implementing CI/CD for the database. Click here to learn how you can do that in SSMS.
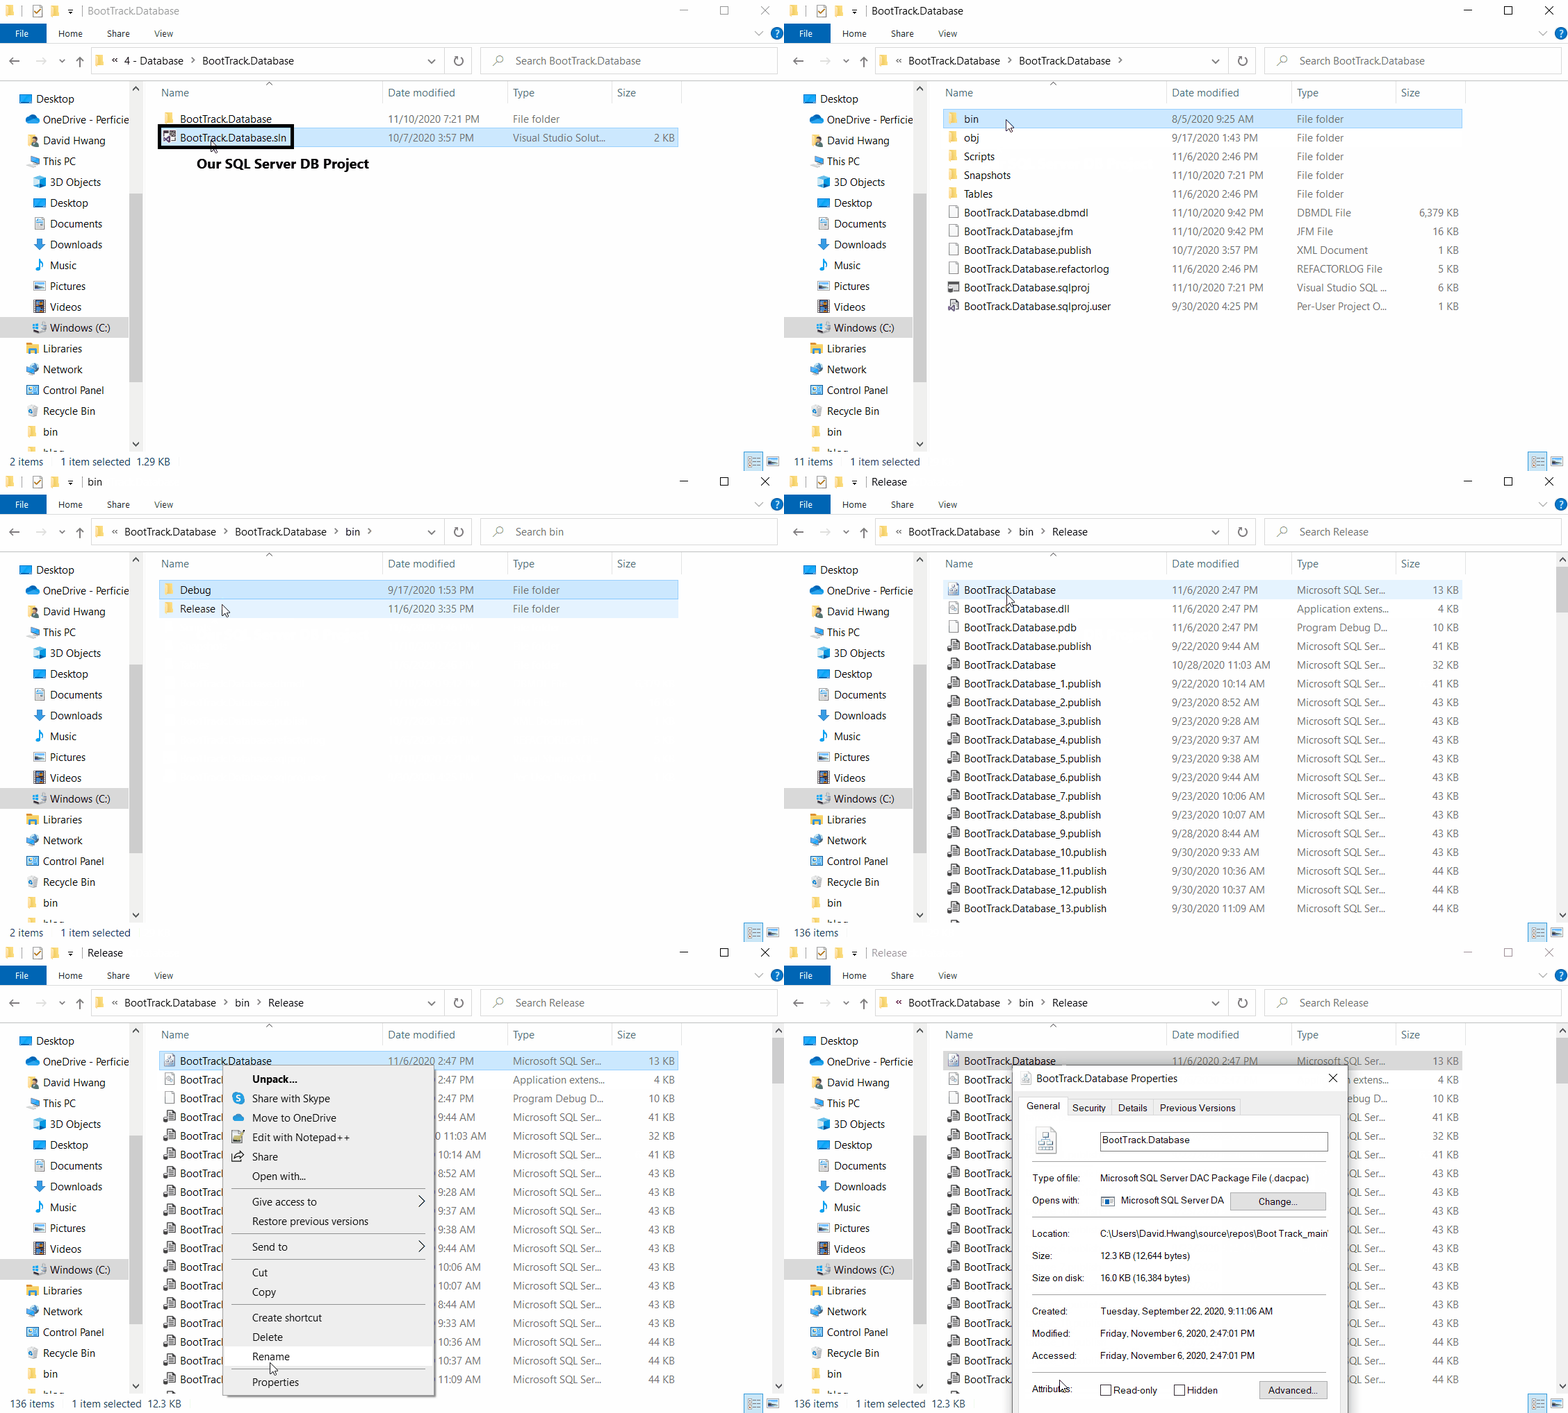
First locate your .dacpac file in your project. From where your SQL project is, navigate to <name of your project>/bin/Release folder. Refer to the GIF below.

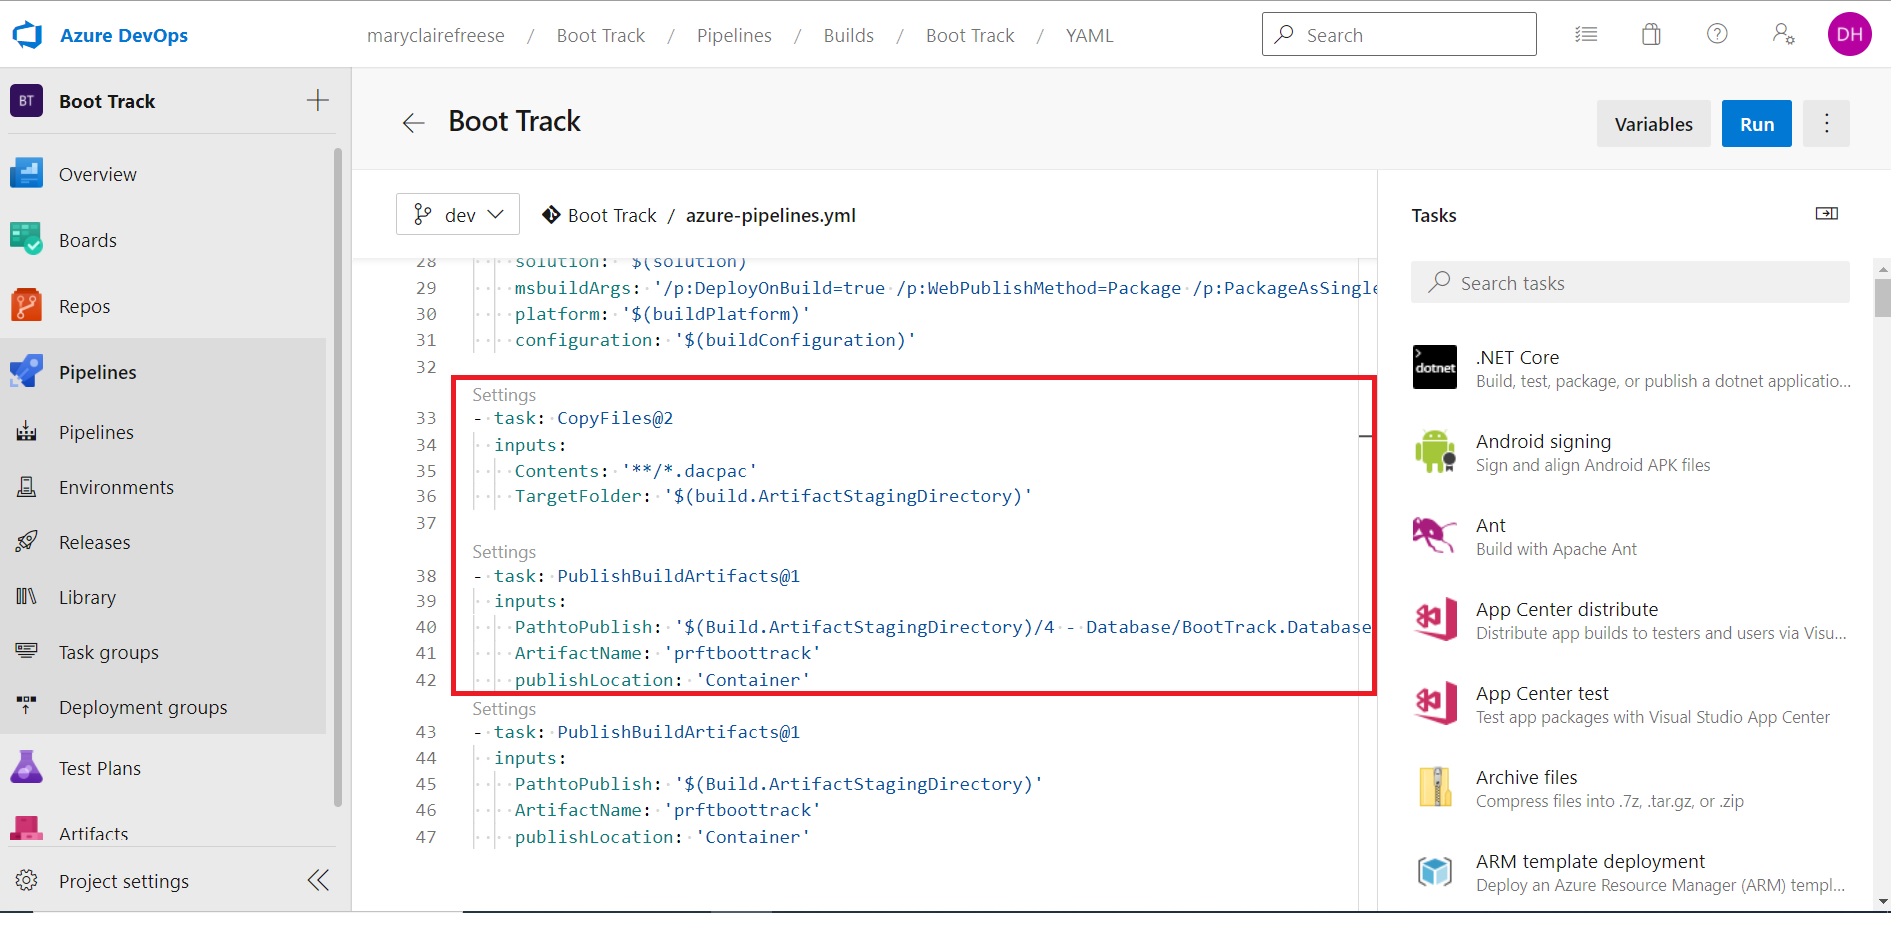
Once you have found your .dacpac file, add a CopyFiles Task with a ‘**/*.dacpac’ under its Contents key and a PublishBuildArtifact task with a PathToPublish configured to where you .dacpac file is located in relation to your .NET Framework Web Application solution.

The PathToPublish in our example here is ‘$(Build.ArtifactStagingDirectory)/4 – Database/BootTrack.Database/BootTrack.Database/bin/Release’.
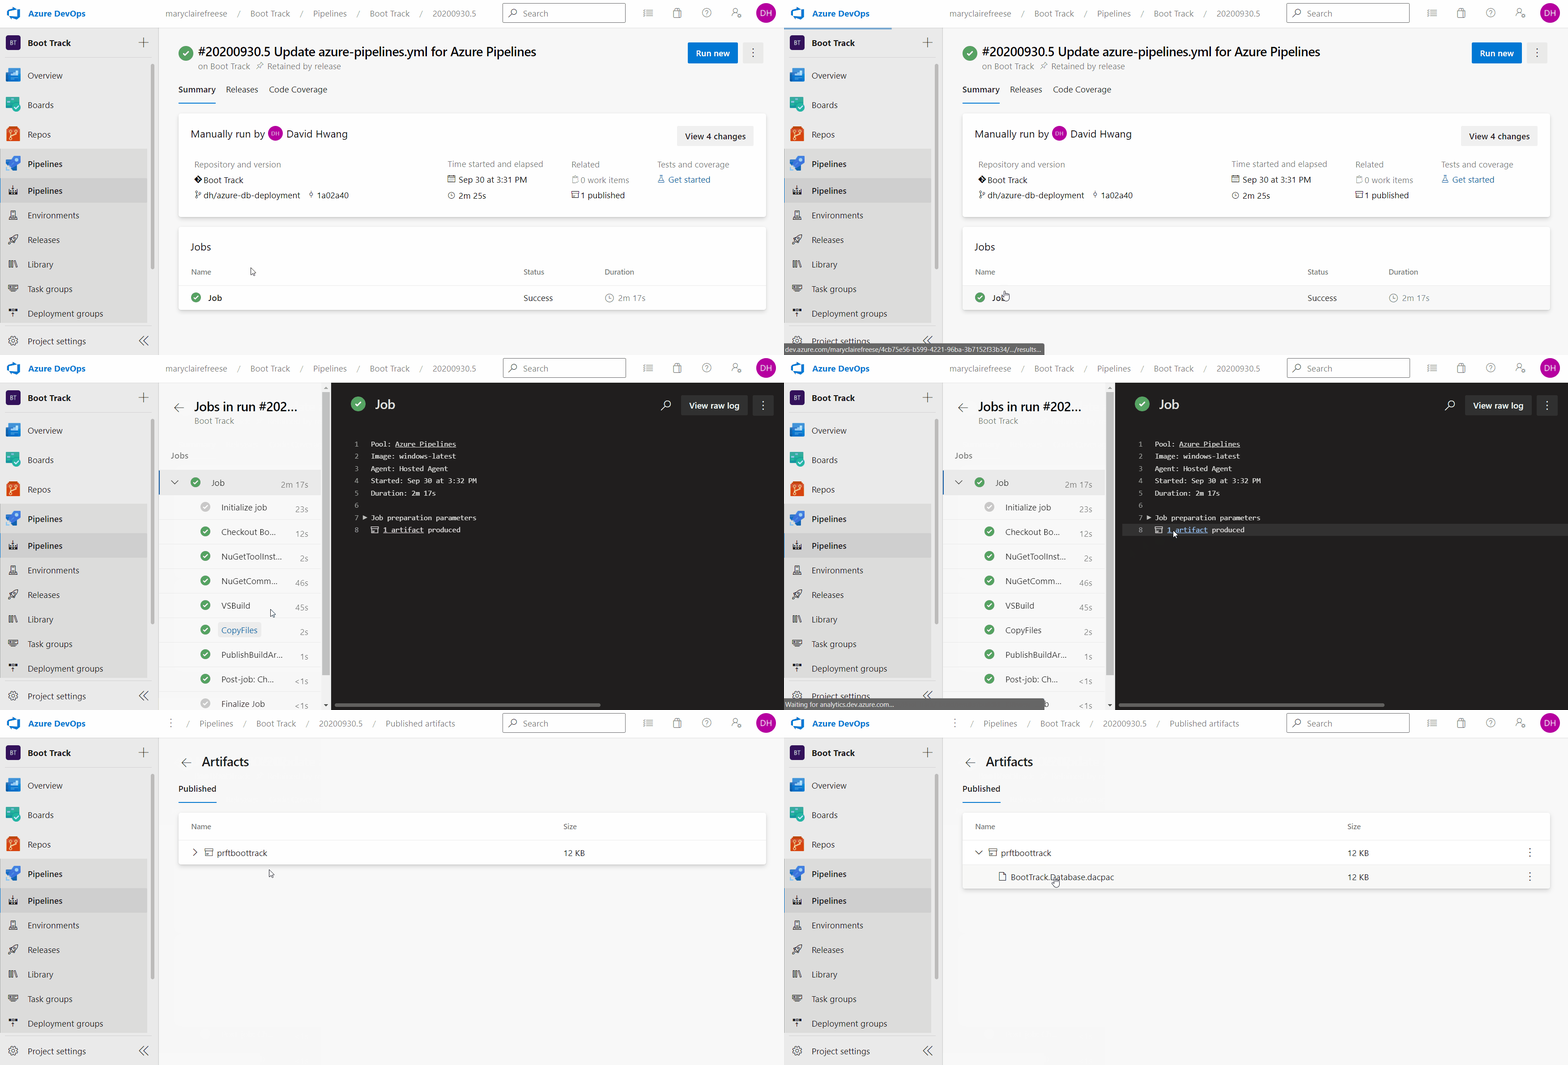
Once your build runs successfully, navigate to view your build artifact. If you correctly set your path to the file, you will see the .dacpac file in your artifact as shown below!

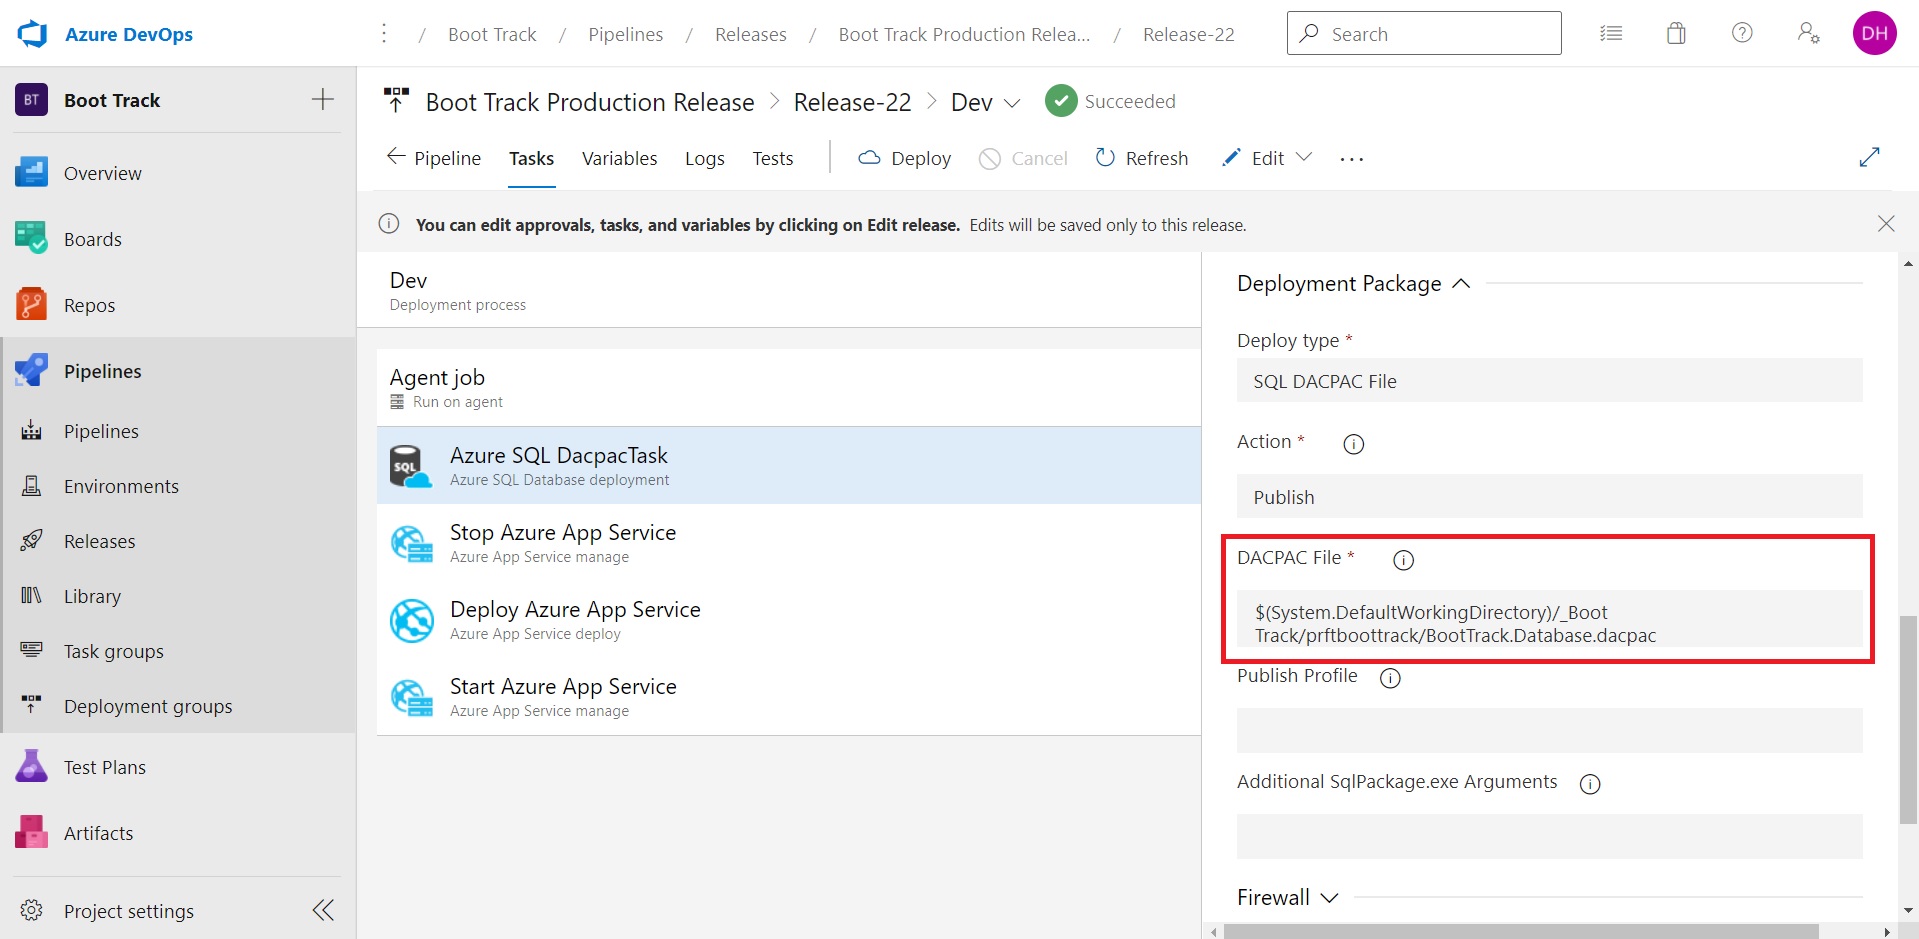
Add the path to your .dacpac file in your Azure SQL DacpacTask.


