Rendering Variants is one of the best features in Sitecore Experience Accelerator (SXA). The feature allows users to change the structure and appearance of how a Component will be rendered without needing any code changes. In this three-part series, we will look at a few different concepts of Rendering Variants. In this first post, we will look at the basics of Rendering Variants.
I’ll use an example to demonstrate just how useful Rendering Variants are.
Example Scenario
Suppose we want to have three variations of a Banner as follows:
- Simple Banner (Image only)
- Banner with Link
Solution without SXA
A traditional Sitecore approach would be to create three View Renderings for these scenarios. Then, a developer would have to create three components and associated code files. This would mean that adding and changing them would involve removing the previous component then adding a new one. Also in this solution, an author does not have the ability to change the structure. They cannot add HTML classes nor change the HTML element wrapper. So, to display a new field, code changes are required. In the end, without a developer, any structural change is impossible.
Solution with SXA
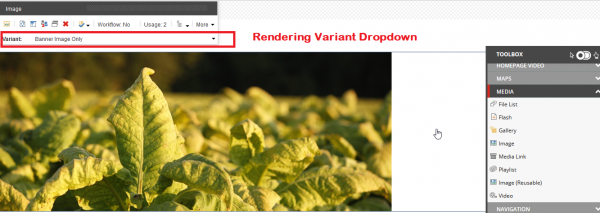
With SXA, we can use the Rendering Variants feature to change the structure and appearance of the Image component without creating new components for simple variations. We can use Rendering Variants and the author can specify CSS Classes, Add Data and Link attributes, Specify HTML wrapper element, Prefix and Suffix, etc. And, changing Rendering Variants is as simple as choosing the desired Variant from a Dropdown in the Component toolbar. This means we can display new fields without changing any code. Also, we can add JS Script, HTML Snippet, Wrapper sections, Placeholder, and many other Variant fields.
Rendering Variants in SXA: How It Works

First, let’s see the code inside Image Component view file found /views/Image/Image.cshtml. You will see that there is a foreach loop inside <div> tag with “component-content” class. This is where all the Fields included inside of a Rendering Variant definition are rendered.

The RenderVariant extension method then returns the IHTMLString containing markup that will be rendered on the page.

Now, let’s create three Rendering Variants for three variations of our Banner Image. We will be using Image and TargetURL fields; which are Image type and General Link respectively.
Simple Banner (Image only) Variant
1. Navigate to /sitecore/content/Main/Website/Presentation/Rendering Variants/Image.
2. Insert a Variant Definition item and name it Banner Image only.

3. Right-click on “Banner Image Only” node and add Field item named “Image.”
4. Now, add the Image Component from the SXA toolbar to your page and select the “Banner Image Only” variant from Variant dropdown menu on Image Component Toolbar.
5. You will see an Image Field thumbnail. Edit it to add your banner image.
6. After adding the image it should look like this.

Banner with Link Variant
1. Add a new Variant Definition item and name it “Banner with Link.”
2. Add a Field type item and name it “Image.”
3. Add another for “TargetURL.”
4. Now drop the Image component on the page and Select “Banner with Link” variant from Variant dropdown.
5. Edit the fields to add Caption and Banner image.

6. After adding both Fields, it should look like below.

To summarize, in the first post on Rendering Variants in SXA, we have looked at the basics of Rendering Variants. Subsequent posts will look at how to wrap a link around another Field Content and how to Render a Variant with a Custom Token.

