What We’ve All Been Waiting For.
Following the team’s Q3 update, it was only a matter of time before they turned on the power for a long awaited piece of functionality. Unfortunately, it’s only rolling out to first release tenants, but that shouldn’t stop people from starting to get their hands on it. After Ankit posted last Wednesday about updates going live, I jumped on my own tenant and started getting my hands into it.
Though not yet fully released, I’m pleased to announce it looks great, and works seamlessly within the SharePoint layout. For those that have done modern SharePoint development, It’s similar to the property pane of the SharePoint Framework (SPFX).
I’ve laid out a basic guide for how you can begin customizing your forms. The screenshots below show just how easy it is.
Customize your Forms with PowerApps

Using the modern experience, I’ve created a new list with some simple fields added for demo sake. I’ll go ahead and select PowerApps > Customize Forms, which is where the new hook is. This will take you to PowerApps online.
PowerApps – Editing the Template Form
 PowerApps will setup a basic form for you to start from. You’ll notice that the look is a little different from a normal PowerApp. If you are not familiar with this view, you will notice on the left an outline view of the components you have on your form. You can access the form fields from here, as well as their sub-components such as the input box, label, etc.
Though the design looks a little different than the normal PowerApp style, all the standard customizations are still available. Here, I’ll focus on automatically calculating the Title field and setting a default value for the Request Date field. This can be handled with some simple changes to the form field properties which we will get into next.
Unlock your Form Fields
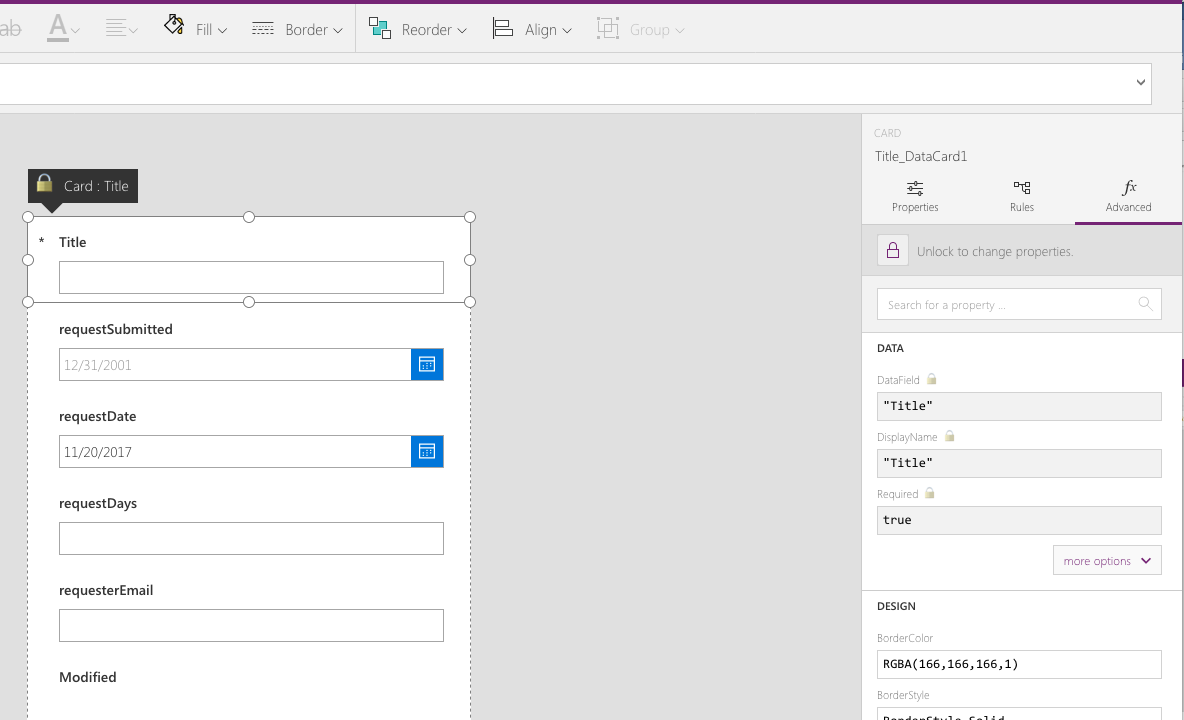
In order to access some of the inner parts of the form fields, you have to “unlock” the field. Select a field that you would like to edit either from the left-hand navigation or by clicking on it, then on the right under the “Advanced” section, unlock the title field and the requestDate fields.
NOTE: unlocking these properties can cause different behaviors that one might not expect if not familiar. Microsoft has a great guide on the form control for reviewing these properties if you would like to learn more before diving in.
Changing the Defaults
The two changes we’ll make will be dependent on each other and I’ll explain why inline.
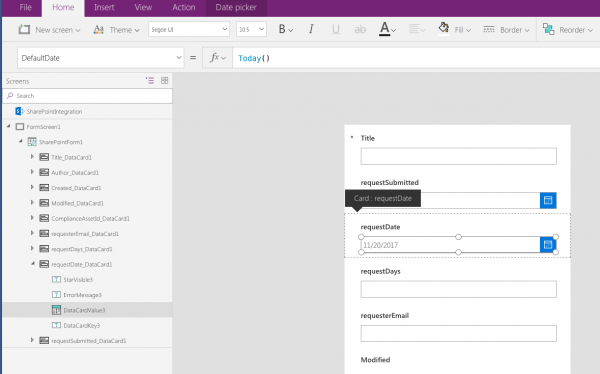
- Request Date – We will set this field’s default to today’s date. By having the property unlocked, we can now change the DefaultDate property to the function Today(). This can either be accessed from the formula bar above, or the property pane on the right.

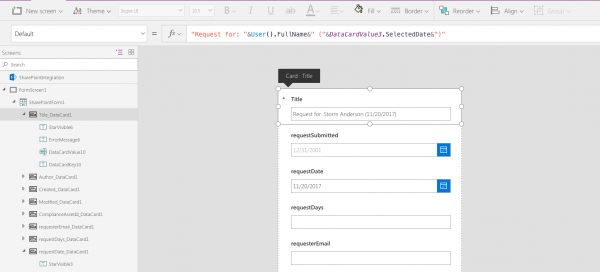
- Calculated Title – Instead of requireing users to manually fill in the title, let’s auto-calculate the field from the selected field values. I’ve selected the Title field and have set it to the following:
"Request for: "&User().FullName&" ("&DataCardValue3.SelectedDate&")"
Using some simple concatenation, this allows me to access the current user’s full name and the requestedDate value.
Saving and Publishing to SharePoint
Saving and publishing to SharePoint is as easy as ever. Go to File > Save, and after saving you’ll see the publish option appear. Select that and you are all set! You can now go back to your list and go to the new form. You will see it now embeds nicely into a side-pane for the list. No longer do you have to use a page viewer web part to recreate this functionality—the platform handles it automatically.

and the final list form display

What’s Next?
Hopefully this guide is helpful for any individual interested in reviewing this long awaited functionality. Following this post, look forward to more details coming out about how you can make the PowerApps custom form work for you and how integrating with Flow can continue to handle ever-growing use-cases.


