Lightning Bolt, the new Salesforce framework for deploying next generation communities and portals, is going to make standing up industry-specific applications very efficient. When a Lightning Bolt solution is installed, it is then available as a template when a new community is created. Selecting it is as easy as selecting the Customer Service (Napili) Template.
Close-Up Look: Selecting a Lighting Bolt Solution
Lightning Bolt solutions are packaged within a standard managed package. (Managed packages are what we have used all along for uploading to the Salesforce AppExchange.)
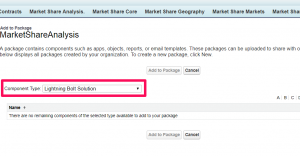
Here is a picture of that Component Type selection of ‘Lightning Bolt Solution’ in the managed package:
But how do I get something to show up under that Component Type? Salesforce has made it pretty simple.
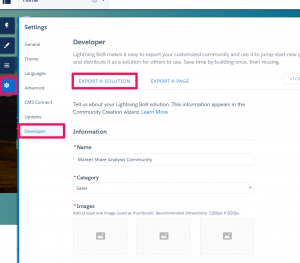
- Go to the Builder for your community.
- Click on the Settings.
- Click the Developer link
- Fill out the ‘EXPORT A SOLUTION’ section.
- That’s it! Go back to your managed package, and it is now available.
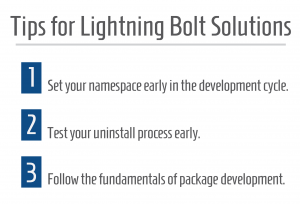
3 Helpful Hints for Creating Your Lightning Bolt Solution
Hopefully those screenshots give you a sense as to how everything is packaged and how everything fits together. But what are some helpful hints for creating a Lightning Bolt solution?
1. Set your namespace early in the development cycle.
Adding a namespace is required for creating a managed package. It is very important to pick the right one, so don’t take the decision lightly. But the earlier you do this, the better for your development. This is because adding a namespace starts to affect how you code your solution.
For example:
- Your references to your Static Resources will need to include the namespace.
- If you are doing a SOQL query on the ListView standard object, the SobjectType field will include the namespace prefix.
- If you are using the $Lightning.use and $Lightning.createComponent methods, you will have to specify the namespace.
In other words, your developers will thank you for getting that namespace in quickly.
2. Test your uninstall process early.
You want the installation and setup process to be easy for your customers. But don’t forget about the uninstall process, too. Remember, a community cannot be deleted, so once you setup a community, it will remain there.
These items can stop an uninstall from completing successfully:
- If any of the custom themes from the Lightning Bolt solution are still referenced in the community. (Simply change them back to the Customer Service templates.)
- If any menu items have been created that reference any custom objects in your Lightning Bolt solution.
- If any of your Lightning Bolt components have been dragged onto a community and are in use.
3. Follow the fundamentals of package development.
Building a Lightning Bolt solution is really just one extra step to building a traditional managed package. So stick with the fundamentals that got you to this point already.
- Leverage the Custom Metadata Types for settings.
- Leverage the Custom Labels, so end customers can change language to match their own business terms.
- Build your package, and test the install early and often.
- Allow customers to drag your Lightning components into their own existing Lightning Communities.
Hopefully this gives you some background on what a Lightning Bolt solution really is and some guidance on how to develop it. And if you need help connecting with your dealers or partners through Lightning Bolt solutions, just let us know. Our team will be happy to help!


