#1. What is JMeter?
JMeter is a free tool made by Apache that helps you test how well your website, app, or API performs when lots of people use it at the same time. It acts like many users hitting your system all at once to see how it handles the pressure.
It’s great for testing:
- Websites and web apps
- REST and SOAP APIs
- Databases

Other services like FTP, JMS, LDAP (though most people use it for web and API testing). JMeter runs on Java, so make sure you have Java installed — version 8 or higher (Java 17+ is even better). The latest version of JMeter is around 5.6.3.
#2. Apache JMeter Working
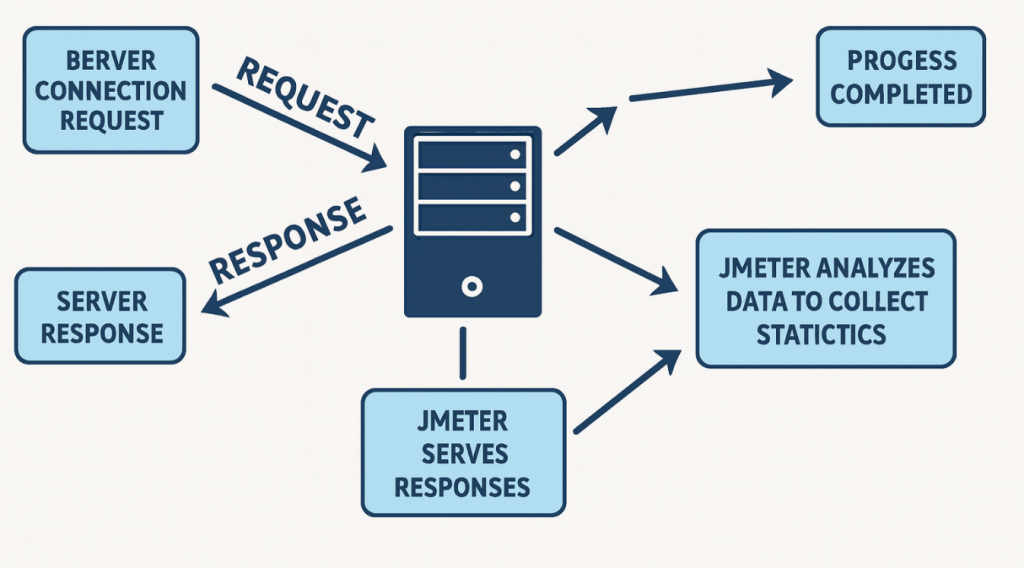
JMeter is a Java based application or tool that simulates a group of users and sends requests to a target server. And hence, return statistics which show the functionality and performance of the server.
Working of Apache JMeter is explained in the image below:
#3. JMeter Test Plan Structure
Everything in JMeter lives inside a Test Plan — think of it as your test notebook.
Basic tree structure looks like this (from top to bottom):
- Test Plan (the root / main folder)
- Thread Group (your virtual users — most important!)
- Samplers (what action each user does — e.g. HTTP Request to open google.com)
- Logic Controllers (if/loop/while — optional for now)
- Pre/Post Processors (prepare or clean data — optional)
- Assertions (check if response is correct — optional)
- Timers (add think time between clicks — very useful!)
- Config Elements (HTTP Header Manager, Cookies, etc.)
- Listeners (how you see results — tables, graphs, reports)
- Thread Group (your virtual users — most important!)
Most beginners start with just: Test Plan → Thread Group → HTTP Request → Listener.
#4. Create Your First Test Plan (Step-by-Step)
Step 1: Download and open JMeter
- Download JMeter from the official Apache page:
https://jmeter.apache.org/download_jmeter.cgi - Download the binary file (ZIP or TGZ). For example, Apache JMeter 5.6.3 has both apache-jmeter-5.6.3.zip and apache-jmeter-5.6.3.tgz.
- Unzip / extract it anywhere on your machine.
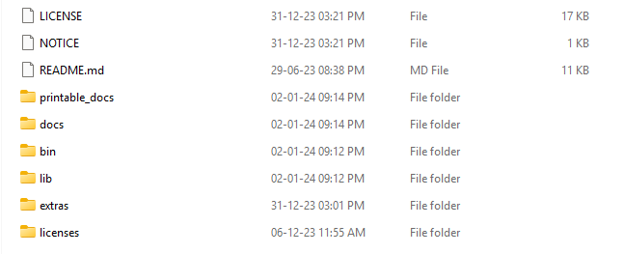
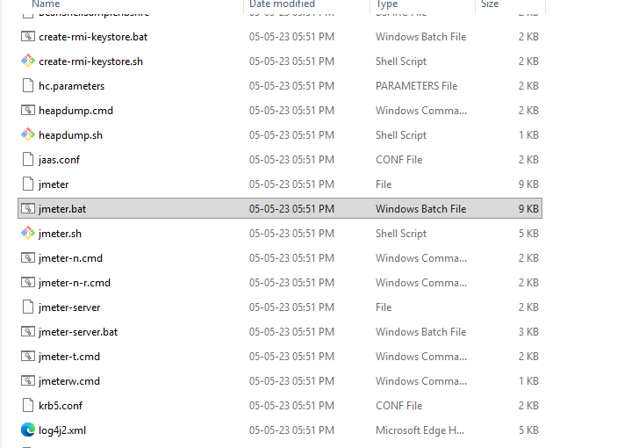
- Open the bin folder:
- Windows: double‑click jmeter.bat
- Mac/Linux: run jmeter.sh
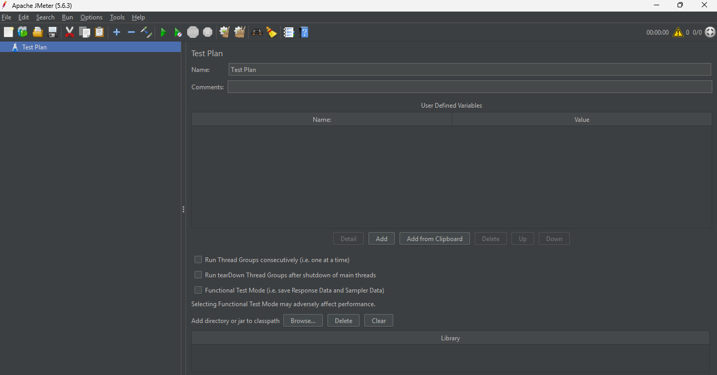
- JMeter GUI opens and you will see a blank Test Plan.
Step 2: Add a Thread Group (users)
- Right‑click Test Plan → Add → Threads (Users) → Thread Group
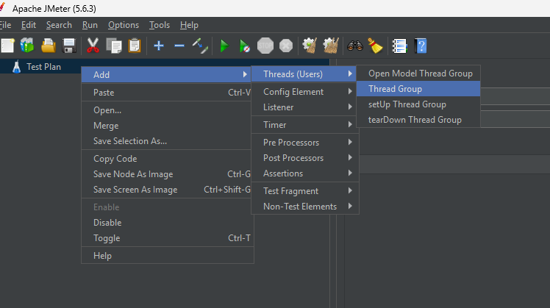
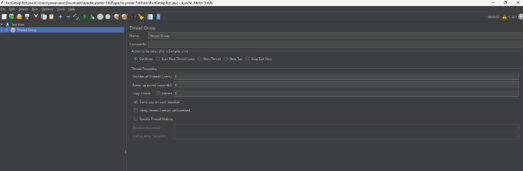
Thread Group controls how many users run your test and how the load starts.
Step 3: Create a GET API test (List objects)
3.1 Add HTTP Request sampler
Right‑click Thread Group → Add → Sampler → HTTP Request
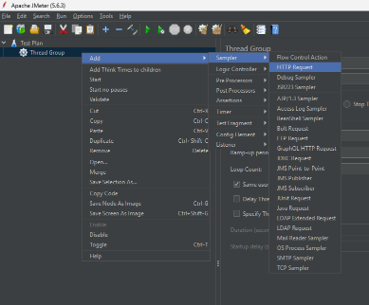
3.2 Fill HTTP Request fields (IMPORTANT)
Use these values:
- Name : HTTP Get Request
- Protocol: https
- Server Name or IP: api.restful-api.dev (only domain, not full URL)
- Method: GET
- Path: /objects
The real endpoint is: https://api.restful-api.dev/objects
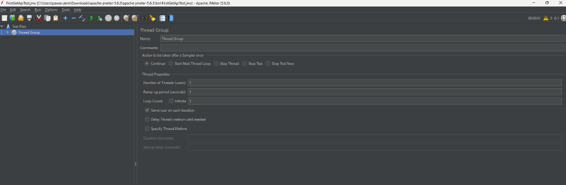
Common mistake: Don’t put https://api.restful-api.dev/objects inside “Server Name”. If you add path there, JMeter can fail with host errors (UnknownHost). Use domain in Server Name and endpoint in Path.
3.3 Add Listeners
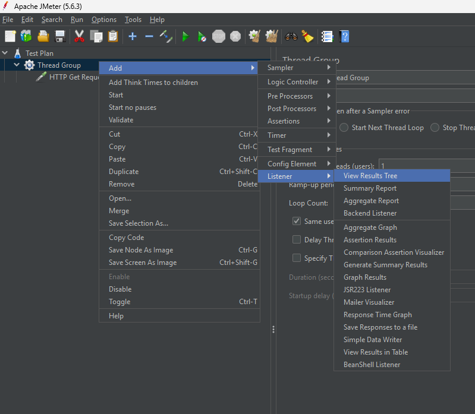
Right-click Thread Group → Add → Listener → View Results Tree (best for debugging)
- Add Summary Report or Aggregate Report (for final numbers)
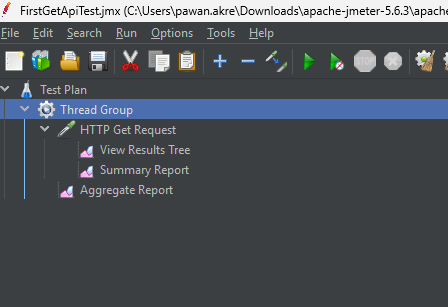
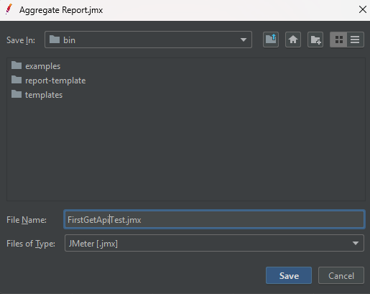
3.4 Save Your Test Plan
Save your file as something like FirstGetApiTest.jmx
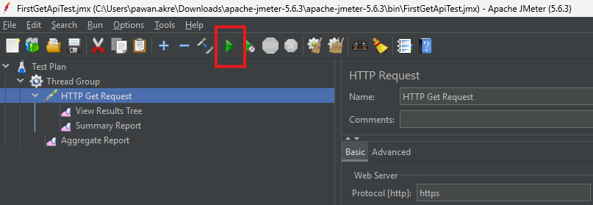
3.5 Run the Test
Click green Play button (or Run → Start)
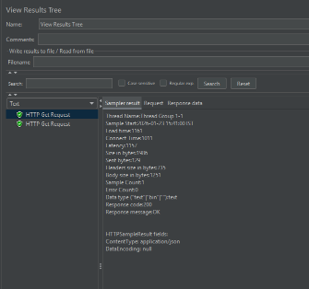
3.6 Watch the Results
Watch the results in View Results Tree!
Step 4: Create a POST API test (Add an object)
4.1 Add another HTTP Request sampler
Right‑click Thread Group → Add → Sampler → HTTP Request
4.2 Configure POST sampler fields
- Name: HTTP Post Request
- Protocol: https
- Server Name or IP: api.restful-api.dev
- Method: POST
- Path: /objects
4.3 Add JSON Body (Body Data)
Inside the POST HTTP Request sampler, go to Body Data and paste this JSON:
JSON : {
“name”: “Apple MacBook Pro 16”,
“data”: { “year”: 2019,
“price”: 1849.99,
“CPU model”: “Intel Core i9”,
“Hard disk size”: “1 TB”
} }
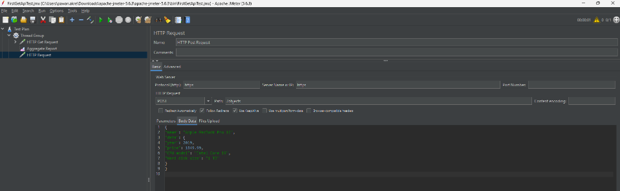
This sample object structure matches the API style shown by restful-api.dev (objects contain name and flexible data).
4.4 Add Header (Content-Type)
For POST requests, you should send JSON with correct header.
- Right‑click the POST HTTP Request (or Thread Group) →
Add → Config Element → HTTP Header Manager
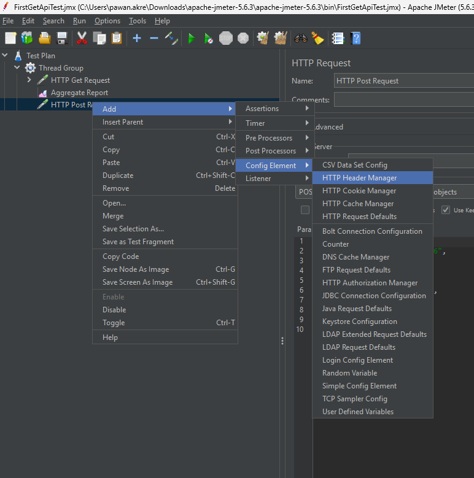
2. Add header:
- Content-Type = application/json
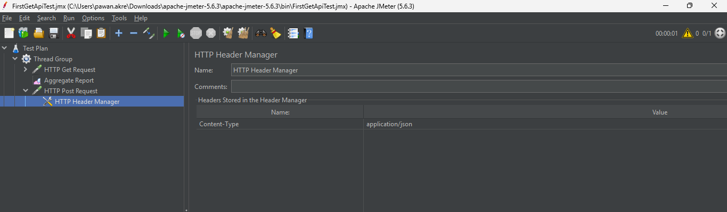
This tells the server your request body is JSON.
Step 5: Add Listeners (to see results)
For debugging (best for beginners)
- Right‑click Thread Group → Add → Listener → View Results Tree
For final numbers (report-style)
Add one of these:
- Summary Report or Aggregate Report
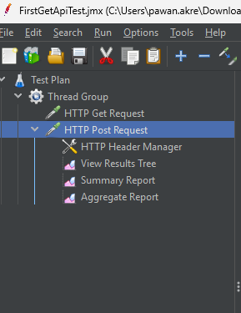
Listeners show your execution results in table/tree/graph formats and can save results too.
Step 6: Save your test plan
Save file: JMeter recommends saving your test plan before running.
Step 7: Run the test
Click the green Play button (or Run → Start).
Now open View Results Tree to see:
- Request details
- Response body
- Status code (200/201)
- Any error message
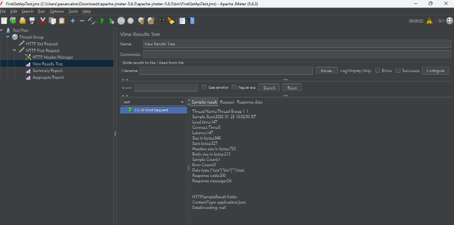
You now understand how to create GET and POST API tests in JMeter.
Next, let’s take your learning one step further with two practical real‑world challenges.
The first covers JWT Authentication Testing in JMeter, and the second focuses on Data‑Driven Testing at Scale with JMeter (CSV + Groovy).
Challenge A: JWT Authentication Testing in JMeter Using DummyJSON API
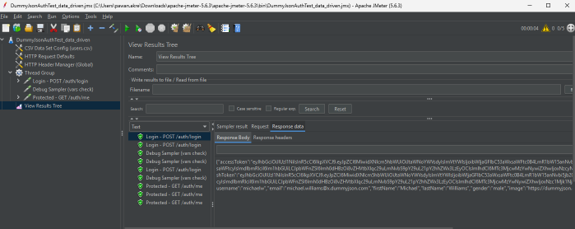
This section provides a simple, production-friendly approach to testing JWT authentication in Apache JMeter using the DummyJSON Auth API. It demonstrates how to build a minimal test plan that performs a complete authentication flow with only the essential JMeter components. The guide walks through sending a login request to generate a JWT accessToken, extracting the token using a JSON Extractor, and finally invoking a protected endpoint (/auth/me) using the required Authorization: Bearer <token> header. With a focus on clarity and minimalism—no timers, assertions, or extra plugins. This blog serves as an ideal starting point for understanding token-based authentication testing in JMeter.
Step 1: Create a New Test Plan
- Open Apache JMeter 5.6.3+
- Go to File → New
- Rename it to: DummyJsonAuthTest
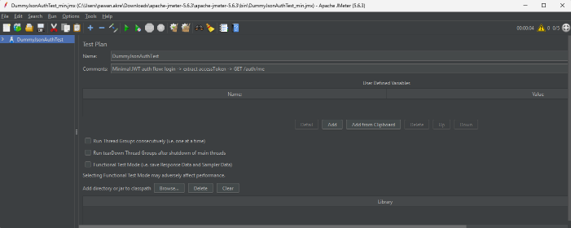
Step 2: Add HTTP Request Defaults
- Right‑click Test Plan →
Add → Config Element → HTTP Request Defaults - Enter the following values:
- Server Name or IP: dummyjson.com
- Protocol: https
This sets the base URL so you don’t repeat it everywhere.
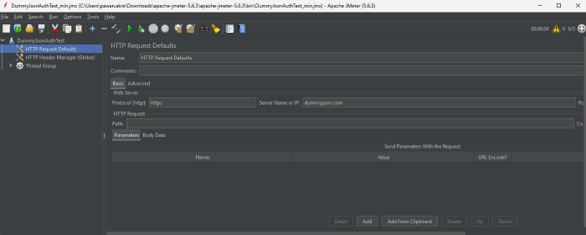
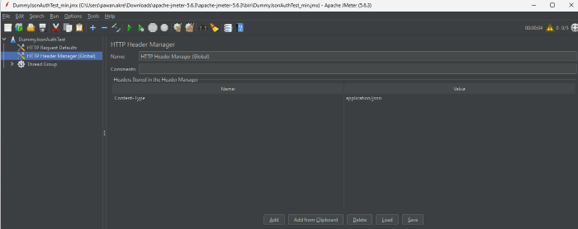
Step 3: Add Global HTTP Header (Content-Type)
- Right‑click Test Plan →
Add → Config Element → HTTP Header Manager - Add only one header:
- Name: Content-Type
- Value: application/json
This ensures your JSON login body is posted correctly.
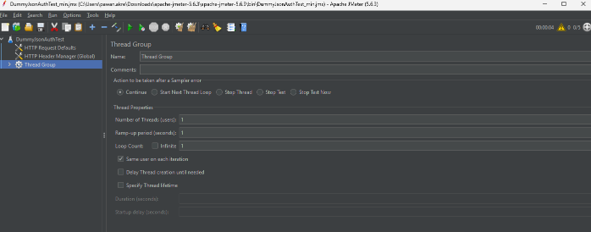
Step 4: Add a Thread Group
- Right‑click Test Plan →
Add → Threads (Users) → Thread Group - Configure the following settings:
- Number of Threads: 1
- Ramp-Up Period: 1
- Loop Count: 1
This keeps the test extremely lightweight.
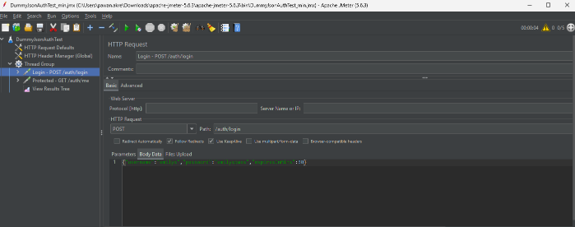
Step 5: Add Login API (POST /auth/login)
- Right‑click Thread Group →
Add → Sampler → HTTP Request - Set the following:
- Name: Login – POST /auth/login
- Method: POST
- Path: /auth/login
3, Go to Body Data tab → paste:
{
“username”: “emilys”,
“password”: “emilyspass”,
“expiresInMins”: 30
}
This request matches DummyJSON’s official documented example.
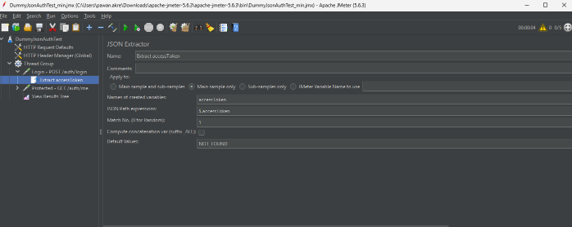
Step 6: Extract JWT accessToken
This is the most important step.
- Right‑click Login sampler →
Add → Post Processor → JSON Extractor - Configure the following:
- Variable Name: accessToken
- JSONPath Expression: $.accessToken
- Default Value: NOT_FOUND
Why $.accessToken?
Because DummyJSON returns this exact field name in the login response.
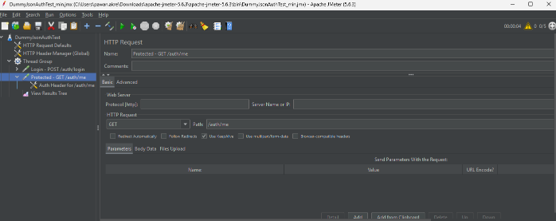
Step 7: Add Protected API (GET /auth/me)
- Right‑click Thread Group →
Add → Sampler → HTTP Request - Configure the following:
- Name: Protected – GET /auth/me
- Method: GET
- Path: /auth/me
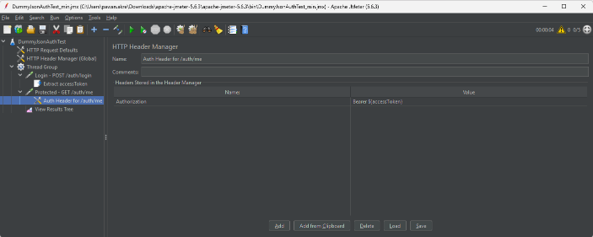
Step 8: Add Authorization Header (Bearer Token)
- Right‑click Protected sampler →
Add → Config Element → HTTP Header Manager - Add:
- Name: Authorization
- Value: Bearer ${accessToken}
DummyJSON explicitly states that /auth/me must receive the accessToken via the Bearer header.
Step 9: Add View Results Tree (Optional but Useful)
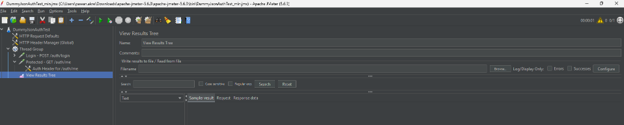
- Right‑click Thread Group →
Add → Listener → View Results Tree
This will allow you to see the response body and confirm that the token extraction works correctly.
Step 10: Run the Test
Click the green Start button (▶).
Expected Behavior
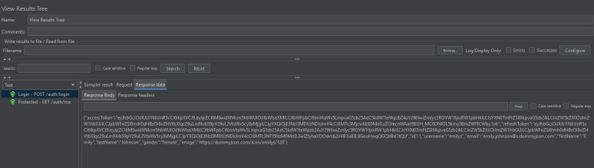
- Login API returns 200 with a JSON containing accessToken.
- The JSON Extractor captures the token.
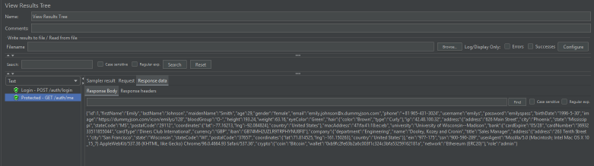
- Protected API returns 200 with authenticated user details.
If you see:
401 Unauthorized
Check the View Results Tree → Request headers → Authorization must look like:
Authorization: Bearer eyJhbGciOiJIUzI1NiIs…
Challenge B: Data‑Driven Testing at Scale with JMeter (CSV + Groovy)
This section explains an easy and practical way to run large‑scale API load tests in JMeter without errors or data conflicts. When many virtual users use the same username or repeated IDs, tests often fail because of server caching or duplicating data issues. To avoid this, the blog shows how to give each virtual user its own unique data using a CSV file, small random values, and Groovy scripts.
You’ll learn how to create a clean and simple JMeter test plan that reads login details from a CSV file, skips the header row, adds random values, and generates unique fields through a Groovy PreProcessor. The test then logs in, extracts an access token, and uses that token to call a protected endpoint. This guide helps you build reliable, scalable, and realistic API tests in JMeter.
1) Prepare Your CSV Data
Create a file named users.csv. Include a header and tab or comma as your delimiter. Two examples:
Option A — Tab‑separated
username password
emilys emilyspass
michaelw michaelwpass
sophiab sophiabpass
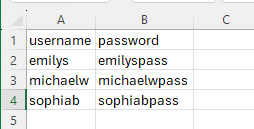
Option B — Comma‑separated
username,password
emilys,emilyspass
michaelw,michaelwpass
sophiab,sophiabpass
We’ll configure JMeter to ignore the first line so the header is not treated as credentials.
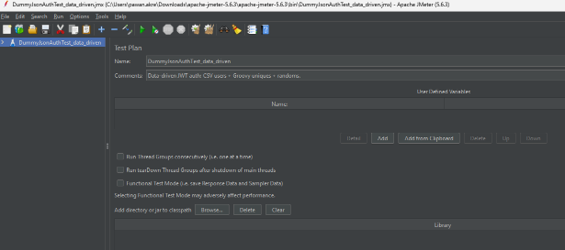
2) Create a New JMeter Test Plan
- Open JMeter → File → New.
- Rename Test Plan to: DummyJsonAuthTest_data_driven
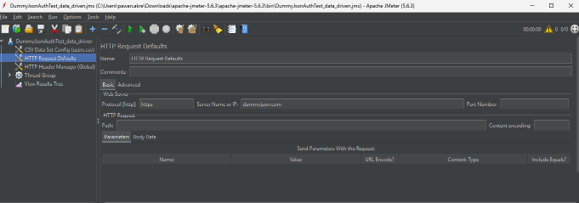
3) Add HTTP Request Defaults
- Test Plan → Add → Config Element → HTTP Request Defaults
Set:- Protocol: https
- Server Name or IP: dummyjson.com
(Prevents repeating the base URL for every request.)
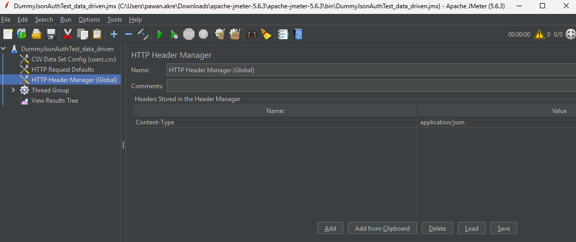
4) Add Global HTTP Header Manager
- Test Plan → Add → Config Element → HTTP Header Manager
Add: Content-Type : application/json
5) Add CSV Data Set Config (Critical)
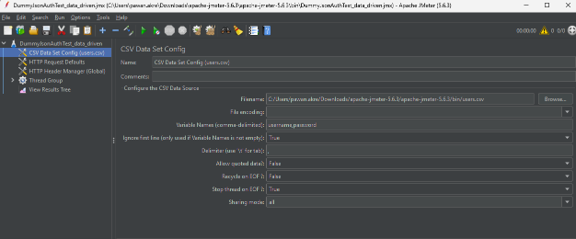
- Test Plan → Add → Config Element → CSV Data Set Config
Configure:
- Filename: users.csv
- Variable Names: username,password
- Delimiter:
- \t if your file uses tabs
- , if your file uses commas
- Ignore first line: True (ensures the header row is not treated as data)
- Recycle on EOF: False
- Stop thread on EOF: True
- Sharing mode: All threads
With Ignore first line = True, JMeter reads username,password strictly as variable names, and your data rows become proper user credentials.
Setting Recycle=False / Stop on EOF=True ensures each row is used once per thread and unused threads stop when data runs out.
6) Add a Thread Group
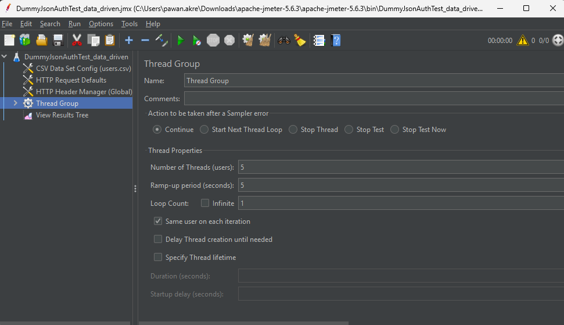
- Test Plan → Add → Threads (Users) → Thread Group
Example settings (tune to your needs):- Number of Threads (users): 5
- Ramp‑Up (sec): 5
- Loop Count: 1
Each thread will pick the next row from users.csv.
7) Add the Login Request (POST /auth/login)
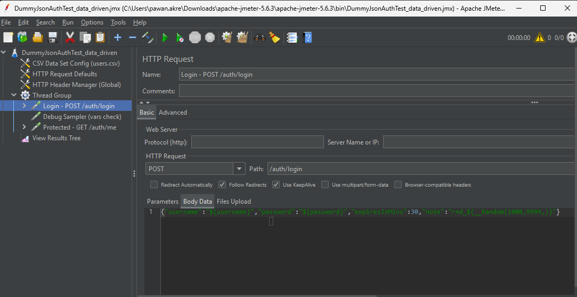
- Thread Group → Add → Sampler → HTTP Request
- Name: Login – POST /auth/login
- Method: POST
- Path: /auth/login
Body Data:
{
“username”: “${username}”,
“password”: “${password}”,
“expiresInMins”: 30,
“note”: “rnd_${__Random(1000,9999,)}”
}
Why this helps
- ${username} / ${password} come from the CSV row for that thread.
- ${__Random(1000,9999,)} appends a small random number per request (handy when you want trivial uniqueness).
8) Generate Unique Variables (JSR223 PreProcessor, Groovy)
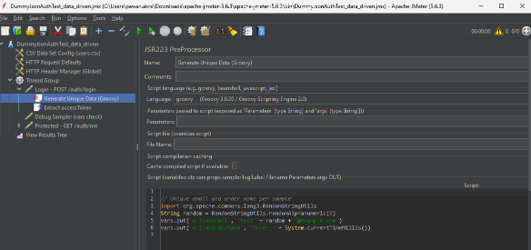
We’ll create values that are globally unique per sampler execution, perfect for payload fields like emails or order names.
- Right‑click Login – POST /auth/login → Add → Pre Processors → JSR223 PreProcessor
- Language: groovy
- Script:
// Unique email and order name per sample
import org.apache.commons.lang3.RandomStringUtils
String random = RandomStringUtils.randomAlphanumeric(8)
vars.put(‘uniqueEmail’, ‘test’ + random + ‘@example.com’)
vars.put(‘uniqueOrderName’, ‘Order_’ + System.currentTimeMillis())
“
You can now use ${uniqueEmail} and ${uniqueOrderName} in any downstream JSON body or header to avoid caching/collisions.
📝 If you see a class not found error for RandomStringUtils, add Apache Commons Lang to JMeter’s /lib folder and restart JMeter. Most distributions already include it, but environments vary.
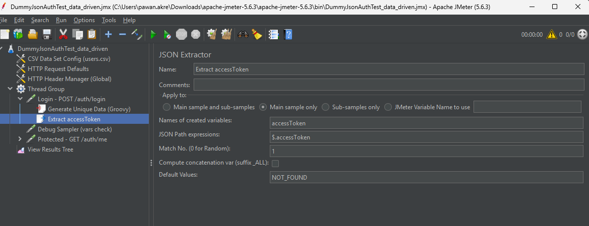
9) Extract the Token (JSON Extractor)
- Right‑click Login – POST /auth/login → Add → Post Processors → JSON Extractor
Configure:- Names of created variables: accessToken
- JSONPath expressions: $.accessToken
- Default Values: NOT_FOUND
The login response should return accessToken. This extractor exposes it as ${accessToken} for the next step.
10) Add a Protected Request (GET /auth/me)
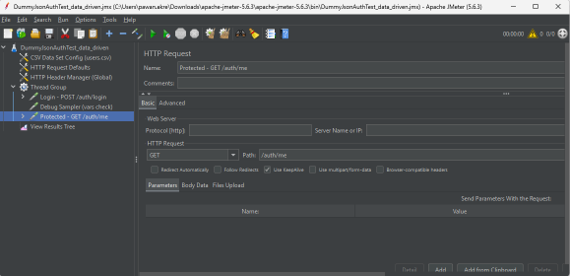
- Thread Group → Add → Sampler → HTTP Request
- Name: Protected – GET /auth/me
- Method: GET
- Path: /auth/me
Add a Header Manager (child of this sampler):
- Authorization : Bearer ${accessToken}
11) Add One View Results Tree (for quick verification)
- Thread Group → Add → Listener → View Results Tree
Run a small test (1–5 threads) and verify:
- Login → 200 OK, response contains accessToken.
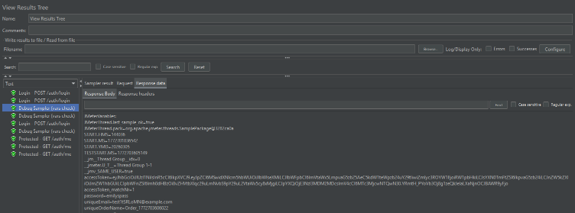
- Debug Sampler (optional) shows username, password, uniqueEmail, uniqueOrderName, and accessToken.
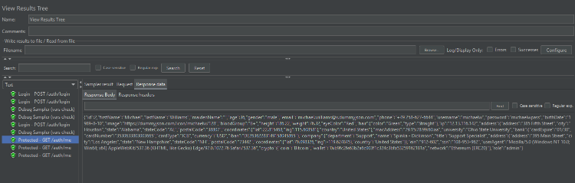
- /auth/me → 200 OK with user details.
- No more Invalid credentials due to the header row being treated as a login attempt.