
A custom API is a unique interface built to allow different applications to interact with your system. Unlike generic APIs, a custom API is specifically designed to meet the needs of your project, enabling tailored functionality like retrieving data, processing requests, or integrating with third-party services. Building a Custom API gives you complete control over how your application communicates with others.
In this article, you will walk through building a Custom API with Node.js, step-by-step, implementing essential CRUD operations—Create, Read, Update, and Delete, so you can create your own powerful and efficient API.
Setting Up the Project
To get started, you need to have Node.js installed. If you haven’t installed Node.js, here’s how to do it:
- Go to the Node.js official website.
- Download and install the latest stable version for your operating system.
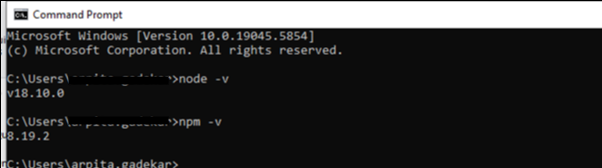
Once Node.js is installed, you can verify by running the following commands in your terminal:
node -v
npm -v
Creating the Project Direct
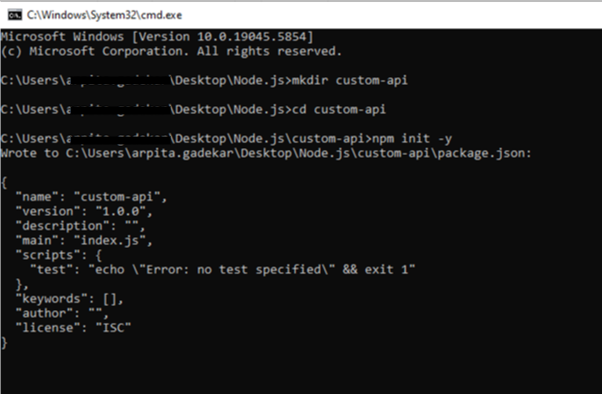
Let’s create a simple directory for your API project.
- Create a new folder for your project:
mkdir custom-api
cd custom-api
- Initialize a new Node.js project:
npm init -y
This creates a package.json file, which will manage the dependencies and configurations for your project.
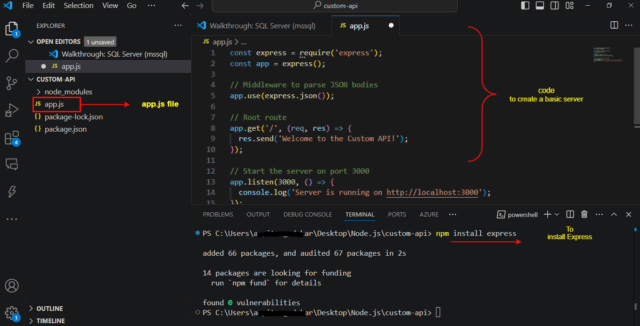
Installing Dependencies
You can continue with the terminal or can switch to VS Code. I’m switching to VS Code. Need Express to build the API. Express is a minimal web framework for Node.js, simplifying routing, handling requests, and creating servers.

To install Express, run:
npm install express
Creating the Server
Now that we have Express installed, let’s create a basic server.
- Create a new file called app.js in the project folder.
- Add the following code to create a basic server:
const express = require('express');
const app = express();

// Middleware to parse JSON bodies
app.use(express.json());

// Root route
app.get('/', (req, res) => {
  res.send('Welcome to the Custom API!');
});

// Start the server on port 3000
app.listen(3000, () => {
  console.log('Server is running on http://localhost:3000');
});
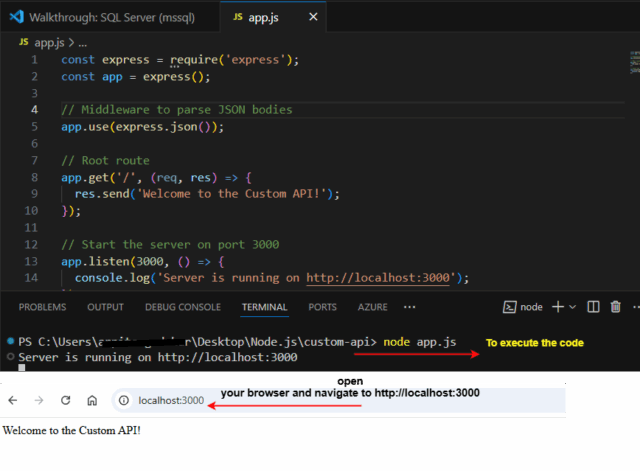
To run your server, use:
node app.js
Now, open your browser and navigate to http://localhost:3000. You should “ee “Welcome to the Custom “PI!” displayed.
Defining Routes (CRUD Operations)
APIs are built on routes that handle HTTP requests (GET, POST, PUT, DELETE). Let’s set up a few basic routes for our API.
Example: A simple API for managing a collection of items
- In app.js, define the routes:
You can find the complete source code for this project on GitHub.
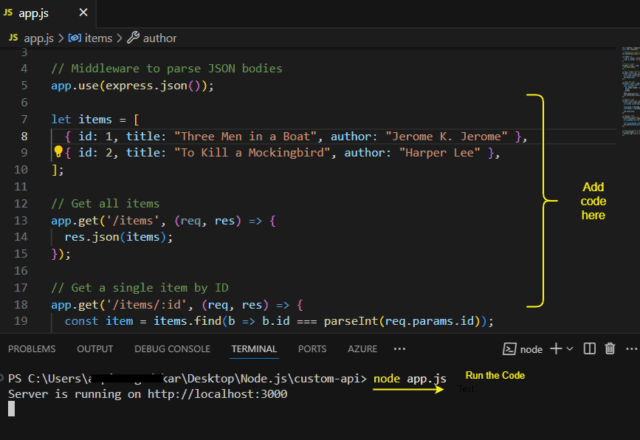
Here’s what each route does:
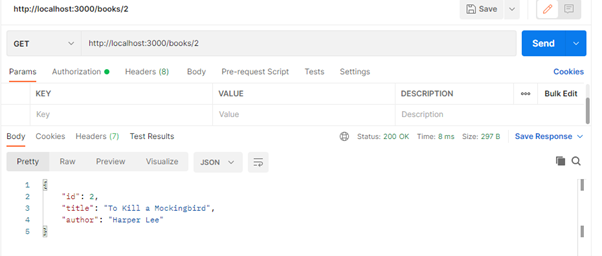
- GET /books: Retrieves all items.
- GET /books/:id: Retrieves an item by its ID.
- POST /books: Adds a new item.
- PUT /books/:id: Updates an existing item.
- DELETE /books/:id: Deletes an item.
Testing the API
You can test your API using tools like Postman.
Conclusion
Congratulations, you’ve built a Custom API with Node. You’ve learned to create CRUD operations, test your API, and learned how to handle requests and responses. From here, you can scale this API by adding more features like authentication, database connections, and other advanced functionalities.
Thank you for reading!